When and why does a cat need a collar?
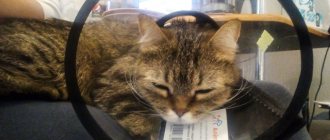
A protective collar is a veterinary device in the shape of a horn or funnel that limits the animal's mobility. As a means of protective therapy, the collar will prevent the cat from licking medications from the body, licking a post-operative suture or a damaged area of skin.
The veterinary collar is also called the “Elizabethan” collar. This is due to the fact that it resembles a piece of clothing worn by noble ladies of the era of Queen Elizabeth I of England. In the 16th century, lush, rigid collars made of starched fabric (usually lace) were in fashion. Of course, turning your head in such a dress was extremely difficult. Later, this design served as the basis for the creation of a veterinary collar.
The veterinary device resembles the collar of Elizabeth I's royal dress
Barrier therapy, of which the collar is one component, is used for a number of health problems in pets. Here are the main ones:
- The cat tries to lick the wound (especially if it heals and begins to itch), this prevents the restoration of the damaged area of skin.
- The animal has undergone medical surgery (for example, a spay procedure or tumor removal). In such a situation, it is important to prevent licking and chewing of the sutures placed by the veterinarian.
- The cat has been neutered. In this case, the animal will not have stitches, but the operation site is treated with an antiseptic, which also cannot be licked off. There is also a danger that the cat will begin to lick the sore spot and thereby provoke bleeding.
- Your pet's ears hurt. The animal begins to scratch them, which provokes additional infection, as well as untimely removal of veterinary drugs from the ear cavity.
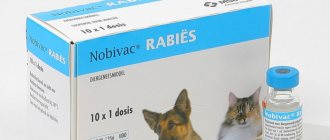
- The cat was treated with a remedy against ecto- and endoparasites. Animals should not lick such substances, as this can cause poisoning. And you won’t have to wait for the effect of the antiparasitic agent either.
- A cat that is active, fearful or aggressive needs to have its fur or nails trimmed. The collar will protect the owner from pet bites.
The protective collar is shaped like a bullhorn
In all of the above cases (except, perhaps, for ear diseases and treatment for parasites), the owner of the animal is faced with a choice: a special blanket or a veterinary collar.
The blanket will protect the postoperative suture from not only germs, dirt and fungi getting there, but also from the cat itself, which after surgery tries to chew or lick the place that bothers it
The advantages of the blanket are that it:
- does not restrict the cat's movements;
- does not cause her anxiety or irritation;
- allows you to wash exposed areas of the body;
- protects stitches or wounds from contact with other objects that are not always safe and sterile.
But especially active pets manage to take off their blankets. And if they leave them alone, they begin to lick the sore spot through the fabric. Sometimes even this is enough to damage the seam. Blankets also get dirty quickly, especially if the wound needs to be treated with medications.
Advantages of a collar compared to a blanket:
- completely limits the cat’s access to the sore spot, be it the head, paws or torso;
- the animal will not be able to hide in a hard-to-reach or inappropriate place thanks to the voluminous collar on the neck.
The pet will be dissatisfied with the presence of the collar, since it can hardly be called comfortable. The cat will cling to surrounding objects with it and try to remove it. And most importantly, the collar needs to be chosen correctly.
Some owners purchase both barrier products for their pet to be on the safe side.
Using a blanket and collar at the same time completely protects the wound or seam from access by the animal
Veterinary pharmacies and pet stores offer a large selection of Elizabethan collars for cats. Their cost depends on the materials and the size of the pet for which the device is purchased (they are not divided into cat and dog). The price of such products ranges from 100 to 1200 rubles.
Ready-made models
Plastic
The bulk of the products are made of transparent and translucent plastic. These are lightweight, comfortable accessories that do not interfere with the cat’s view and are easy to care for.
- Protective collar for cats with collar (TOSHKA and KO);
- Talismed Collar;
- Avita group.
Protective collar with collar (TOSHKA and KO)
- Plus: the sharp edge of the product is finished with a fabric edging.
- Minus: you need to select the size.
Prices depend on size: from 190 to 995 rubles.
Collar Talismed
The protective cone for cats is made of high-quality plastic and is attached to the collar using three fasteners. A latch-tongue is used for fixation and adjustment. Available in several sizes.
- Pro: Suitable for dogs.
- Cons: sharp edges.
Price: from 101 to 324 rubles.
Avita-group
- Plus: no sharp edges.
- Cons: Requires sizing.
Price: from 95 to 150 rubles.
Soft
- Freddy's Friends Brand Pillow Collar;
- Medical collar OSSO;
- Kruuse Buster Soft Collar;
- Disposable post-operative collar Kruuse Buster.
Freddy's Friends Brand Pillow Collar
- Plus: good review.
- Cons: high price.
Price: from 850 to 1150 rubles.
Medical collar OSSO
The model is made of durable Oxford fabric - a cat will not be able to tear it. To secure it on the animal's neck, the collar is equipped with a Velcro collar. The cat experiences less discomfort when wearing it, thanks to the small dimensions of the product and its flexibility.
- Plus: does not affect the animal’s thermoregulation.
- Cons: bad review.
Price: from 190 to 455 rubles.
Kruuse Buster Soft Collar
This simple fabric model is made in the shape of a four-section cone. The fabric is water-repellent. The edges of the product are finished with piping. Fixation is carried out using lace and loops.
- Plus: has good flexibility.
- Cons: bad review.
I recommend: Choosing cat litter: types, characteristics, review of companies
Price: from 120 to 200 rubles.
Disposable post-operative collar Kruuse Buster
The collar is intended for one-time use after surgery. Made from non-woven waterproof material. The non-rigid design makes it easier for the pet to see and does not interfere with daily functions. Fixed around the neck with a drawstring.
- Plus: it doesn't rub your neck.
- Cons: disposable.
Price: from 150 to 170 rubles.
What to look for when choosing
When buying a protective collar, focus on its size, length, and the material from which it is made.
Manufacturers, as a rule, produce collars made of plastic. This is the most inexpensive model. A reinforced collar can cost a little more - it is trimmed along the edge with an elastic band that protects the structure from breakage. A plastic collar in the shape of a semicircle is wrapped around the cat’s neck and fastened with “tabs” that are pushed through the holes on the opposite edge. Its advantage is that, thanks to the transparency of the plastic, the cat retains its usual view.
If you purchased a plastic collar without elastic around the outer edge, you can reinforce it yourself. To do this, cover the edges of the collar with a regular adhesive plaster. This will protect the upper part from the consequences of collisions with external objects and make the lower part (adjacent to the cat’s neck) softer.
If you want your sick pet to feel more comfortable, and you plan to wear the “protection” for a long time, then you can look for a collar made of soft fabric or non-woven water-repellent material. The shape of such products is a cone or a lifebuoy. The latter option is reminiscent of the pillows that passengers use for comfortable sleep on long journeys. This model is made from padding polyester, cotton or polyester and water-repellent impregnation.
It is not difficult to put such a collar on an animal, because it is attached with Velcro fasteners to a regular collar or has convenient fasteners. This collar does not have to be unfastened every time to feed your pet, because you can eat food, drink water and move actively in it. It can also be washed if it gets dirty with medicine or food.
Photo gallery: range of protective collars for cats
A cone-shaped collar made of non-woven water-repellent materials causes less discomfort than a plastic product. The most comfortable collar for a cat is like a life preserver.
You can buy a plastic collar inexpensively or make it yourself
The size of the collar should correspond to the circumference of the cat's neck with an allowance for freedom of fit (you can stick a finger between the neck and the collar). A narrow collar will cause additional discomfort to a sick animal, while a collar that is too wide may slip off the neck.
The width of the protective field (length of the product) must be sufficient to protect the cat from harming itself. It is approximately equal to the height of the cat's head with a slight increase. If these parameters do not meet, the collar will either not perform its protective function or will interfere with the animal’s movement around the house.
Factory collars have a unique division into sizes, in which the numbers correspond to the scale of the protective field:
- No. 7 (7.5 cm);
- No. 10 (10.5 cm);
- No. 12 (12 cm);
- No. 15 (15 cm);
- No. 20 (21.5 cm);
- No. 25 (25 cm).
Thus, for small kittens, size No. 7 is often chosen, and for adult kittens, sizes No. 10 and 12 are often chosen.
Please note that the collar should not have a pungent “chemical” smell. This is both unpleasant and dangerous for the cat.
Operating instructions
Size chart for barrier therapy medical devices for cats:
| Accessory size | Neck length | Collar width | Who is it suitable for? |
| №1 | 15-17 cm | 8 cm | kittens |
| №2 | 20-24 cm | 10.5 cm | teenagers |
| №3 | 27-31 cm | 12 cm | average cat |
| №4 | 30-34 cm | 14 cm | big cats |
Veterinary devices that protect animals from self-harm are sold in finished form. Their assembly is carried out according to the scheme prescribed in the instructions.
Step-by-step connection of the components of the collar with the straps:
Protective item with straps for a cat, assembled.
Veterinary barrier therapy products with Velcro are assembled faster. To do this, just put them on the animal’s neck and then secure it with a textile fastener.
All medical collars without side effects or contraindications. There are no precautions for use. They are stored in a dry, dark place, with a relative humidity of no more than 75%.
Shelf-life Unlimited.
Making a protective product for a pet
You can make a collar for your pet yourself. There are several different ways to make it, depending on the materials chosen.
Express version made from cardboard
If you don’t have time to purchase a collar, but you need it urgently, you can build it in a short time from what you have at hand. You will need:
- thick cardboard;
- tape measure;
- compass;
- stapler;
- scissors;
- scotch.
The procedure is as follows:
- On a sheet of cardboard we draw a semicircle (diameter - 20–25 centimeters).
- Cut out the part and roll it into a funnel.
- Using a measuring tape, we find out the circumference of the pet’s neck.
- At the base of the cone we make a hole, the diameter of which is equal to the circumference of the cat’s neck.
- After you wrap the future collar around the cat’s neck, its side sections will need to be secured with a stapler or tape.
Video: making an “Elizabethan” collar with your own hands from cardboard
Collar made of plastic
To make a plastic collar you will need:
- two-liter plastic bottle or stationery folder;
- Velcro;
- stapler;
- scissors;
- adhesive plaster.
A plastic collar is not the most comfortable option available. But if the animal does not have too long a rehabilitation period, then it is quite suitable, especially since this product can be made more comfortable.
Do not give in to provocation - any animal will try to remove the collar
It is made as follows:
- Cut a two-liter bottle in half (or unfold a plastic folder), draw and cut out a collar in the form of a semicircle (it is also better to limit its diameter to 25 centimeters).
- Fold the semicircle into a cone. At its base, cut a hole with a diameter determined by the thickness of the cat’s neck.
- Attach Velcro fasteners to the side sections of the cone with a stapler. You can also make holes at the edges of the cuts using sharp scissors and connect them with a soft cord or ribbon.
- Cover the top and bottom edges of the collar with adhesive tape. This will soften the edge adjacent to the cat's neck and strengthen the one that will encounter obstacles. It is very important that all edges of the homemade plastic collar are even and smooth.
Video: making your own plastic collar
Fabric collar
Despite its apparent complexity, making a fabric collar will be no more difficult than the first two. This is the most comfortable and soft protective product for a cat.
You will need:
- paper;
- ruler;
- compass;
- scissors;
- threads;
- needle;
- natural fabric;
- felt or thick non-woven fabric;
- Velcro.
The shape of the collar is again a semicircle with a diameter of 25 centimeters. The collar pattern is first drawn on paper.
Then proceed like this:
- Using the resulting layout, apply the pattern to the fabric (it is better to use cotton or linen) and cut out two identical parts.
- They try the pattern on the cat and cut off the excess. By the way, it is always better to cut a piece of a larger size and reduce it if necessary, than to save fabric and find that the product is too small.
- Using the same pattern, you need to cut out parts from felt or non-woven fabric. You can use several layers of other, less dense fabrics (for example, drape) and stitch with small diamond patterns.
- Now a layer of strong material is sewn inside two pieces of thin fabric. To do this, the three resulting layers are stitched along the entire perimeter, excluding a small section 5 centimeters long. It is necessary so that you can later turn the collar right side out through it.
- Turn the product inside out and iron it.
- The remaining hole is sewn up by machine or by hand.
- Ties or Velcro are sewn onto the side edges to secure the device to the cat’s neck.
Fabric collar - soft and comfortable barrier
It is important to remember the disadvantage of a fabric collar - it retains its shape worse than other models. An active cat that tries to get rid of it will quickly deform the protective accessory. To avoid this, you can make the collar fields not too wide - let them cover only the cheeks. And along the outer perimeter of the collar you can put a thick edging - it will also help the product keep its shape.
Collar made from disposable tableware
An original solution would be to make a collar from cardboard disposable tableware. Some owners manage to fit the cat's head into the hole cut out in the middle, but it would be much better to cut the plate in one place towards the inner circle. This slot will allow you to put the collar on without disturbing your cat. It can be secured with tape or a stapler.
Cardboard disposable tableware can be used as a protective collar
Collar made on the basis of a purchased one
We have already said that a purchased plastic collar can hardly be called comfortable. Soft collars are not cheap (about a thousand rubles). If you want to save money and at the same time please your little animal, you can buy a plastic collar at a veterinary hospital and turn it into a comfortable product. Just cut off unnecessary straps from a purchased collar and use it as the basis for cutting out fabric parts. You can simply sew the fabric to a plastic base, making punctures along its perimeter with sharp scissors. The second option is to do the same as when sewing a fabric collar. Just use a store-bought collar instead of thick fabric. This will give the soft device extra rigidity.
Quick collar made of soft plastic or cardboard
Perhaps the simplest and fastest option for making a protective collar. Suitable materials are soft plastic or polyethylene, for example, a paper folder. It's better if it's transparent. You can use medium-hard cardboard.
This option is suitable for the first time. For example: it is not possible to purchase a collar in a store, but measures must be taken immediately. A good disposable option when treating your pet for parasites.
In case of long-term use, you need to acquire or manufacture a more reliable and convenient design.
Table: advantages and disadvantages of protective devices
| pros | Minuses |
| Reliably limits the cat's access to the sore spot | May cause fear and dissatisfaction in the animal |
| Will not allow the cat to hide in a hard-to-reach place | Able to cling to objects |
| Can be purchased by choosing an inexpensive option | The cat is uncomfortable eating |
| You can make the collar yourself | |
| Lightweight and durable | |
| Can be used to trim fur and nails |
Some funny cats
Some animals behave aggressively during hygiene procedures. By putting a protective item on a cat, the owner will protect himself from its bites and claws.
Wearing rules
The main purpose of such a pet collar is protection. You can watch how the animal tries to take it off and how uncomfortable it is for him to be in it. Don't be led by emotions. Over time, he will get used to the new “accessory”.
After putting on and securing the product, make sure that the animal feels comfortable, namely: the product is not secured tightly and the edges do not rub the neck.
There are times when a cat wearing a collar refuses to eat. You can try placing the bowl on a hill so that the edges of the product do not touch the floor. Otherwise, you will have to take off the protection during feeding and put it back on. Be vigilant at this time so that your pet does not get into trouble.
Remember that such an adaptation, like the situation itself, is stressful for the animal. They sense your mood well, so take your pet in your arms more often and show care. Sometimes you can remove the protective product and let the cat rest under your careful supervision.
In what cases is protection not needed?
Do-it-yourself collar for a dog after surgery
Freedom-loving animals have difficulty accepting a new wardrobe item. Therefore, if the pet cannot calm down, the veterinary cap will have to be removed.
There are times when completely getting rid of an accessory that is unpleasant for an animal is simply dangerous for its health. In such cases, it is necessary to replace the barrier structure with a bandage that is tied on the back. Animals perceive such a unique T-shirt more calmly.
A cat wearing a bandage feels more confident
Preparing for work
Before you begin, you should decide on the purpose of the pet costume, the frequency of its use and design. Any homemade clothing for cats must include:
comfort: when worn, the pet is comfortable in the outfit, its movements are not constrained; quality: when making clothes for a cat with your own hands, you need to pay attention to non-artificial materials. Only inserts or trim made of synthetics are allowed
The reverse side of clothing for cats should be completely natural to avoid allergic reactions; simplicity: simple cut of clothes ─ a minimum of seams and costume items; practicality: clothes for frequent wear should not lose their appearance after cleaning and washing.
Material selection
You need to decide whether the cat's clothing will be sewn or knitted. In the first case, fabrics, accessories, and finishing are selected. In the second ─ suitable yarn.
Choosing the material for your pet's clothing is the most important part of the work. If the cat doesn’t like it, all efforts will be in vain. It is difficult to force your pet to wear such clothes.
In order not to make a mistake with the choice, you can first put the selected material or yarn on the cat’s bed. The fabric must first be washed with a neutral detergent. If the surprise on the bedding does not cause protest from the pet, then you can safely start creating patterns, sewing or knitting.
It is better to choose soft, flexible fabrics for cats: knitwear, cotton or linen with a stretch effect. Clothes made from this material are comfortable and will not hinder your pet’s movements. The appearance of things will not suffer from frequent washing.
The finished knitted product must be washed.
Taking measurements
Creating clothes for a pet with your own hands begins with creating a pattern, for which you need to take measurements
It is important to determine the size correctly. The fit of the product on the cat and its comfort depend on this.
To take measurements from the model, you need to take a centimeter tape. To create a universal pattern, it is enough to determine 3 main parameters of the pet:
- ОШ – neck circumference. Measured at the base of the neck - where it meets the chest;
- OG - chest circumference. Calculate along the widest part of the cat’s body, under the front legs;
- DI is the length of the product. Equal to the distance from the base of the neck to the base of the tail.
Based on these measurements, you can design any styles of clothing for various purposes for your cat.
If the product involves sleeves and a collar, then the following measurements are also needed for the pattern:
- OT - body circumference. Measured across the stomach, in front of the hind legs;
- OPL and OPL are the girth of the front and hind legs, respectively. Calculated based on their widest part;
- LSH - neck length from base to ears;
- DT - length of the body between the front and hind legs.
When creating a drawing, length measurements are taken in full, and the length of the girths is divided in half. Armed with the numbers, you can safely start cutting out a costume for your pet.
Universal drawing
The figure shows an approximate drawing from which you can create various clothing patterns for cats.
The top image is the back, consisting of two parts. The lower part is the tummy. Half of the part is drawn, a fold runs along the middle line. Semicircular recesses are holes for the pet's paws (armholes).
The DI measurement is laid along the lightning line. Next, a drawing is built from it in accordance with the size of the cat. Line CD is the length along the tummy from the front to the back paw.
When cutting the product, remember that clothing for cats should not be too tight. To do this, add 1-3 cm to the pet's girth measurements for a loose fit.
Seam allowances must be made along the contour of the pattern. Their size is adjusted as follows: add 0.5-1 cm along oblique and figured cuts, and 1-2.5 cm along side and shoulder seams. Clothes for a cat should not be too loose.
Required Items
To create clothes for cats with your own hands, you need to prepare a workspace: a table or any flat surface for cutting.
You will also need:
- paper or fabric for making a pattern;
- yarn and knitting needles or crochet hook if the project involves a knitted item;
- fabric: main, lining, cushioning (insulation);
- tailor's chalk;
- adhesive materials for strengthening oblique and figured cuts;
- sewing accessories: buttons, snaps, zippers, Velcro fasteners;
- finishing accessories: braid, lace, adhesive applications;
- sewing threads;
- needle;
- scissors;
- sewing machine.
Now you can start creating an original, stylish set of clothes for your pet.
Features of the pattern
When a veterinarian recommends barrier therapy, inexperienced owners are horrified: “Forbid a freedom-loving cat from doing what she wants?!” Ban itching? Lick your fur coat? It’s not scary if you know how to make a collar for a cat so that your pet experiences a minimum of inconvenience and quickly gets used to the strange thing that covers its neck.
- In order to make a collar for animals, a pattern in the form of half a ring is used. It can have different height, length, width. From such a part a cap is made with a cutout for the neck, its edges are securely fastened.
- When creating a pattern, you need to measure the circumference of the neck (this will be the length of the inner semicircle), the length from the neck to the tip of the nose (plus five centimeters). You can make a small reserve according to the parameters, cut out the blank, fold it, try it on and trim off the excess.
If the collar greatly blocks the cat’s view of the environment, the pet will be very nervous, which will have a bad effect on the progress of rehabilitation.
Fabric collar
In order to sew a device from fabric, you should use a regular pattern; a thick edging is sewn along the edge; it will hold the structure. A soft version of a protective product may not provide full protection; you need to observe the behavior of your pet in such a design. If the cat tries to remove the collar or press it with its paws, a more rigid sample will be needed. The health of the pet should be the main factor.
Plastic bottle collar
When purchasing at a veterinary pharmacy or pet store, the question arises how much an “Elizabethan” collar for a cat costs. The price may surprise you, especially for imported products from famous brands. Since the design is most often used temporarily, for a short period, it is more practical to make it from scrap materials, for example, from a plastic bottle. Additionally, you will need Velcro and ribbons.
- The bottle needs to be cut so that it forms a cone.
- To prevent the cat from being injured by sharp plastic, the inner edge should be covered with tape or a strip of fabric.
- Where the parts of the product will be connected, ribbons are sewn for ties.
In this way it is easy to make a product from a transparent plastic bucket or flower pot.
Option for quick production of a veterinary collar
In emergency cases, there is no time to sew a veterinary collar or look for one in pet stores. If you need to put such a device on your head urgently, you can use a temporary option.
- You need to flatten the cardboard and cut a semicircle out of it. Then the material should be twisted, this will make it softer.
- The blank must be tried on the animal, cutting off the excess.
- The edges of the cardboard may be sharp; you need to cover them with tape.
A temporary option is used when urgent protection is needed for the cat’s wounds. You can also use it when treating your pet antibacterially, when applying a spray against fleas or ticks. The pet should not touch its fur or skin for a while. Then the simple collar is thrown away without regret. The best material for construction is thick cardboard from a shipping box or shoe box. If the cardboard is very thick, it is better not to use it for cats; it is only suitable for a dog collar.
The simplest option for a cardboard collar may be if it is needed only for a short time (before visiting the veterinarian, before purchasing a more serious design).
With your own hands
It is not always possible to quickly select a ready-made medical collar of the required size and dimensions. In addition, it is possible that a protective accessory is needed urgently, but there is no time to search and purchase. There is only one way out - to make an E-collar with your own hands.
We will look at the most popular models of homemade collars and tell you how to make them at home.
The most popular materials for this barrier protection product are:
- cardboard;
- lightweight plastic;
- plastic bottle;
- textile.
Cardboard
The simplest and easiest way to make a collar for a cat.
A cardboard structure can be built in a hurry when an animal urgently needs protective equipment. The model is not suitable for long-term use, but it can cope with its task within a few hours. In the future, industrial designs or collars made of other materials should be used: plastic, soft fabric.
To make your own cardboard collar you will need: cardboard, tape and lace.
How to make a cardboard collar:
- Take thick cardboard. Boxes from household appliances or shoes will do.
- Take measurements from the cat - neck circumference (measurement No. 1) and neck length from the collar to the tip of the nose (measurement No. 2).
- Draw a cone on the cardboard with the length of the inner circle equal to the circumference of the neck (+2.5 cm). The width of the product will be equal to the second measurement (+2.5 cm).
- Cut out the collar according to the drawn pattern.
- The edges of the cone must be treated with tape.
- Using a lace, fasten the parts of the cone.
- For ease of wearing, make loops for the collar.
You can use a stapler, sticky tape or tape to secure the edges of the cone.
Video
Made from lightweight plastic
A more solid and reliable design is made from lightweight plastic. Such a collar is not inferior in its characteristics to finished plastic products.
To make a plastic collar you will need: a stationery folder or a flexible cutting board, tape or wide adhesive tape, a stapler and a textile fastener (Velcro).
How to make a collar from lightweight plastic:
- The pattern for the product is made in the same way as for a cardboard model.
- A cone is cut out from a stationery folder or cutting board according to the pattern, adding 2-3 cm along the edges to adjust the size.
- Sharp edges are treated with adhesive tape or tape.
- The textile fastener is attached to the plastic edges of the cone using a stapler.
To make it easier to fix the product on your cat, you can improve the design by cutting or constructing loops for the collar.
Video
From a plastic bottle
Models of Elizabethan bottle collars are popular among cat owners - this material is found in every home. Bottle plastic is transparent, flexible and durable - collars made from them will last a long time.
For a plastic bottle collar you will need: a water bottle, tape, adhesive tape or string.
How to make a collar from a plastic bottle:
- Choose a transparent bottle of the appropriate size.
- On the side of the neck, a marker marks a diameter equal to the circumference of the pet’s neck.
- The neck is cut off and the length of the cat’s head is measured (measurement No. 2).
- The rest of the bottle is cut along the marked line.
- So that the product can be put on a cat, the cone is cut lengthwise.
- The lacing is threaded along the cutting line into pre-made holes or a Velcro fastener is attached using a stapler.
To prevent the animal from injuring itself, all sharp cuts are sealed with adhesive tape or tape.
Soft fabric collar
Not all cats will like hard plastic and cardboard structures. Capricious pets will like soft fabric products more. The collar is sewn from cotton fabric to minimize possible allergic reactions. Linen or cotton is best suited for this purpose.
To create a more dense structure, a cardboard or plastic base is placed between strips of fabric, and the collar is stuffed with padding polyester or cotton wool.
The simplest collar can be sewn using the pattern that was used for the cardboard and plastic versions. Don't forget to add 1.5 cm at the seams. Along the cut line, the edges of the collar are secured with adhesive tape.
Collar made from scrap materials
An interesting video about how to quickly make an Elizabethan collar from disposable paper plates.