Let's figure out how to give an injection to a dog yourself? How and where to give intramuscular injections correctly? How to give a subcutaneous injection to a dog? Are there any secrets to reducing stress in your pet during treatment?
Preparing the dog
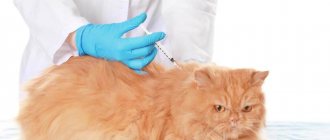
First, the animal is calmed down by stroking and calm conversation. It is best to carry out the procedure after a walk and feeding, when the dog is in the most relaxed state.
Attention! The instructions for some drugs put forward conditions regarding the time of day or condition, food intake, so you should first carefully study the instructions and consult with your doctor.
Some dogs tolerate the procedure well, while others do not. Owners of restless animals need to ask their loved ones for help to hold their dog. This must be a person she knows. The assistant is located at the animal's head and strokes its chest and sides so as to prevent jerking. Rude behavior is unacceptable, as fear will make intramuscular injection difficult.
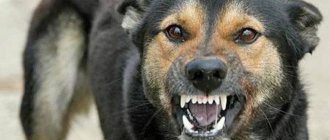
To prevent the dog from biting the owner and his assistant, it is recommended to use a muzzle. If there is no accessory, then the mouth is fixed with a bandage or other available means.
The muzzle will prevent injury to the owner and his assistant
What to do if your dog is afraid of injections
Some animals are simply terrified of injections, and it is not so easy to persuade them to undergo such a procedure. In any case, the owner should remain as calm as possible and, if possible, enlist the support of another family member. Having laid the animal on its side, one person fixes it in this position, and the second gives an injection. At the same time, we must not forget about the need for muscle relaxation, so while the dog is trembling and trying to become as inconspicuous as possible, it is advisable to only stroke it and calm it down with affectionate treatment. Alternatively, you can distract your pet with a treat and only then proceed to the injection. Sometimes, it is only possible to complete what has been started in a veterinary clinic, since the owners themselves cannot cope with a frightened dog.
Did you know? A dog's tail is a kind of rudder that allows the animal to easily move in the water and maintain coordination when moving along a narrow, elevated path.
Instructions
There are several varieties that differ in pain and in what drugs are administered with their help. It is ideal if the owner learns how to do them all.
We fix the pet before the injection
Few dogs, even flexible and kind ones, will take sudden pain well. And if she jerks too much - or, moreover, tries to run away - the needle will break off and you will have to go to the vet to get it out.
To prevent this from happening, you need to at least minimally prepare the dog:
- Choose the correct time if the instructions allow. Preferably after eating and walking, when the animal is relaxed and is not going to resist.
- Talk to the dog. Having placed it in the right place, give the command “sit”, and then, during preparation, speak in a calm, soft voice about anything. Before taking the injection, let the syringe smell and stroke it.
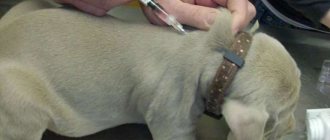
- Put on a muzzle. If there is a tendency towards aggression or cowardice, you need to wear a muzzle: this will prevent the owner from biting.
It is advisable that another person whom the dog trusts participate in the procedure. This person should come from the side of the head, sit on the floor and, holding the dog by the withers, distract him from the procedure. You can pet him, you can even offer him a treat.
If the dog handled everything calmly, didn’t try to run away, didn’t want to bite anyone, he is offered encouragement - a treat and affection. It is imperative that the idea “yes, they do something strange and even a little painful, but then they will give you something tasty” takes root in your head.
The association should be pleasant, otherwise the fixation will have to be carried out more harshly: roll it on its side and hold it by the withers and pelvis, with force. But then there is a great risk that each time the procedure will turn into a local war.
Intramuscular injections
When they say that you need to give an intramuscular injection to a dog, they usually mean that the injection should be in the thigh . The biggest muscle is there and everything will be the least painful.
The process is simple:
- Feel the thigh and find the place where the muscles are softest, usually located between the hip joint and the tibia. Since nerve ganglia are located in the thigh of canines, proceed with caution.
- Stretch the muscle with massaging movements. You can’t inject into a clamped one - the medicine will not be distributed correctly, and an allergy will begin.
- Insert the syringe sharply and easily - you can remember how nurses do this in clinics. You don’t need to go very deep, the main thing is to feel that the needle has entered the muscle. It is important to remember that she must walk at a right angle.
- Slowly and smoothly press the piston. Resistance should be felt, but the liquid must be injected slowly, otherwise it will not be able to distribute correctly and will form a drug-filled lacuna in the muscle.
- Gently, without excessive force, pull out the needle.
Preparing for the injection
To complete the medicine kit you will need:
- alcohol wipes or cotton wool soaked in alcohol;
- cotton ball;
- medicine, solvent for it;
- syringe, preferably with two needles.
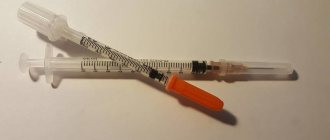
Types of syringes
For dogs weighing up to 5 kg, insulin syringes are used if there is no need to inject viscous oily solutions that such a needle cannot pass through, or the dosage of the medicine does not exceed 1 ml. In other cases, preference is given to an instrument with a capacity of 2–3 ml. For representatives of large breeds, syringes of 5–10 ml are used, but they try to use a thinner needle (as much as the drug allows).
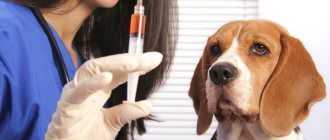
Before the injection, wash your hands thoroughly and treat them with an antiseptic, for example, chlorhexidine. Do not touch the needle.
Antiseptics for hand treatment
Carefully study the instructions for the drug and prepare solvents. Cold liquids are heated by immersing the bottle in warm water (about 40 ° C) or left for some time at room temperature. This will reduce pain in the animal and prevent complications. They also study the date of manufacture of the drug to ensure its suitability, check the integrity of the packaging and compliance with the concentration prescribed by the veterinarian.
Before use, carefully study the instructions for the drug
Attention! Ready-to-use solutions should not contain sediment, and the color should correspond to that described in the instructions. Otherwise, use of the drug is prohibited.
Next, check the syringe. Cracks in the body or damage to the needle are unacceptable. If an expiration date is indicated, then after its expiration the product is not used. The type and capacity of the syringe should correspond to the medicine and its dosage, but be slightly larger.
If necessary, mix the drug by rolling the bottle between the palms of your hands. There is no need to shake the container to prevent air from getting into the liquid.
Then proceed in this order:
- Remove the metal cap from the bottle.
- Wipe the lid with an alcohol wipe.
- Use a needle to pierce the lid or cut off the glass top with a blade.
- Connect the syringe.
- Take the required dose.
Many medications come in powder form and must be diluted before use. Then first draw the solvent into the syringe, then inject it into the ampoule with the powder and stir until the product is completely dissolved.
All air must be removed from the syringe
Next, you need to check whether air has gotten inside. To do this, lightly tap the syringe with your fingernail. If air was in the liquid, it rises to the surface. Then press down on the plunger until several continuous drops of liquid emerge from the needle.
Video - How to dilute drugs
Syringe kit rules
To understand how to correctly draw a syringe, consider a small algorithm:
- wash your hands thoroughly;
- wipe the ampoule with an alcohol-containing solution (before doing this, you need to read the name of the drug and the dosage on the ampoule so as not to introduce another medicine by mistake, also read the instructions carefully - you may need to shake it);
- file the thinnest part of the ampoule (some preparations have a ready-made sawed “neck”) and break it;
- take a new syringe and, without touching the needle with your hands, draw up the drug sterilely;
- expel the air from the syringe with a piston;
- Collect the remaining bubbles by lightly tapping under the base of the needle and squeeze out with a gentle movement of the piston.
IMPORTANT!
- do not use drugs from open ampoules;
- do not use previously opened syringes and needles;
- Under no circumstances should you put the drug into a syringe in front of an animal - this may affect the emotional state, which will lead to problems with the manipulation.
To save money, you can draw several doses of the drug into a syringe, inject one dose, and store it in the refrigerator. Warm it in your hand before use.
How to give an injection in the withers of a small, emaciated dog or puppy
Recommendations for small, malnourished dogs or puppies are practically no different. The only nuance is the size of the syringe and the depth of needle insertion. The safest and most painless option is insulin. It has the thinnest and shortest needle. Due to the short length, in most cases it is inserted to the end, but for the listed animals the depth can be reduced to half.
At the time of injection, be sure to keep the coat dry. If it gets wet, the selected depth is not sufficient to pierce the skin. In this case, you need to enter it a little further.
Subcutaneous administration of medication
A subcutaneous injection is most often given at the withers. This is the area on a dog's body where the shoulder blades of the front legs meet. The location has many advantages: it is impossible to hit large blood vessels and nerves here. This minimizes the likelihood of injury to the animal. In general, subcutaneous administration of small doses is possible on any area of the skin where the skin can be pulled back. The disadvantage of this method is that the active substances are absorbed for a relatively long time during this administration and slowly enter the bloodstream. Therefore, in emergency cases, subcutaneous injections are not very effective.
This is interesting! To divert attention from the pain, during the subcutaneous injection, the person helping to hold the dog should grasp the fold of the dog's armpit with two fingers.
The injection site is first disinfected. The skin on the withers is gathered into a “house” and a needle is inserted in the direction of the spine, closer to the base of the formed fold, at an angle of 90° to it. When done correctly, the needle seems to fall through, and the liquid flows freely from the syringe.
Proper skin grip
Attention! For all injections, the syringe is pulled out at the same angle at which it was injected. Sterile cotton wool is applied to the puncture site on the skin and pressed lightly.
Video - Hypodermic injection for a dog
When the skill of giving injections comes in handy
In an emergency, an intramuscular injection can save a life. When injected into the muscle, the medicine quickly reaches the blood vessels, achieving the desired effect in a short time. If the veterinary clinic is located remotely, first aid will be the responsibility of the owner, so he must be able, among other skills, to give injections.
In addition to force majeure, it is important to take into account simple economic benefits. Most diseases cannot be treated without drug therapy. Regular trips to the veterinary clinic will hit your budget hard.
Carrying out therapeutic measures at home is not only more profitable, but also calmer for a sick animal. A familiar environment reduces stress levels, allowing you to avoid extreme anxiety during the administration of the medicine.
Intramuscular injection in dogs
When there is a choice between intramuscular and subcutaneous administration, it is better for a beginner to choose subcutaneous, especially when there is no experience at all in carrying out this type of procedure. Very often, intramuscular injections result in lameness, especially when it comes to representatives of small breeds. In addition, there is a possibility of an abscess. If the hind limb is injured, then the injection is given in the shoulder of the front limb.
Places on the body for intramuscular injection
The injection site is disinfected with medical alcohol. The syringe is positioned at an angle of 90°. With a sharp movement, the tip of the needle is pierced into the muscle to a depth of about 5 mm and the drug is carefully poured in, putting pressure on the piston. The muscle will not change position if the unoccupied hand is placed under the thigh. Painful injections are administered slowly, at the same speed.
After the injection, the pet is rewarded with a favorite treat, and if this is prohibited by the conditions of therapy, then with gentle words and stroking.
Attention! A single dose of the drug administered in this way should not exceed 5 ml, even for representatives of large breeds. If a large dose needs to be administered, it is divided into two parts and injected into different muscles.
Video - Intramuscular administration of the drug
Where to inject - choose and prepare the place
“Giving” an intramuscular injection is not easy, especially when the owner has no experience in carrying out this procedure. Everyone is scared for the first time - what if I inject in the wrong place, what if I puncture a nerve, what if I damage a bone or vessel with a needle. Psychologically, it is also very difficult to stick a syringe into a pet’s paw. Here it is important to understand that you are not torturing the animal, but on the contrary, you are prolonging its life and taking care of its health. Following our instructions, you can inject your dog. So:
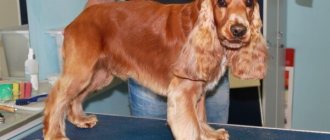
Injections are given intramuscularly in the hind leg. Carefully examine your pet's paw from the side, assessing the volume of muscles, thickness of bones and skin. The picture below clearly shows the area that should be carefully palpated.
The blue dot is the right place
The burgundy lines are the pelvic bone, femur bone, tibia (small and large). The dog needs to give an intramuscular injection into the thigh muscle, approximately where we see the blue dot in the picture.
Important! The safest area is from the femur on the right, if you look at the left paw, if at the right, then vice versa. It is in this part that there are no large blood vessels, tendons, or nerve endings; the bone is located far from the site of needle insertion. Therefore, even without experience, there is no chance of harming anything to the dog.
The needle should be inserted into the most powerful part of the muscle; it can be easily felt - you will always feel how the muscles roll during palpation. Above/below the muscle is thinner, it is taut and hard. It is extremely undesirable to stab into these places - it will hurt the animal, and you can damage a nerve, bone, or joint.
During the procedure, the muscle must be relaxed. You can relieve tension if you lightly massage the injection site when the paw is in a bent position. Before inserting a needle, it is not necessary to treat the injection site with alcohol - the dog’s skin is distinguished by the presence of a reliable antibacterial layer.
Theory
How to give an injection to a dog in the thigh or withers? Quite simple if you know the theory. There are no a priori difficulties in giving an injection, but there are risks with violating the dosage and introducing an infection. If you do not have experience, you should not even try to give an intravenous injection or drip without the help of a veterinarian. To facilitate the treatment process, a catheter is installed in dogs requiring intravenous infusions.
The main goal is to adhere to the dosage of the medication as accurately as possible, depending on the doctor’s prescriptions. The high cost of most drugs forces owners to purchase more affordable analogues, the dosage of which may differ. You need to understand that the veterinarian writes either the exact amount of a certain medicine or the dosage of the active substance . If the prescription indicates a specific drug, and you bought an analogue, you need to calculate the dosage yourself. In some analogues, the dosage is no different, but even in this case, you need to check compliance with the main points of the instructions.
Injecting a dog in the thigh means achieving several goals:
- Rapid absorption - when prescribing tablets, there is a possibility that the active substance is not absorbed in full.
- Precise dosing - tablets often have to be divided into parts, crushed, and mixed with food. All these manipulations reduce the accuracy of the dosage and, usually, to a lesser extent. If the drug is injected intramuscularly, you have a guarantee that all the prescribed medicine has entered the body.
Naturally, there is also a risk of overdose. When treating with tablets, an overdose is also possible, but in this case the dog can be washed out the intestines, induce vomiting, drink absorbents, etc. If an excess dose of the drug is injected into the muscle, then the detoxification process is more complicated and should only be carried out by a doctor.
The next point that you need to pay attention to is the volume of the prescribed injection dose. Even very large dogs are not recommended to inject more than 5-7 cc in one place. If this rule is violated, there is a high probability that a lump (seal) will form at the injection site. If the outcome is good, the lump will resolve on its own. The period is very individual, from 2-3 days to several months. If the muscle rupture provokes inflammation, an abscess (purulent focus) forms at the injection site, which, at best, will quickly open out; at worst, it needs to be opened and cleaned.
Note! Regardless of the veterinarian's prescription, always check the instructions. A number of drugs cannot be injected subcutaneously or intramuscularly.
Intravenous injection through a catheter
This method is considered the most effective in intensive care, and this is the main advantage. However, without a catheter installed in the dog’s body, it is quite difficult to do this yourself, without special skills.
If the dog is undergoing treatment and a catheter is installed in the paw for administration, the task is simplified. Before injecting the medicine, make sure that the device has not moved and is in the blood vessel. This is tested by injecting a small dose of sodium chloride solution. If the piston moves tightly, and a swelling forms near the place where the device is installed, then the drug cannot be injected. You need to replace the catheter first.
It is convenient to infuse medications through a catheter
The cap is removed from the catheter and a syringe with saline solution is attached to it. To flush, pour 2–3 ml of solution into the hole, and another 2–3 drops into the port. Then connect a syringe filled with medication and slowly inject the drug.
Attention! Medicines are administered very slowly. A high rate of drug administration may subsequently cause vomiting in the animal.
After each injection, the device is washed with saline solution.
Video - How to administer drugs intravenously to animals through a catheter
Injection errors
One of the most common mistakes is a poorly secured needle . The needle “shoots” when the plunger of the syringe is pressed. This happens especially often if viscous liquids are administered - for example, oil vitamins, antibacterial drugs, etc.
People who have not injected before may insert the needle too deeply and pierce the skin fold all the way through. To prevent this from happening, the injection is made not at the top of the resulting triangle, but almost at its very base.
Correct and incorrect direction of injection
Another mistake is using a blunt instrument . Very often, one needle is used to pierce the cap of a bottle of medicine and for subsequent administration of the drug. This is not necessary because the animal will experience more pain than usual. To ensure that the injection brings minimal discomfort, two needles should be used. Veterinarians also do not recommend mixing two drugs in one syringe.
Attention! Not all medications are compatible. Injecting different medications from the same syringe can lead to an allergic reaction in a dog.
Video - How to dissolve powder preparations
Methods of drug administration
Before injecting a drug, you need to find out which method of administration is provided for a particular drug.
Table 1. How some drugs are administered.
| Type or name of medicine | Route of administration |
| Oil solutions | Intramuscular, subcutaneous |
| Irritants | Administered intravenously only (must be specified in the instructions) |
| Vitamins | It is not recommended to administer intramuscularly as they cause pain |
| Suspensions | Not administered subcutaneously due to the risk of infiltration |
Attention! Care must be taken when administering oil solutions intramuscularly to avoid getting into a blood vessel. A drop of such a drug in the bloodstream causes an oil embolism and the death of the animal.
Therefore, before infusing the medicine, check whether the needle has entered a blood vessel. After puncturing the tissue, the piston is pulled slightly towards itself. If blood appears in the syringe, choose another injection site.
Common mistakes and mistakes
Most common mistakes are due to lack of experience. These include:
- Inserting the needle to its full length. Insertion that is too deep can result in puncturing the skin fold. After this, all the medicine will come out on the reverse side.
- Strong excitement that is transmitted to the animal.
- Using a dull tool. The drugs, stored in bottles with a lid, are collected by puncture with a needle. This dulls it, so when giving an injection it is necessary to change the needle.
- Too many assistants. The abundance of people frightens the dog. It is enough to invite one person familiar to your pet.
- Poorly secured needle. Be sure to make sure the fastening is secure. Otherwise, the needle will fly away in an unknown direction immediately after pressing the piston.
Please note that mixing multiple medications is prohibited. This may cause an allergic reaction or more serious complications.
Required documents confirming vaccination
The ability to quickly and correctly give an injection will not only save money, time and nerves, but in some situations it will help save the dog’s life. This is especially true in acute conditions - poisoning, severe pain due to injuries, and the like. For example, quickly administered Pyridoxine during symptoms of Isoniazid poisoning gives the dog a great chance of survival. You can read more about this in the article “How dog hunters poison dogs. How to act in case of poisoning." Intramuscular injections are prescribed for almost all diseases. After all, the same active substance, introduced into the body in the form of an injection solution, “works” much faster than tablets, since it enters directly into the blood. This feature is important for diseases accompanied by vomiting - when no medications simply can be absorbed from the stomach. By carefully following all the specialist’s recommendations, you will quickly master the technique of performing intramuscular injections - whenever necessary, you will be able to help your dog. When carrying out this difficult manipulation, it is important to choose the right injection site, select/prepare the syringe correctly, and perform the procedure technically. Let's talk about everything in more detail.
Complications
Failure to comply with the rules for carrying out such manipulations is fraught with complications. Moreover, they happen even to people with experience.
Lameness
The dog may experience lameness. Typically, the complication manifests itself after painful injections, during which the animal even whines or breaks out. A nerve may also be affected.
If lameness does not go away for a long time, you should consult a doctor
To improve the condition, the injection site is gently massaged several times a day with rubbing movements clockwise and in the opposite direction. If a lump pops up at the injection site or the condition has not returned to normal after two days, the help of a doctor is needed.
Formation of infiltrate
In the tissues where the injection was administered, an infiltrate sometimes forms, that is, cellular elements mixed with blood and lymph, and sometimes pus, accumulate in this area.
Errors that cause this phenomenon:
- infusion of the drug into the same place on the animal’s body;
- ignoring the norms of asepsis and antisepsis;
- improper removal of the needle when working with irritating compounds;
- infusion of an irritating drug under the skin or into connective tissue;
- the use of cold preparations, especially suspensions, as well as oily solutions, biological drugs.
To avoid such a complication, it is necessary to constantly change the location of the infusions, and not to inject irritating agents under the skin. Before use, the compositions are heated, especially oil ones, to avoid vasospasm and speed up the resorption of the solution. The infiltrate is resolved by iodine mesh or heat.
An iodine grid will help
Attention! You should not heat the damaged area if the swelling becomes larger and itches. This is a reason to contact a veterinarian.
Abscess
With this complication, a cavity forms in the skin where pus accumulates. The development of phlegmon, a purulent-diffuse inflammation, is also likely.
Subcutaneous abscess in a dog
With purulent inflammation, the temperature locally rises, the size of the swelling increases, and at the first stage it thickens. At the end of its formation, the formation softens in the center or in several places. When touching the abscess, the dog feels pain. The pet may develop a fever and refuse to feed. All sorts of digestive upsets and dehydration can occur.
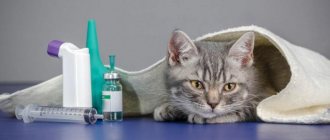
Different syringes are used for different medications
The main reasons for the complication are the same - violation of aseptic and antiseptic standards, as well as infusion of medicine into loose tissue. To prevent an abscess, you should:
- use a new syringe for each product;
- use medications from ampoules that are opened immediately before use;
- treat the injection site with alcohol for intravenous, intraarterial, intraosseous administration.
At the initial stage, the abscess is treated with short novocaine blockades, and other options of physiotherapy are resorted to. In the final stages, surgical methods are used to clean the abscess cavity from pus.
Reference. A short novocaine blockade is an anesthesia in which the medicine is administered around the inflamed area.
Tissue necrosis
This is a process in which destruction and death of tissue occurs, accompanied by the formation of blisters and ulcerations. The dog feels pain at the injection site, swelling and bluish skin develops.
Necrosis often occurs after improper administration of irritating substances. To prevent this, the patency of the catheters through which drugs are administered should be checked.
If, during intravenous administration, the drug spills under the skin, then they try to draw out the solution with a syringe, and inject the affected area with novocaine. An effective measure is applying a cold compress.
Applying ice is an effective method
Allergic reaction
Usually occurs in response to the administration of a low-quality, expired drug or hypersensitivity to this drug in an animal. To prevent this, a sensitivity test is performed before administration. If symptoms of a sharp allergic reaction occur - for example, convulsions, respiratory problems, then the administration of the drug is stopped and antihistamines are used.
Allergy in a dog
You can read more about allergies in dogs on our website.
How to properly prepare an injection
The next step is to prepare the syringe.
- The owner thoroughly disinfects his hands with soap.
- Pick up the ampoule and carefully read the instructions again. Compare what is written with the doctor’s dosage.
- Wipe the ampoule and hands with an alcohol-containing solution.
- Cut the packaging and open it. Do not leave glass near your dog; he can easily put it in his mouth and chew it.
- Open the package with Spitz and take the required amount of solution.
- Turn the syringe over with the needle facing up and tap it. Make sure the liquid is evenly distributed inside.
- Start moving the dispenser slowly so that the air comes out.
Read 10 symptoms of allergies in dogs and effective ways to treat the disease
Important! Experts who make injections for dogs recommend using the liquid drawn up into a syringe within 5 minutes. Otherwise, the solution will gradually begin to lose its beneficial properties.
How to properly place an IV
At home, you can install both intravenous and subcutaneous drips. In the first case, the preliminary installation of the above-mentioned catheter in a vein is implied, and in the second, it is enough to pierce the skin with a needle from a dropper and, connecting the device tube to it, administer the medicine. It is very undesirable to move the needle from side to side, because such actions injure the tissue. Within a few minutes, you will notice a rounded subcutaneous ball at the injection site, which you should not be afraid of: some time after completion of the procedure, it should disappear.
An intravenous catheter requires more careful handling. So, before the next infusion of medicine, the outside of the catheter cannula is treated with a disinfectant solution and the blood clot that has formed inside is removed with a syringe without a needle. In the future, to prevent re-clogging, it is filled with a mixture of saline and heparin, which prevent blood clotting inside the device.
We recommend reading how to vaccinate your dog yourself at home.
In general, it is easy to identify several main stages of installing an IV at home:
- First, prepare a comfortable soft bed for your dog in a place where no one will disturb him.
- Find a support for the bottle (it should be higher than the catheter), and then wrap the bottle with tape and make a loop to secure it to the stand with the cap facing down.
- Wash your hands with soap and prepare all the necessary medications, syringes, alcohol, cotton wool, bandages and scissors, not forgetting the doctor’s instructions.
- Wipe the lid of the bottle with alcohol and insert the needle of the drip system into it (it should go into the bottle all the way). Place the air needle next to it, opening the cap on it.
- Squeeze the dropper well several times so that the solution from the bottle fills it by at least one third.
- Move the drip clamp wheel all the way up and allow the solution to completely fill the system until all air bubbles are released. As soon as this happens, clamp the dropper again by simply turning the wheel all the way down.
- With the dog lying on its side, unbandage the catheter, and after flushing it, attach the drip system tube to the desired location. Using the same wheel, you can adjust the speed of fluid supply into the system, in accordance with the doctor’s prescription.
If necessary, additional injections can be administered into the rubber part of the dropper, but be sure to carefully calculate the dosage and sequence of use of the medications.
As soon as the drug in the bottle runs out, close the clamp and disconnect the system. Give the animal a rest from the procedure.
In most cases, with a steady flow of liquid from the dropper, the dog quickly relaxes and falls asleep, but if it behaves very restlessly, it is likely that the rate of flow of the solution is increased and needs to be reduced.
Important! If swelling of the skin appears around the catheter, stop the IV, otherwise there is a risk of rupture of the vein.