Breeding eggs in an incubator allows you to control the reproduction of the duck population without depending on the desire of the ducks. It is only important to carefully study the features of incubation: select and prepare suitable eggs, place them in the incubator, monitor the regimes and get healthy young animals on time. The rest of the article describes in detail all the step-by-step activities.
Egg selection and preparation for incubation
Breeding strong and healthy ducklings begins with the selection of eggs. Duck eggs are larger than chicken eggs, and their thick white shell has a greenish tint.
Eggs are rejected:
- Non-standard shape. Specimens with any deviations are not suitable - too rounded or, conversely, excessively elongated.
- With defects. Specimens with chips, shell deformations, or cracks are set aside.
- With limescale deposits.
- With two yolks.
Optimal egg parameters for the incubator:
| Parameter | Meaning |
| Weight | 75-90 g |
| Transillumination characteristics |
|
| Form | standard |
| Shell | smooth and clean |
Store eggs in a ventilated area. Optimal environmental conditions: temperature – 8-13 °C, humidity – 75%. The eggs are placed in trays with their blunt ends down. Fresh duck eggs intended for hatching are not recommended to be stored for more than a week.
To get the maximum yield of ducklings, the eggs are subjected to ovoscopy - candling. With its help, microcracks, uneven shell thickness, and internal defects are identified. Candling allows you to see what is behind the shell - for example, mold or damage to the yolk.
Increasing the hatching of young animals
To increase the percentage of hatching of young animals, high-quality material should be used - eggs should be obtained from healthy livestock, provided with adequate nutrition before and during mating. It is not recommended to add material from an unknown source to increase the quantity. Do not place dirty material in the tray, or allow the recommended temperature and humidity levels to increase/decrease during the incubation process.
Breeding ducks at home is a labor-intensive process and requires constant monitoring of parameters. The farmer can make his task easier by choosing a model with automatic egg turning and a digital display that displays temperature, number of days, humidity, and other data.
- Related Posts
- Colibacillosis in ducks
- What kind of ducks are mulardas?
- Tufted ducks
- Aspergillosis in ducks
- Agidel duck: description of the breed
- Runner duck breed
To wash eggs or not?
Duck eggs are often smeared with droppings. Many people are interested in whether to wash them or not to wash them? There is an opinion that you should not wash eggs before incubation. But, according to experienced poultry farmers, if an egg is more than half dirty, it should be washed.
They wash the eggs extremely carefully - all copies damaged during washing are subject to rejection. You can wash eggs manually - using a soft sponge, or using a spray bottle.
Washed eggs are disinfected in potassium permanganate to destroy pathogenic fungi, mold, and salmonella.
How eggs are incubated is shown in the video below:
Opponents of egg washing will say that in nature no one washes eggs. But a duck is a waterfowl animal; when it hatches eggs, it cleans the eggs from droppings with its wet feathers and paws.
Disinfection
In a humid, warm environment, bacteria actively develop, so the shell must be disinfected. You can use commercial disinfectants or formaldehyde vapor, but this is not cost-effective for small farms. Disinfection with a pink solution of potassium permanganate shows no worse results. Its temperature should be within +30°C. The incubation material is placed in a grid, immersed in the solution for 3-5 minutes, removed and laid out on a clean cloth. If there are stains, carefully scrub them off using a soft toothbrush, sponge or cloth.
Rules for hatching ducklings using an incubator
Basic rules for incubation:
- Incubators must be of high quality and reliable - the slightest breakdown can lead to losses.
- It is important to strictly observe the incubation regime - temperature, humidity, etc.
- Only high-quality eggs are selected for hatching - they are determined by appearance and after candling.
To get offspring, you must:
- Provide fresh air flow to the incubator.
- Maintain the specified humidity level.
- Control the heating temperature.
- Prepare equipment for use: wash and dry trays;
- pour water into the holes;
- raise the temperature to the specified values.
The most common mistakes
During egg incubation, the slightest mistake can lead to negative consequences that will affect the health of the future young.
The most important mistakes are considered:
- overheating of eggs;
- small number of turns;
- incorrect humidity level, dry air inside the incubator;
- rare ventilation.
IMPORTANT : Any disturbed incubation condition can provoke the death of the embryo at any stage of development.
Features of the incubation apparatus
An incubator is a device that maintains the conditions necessary for hatching chicks. If you configure the device correctly, the entire incubation process is automated.
In the incubation machine the following is regulated:
- ventilation;
- gas exchange;
- temperature;
- humidity.
The market presents models of different levels - from the simplest to the innovative. Standard incubator equipment:
- trays for laying eggs;
- ventilation system;
- alarm – reports overheating;
- air heater;
- mechanism for turning eggs.
In more expensive and modern models, the trays are turned alternately in one direction or the other at an angle of 45 degrees. There is another option - the eggs are turned over with a special “pusher”. But the second option is less safe - injury to the embryos is possible.
The industry offers incubators that can hold from 35 to 100 eggs.
IPH-5
This incubator is designed for 35-40 duck eggs. He:
- easy to operate;
- designed for owners of small household plots;
- It is a convenient chamber with a door on the front.
The air in the chamber is heated by ceramic resistors, and a fan is responsible for air exchange. The incubator is also equipped with:
- rotating device;
- water container;
- temperature sensor.
Despite the weight of 40 kg, the model is classified as a desktop one. There are also IPH-10 and IPH-15 - more capacious and modern incubators of this type.
Comparison of eggs of Indian ducks, mulards and wild ducks
Comparison of eggs of duck varieties:
- Indian girls. The eggs are white, with a smooth and dense shell. Weight – 75-80 g. Due to the strong shell, the eggs are difficult to break. The eggs are usually clean - ducks are neat birds. Incubation of indo-duck eggs takes 5-10 days longer than that of ordinary ducks - it lasts 30-35 days.
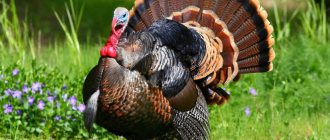
- Mulards. Hybrid of domestic duck and Indian duck. The eggs are smaller than those of ducks and indo-ducks - only 50-60 g. The shape is normal, oblong, like all other ducks. The yellowish shell is covered with a speckled pattern - mulard eggs are similar to turkey eggs. The duration of incubation of mulard eggs is 30-31 days.
- Wild ducks. Eggs of different shades - white, brownish-greenish. Incubation period is 26-28 days.
The incubation regimes for the eggs of ducks, wild ducks, mulards and indo-ducks practically do not differ from each other, but the timing of hatching the chicks is different. It is most convenient to incubate domestic and wild ducks together - their chicks hatch almost simultaneously, but when the spread of hatching dates is a whole week, the process becomes more complicated.
Shelf life and hatchability
When storing eggs for a long time, their hatchability rate significantly decreases. Let's look at the effect of egg storage period on incubation.
| Shelf life of eggs for incubation (days) | Hatchability percentage (%) |
| 5 | 85 |
| 10 | 80 |
| 15 | 73 |
| 20 | 45 |
| 25 | 6 |
Duck eggs are collected for no longer than seven days. Subsequent storage will reduce the hatchability rate.
Adding material to the incubator
The selected eggs are washed, the incubator is cleaned, all that remains is to put marks on the sides. On one side of the eggs they put “+”, on the other “-”. Such marks help to turn eggs correctly - without marks it is easy to get confused which egg is turned over and which is not. It is recommended to lay eggs in the morning.
Bookmark order:
- Warming up the device to +38 °C.
- Filling water into the gutters of the incubation apparatus.
- Warming eggs at room temperature.
- Laying eggs. The largest eggs are laid first, followed by the rest after 4 hours.
The entire incubation period of duck eggs is presented in the following video:
Temperature conditions before laying duck eggs:
| Period | Temperature, °C |
| Storage before incubation | 8-13 |
| Warming up before laying | 25 |
| Warming up the incubator | 37,8-38,3 |
The eggs should not be packed too closely - there will be problems with turning over. If the incubator has an automatic turning function, the eggs are covered with mesh material on top.
Egg collection
Collect eggs for incubation twice a day. Some breeds of ducks lay eggs at night, others in the afternoon. For incubation of duck eggs at home, only the cleanest eggs free of defects are selected. While the required quantity for bookmarking is collected, it is necessary to ensure proper storage. Eggs should be kept in a dry room with a low temperature (about 15-18 degrees). During storage, air humidity is taken into account - 70-80%.
To get healthy ducklings, you need to know how to store duck eggs for incubation. To prevent the hatchability rate from falling, the egg should be positioned with the blunt end up. If you turn it over, this will break the air chamber (it is located at the blunt end), and the duckling at the outlet may suffocate. If the egg is stored on its side, it must be turned at least twice a day.
Incubation of duck eggs at home
Before laying eggs in the incubator, novice farmers must understand the order of the process, its nuances and modes. Duck eggs must always be kept in comfort, and conditions - temperature and humidity - change depending on the stage of hatching.
What modes are there?
There are 4 modes of “hatching” eggs in the incubator, which vary depending on the period.
The conditions for incubating duck eggs depending on the period are described in the table:
| Incubation period for duck/indo-duck eggs, days | Temperature, °C | Humidity, % | Hardening | Number of revolutions | Note |
| 1-7 | 38 | 70 | No | 4 | There should be small gaps between the eggs - they should not be pressed tightly against each other. |
| 8-14 | 37,6 | 60 | No | 4-6 | It is not necessary to add water, just spray the eggs every day. Turn on the ventilation. |
| 15-25/15-30 | 37,8 | 60 | 2 times a day – cool by spraying to 30 °C | 4-6 | Coups become more frequent up to 6 times a day. Cool the eggs - open the incubator 2 times a day for 20 minutes. |
| 26-28/31-35 | 37,5 | 80-90 | No | No | If there are few eggs, the temperature is kept at 37.5 °C, if there are many - 37.2 °C. |
Duck eggs have a lot of fat and little water, and, unlike chicken eggs, they are at greater risk of overheating.
Stages of embryo development in the incubator
Embryo development:
- First week. During this period, the organs of future ducklings are formed and the heartbeat begins. The length of the embryo is 2 cm.
- Second week. The chick's skeleton is being formed. The intensity of breathing gradually increases. First, the embryo breathes oxygen from the yolk, then - external oxygen entering through the shell.
Stages of embryo development:
| Age of the embryo, days | What's happening? |
| 2 | The circulatory system is formed |
| 4 | Limb buds form |
| 5 | The allantois (germ membrane) is visualized |
| 8 | The beak begins to form - its shape is laid |
| 10 | Nipples form under the feathers on the back |
| 11 | The beak is finally formed |
| 13 | The allantois is formed inside the shell |
| 14 | Fuzz appears on the head |
| 15 | The body is covered with fluff |
| 23 | The chick sucks in the yolk |
| 24 | Eyes begin to open |
| 26 | Eyes fully open |
| 27 | The pecking process begins |
Timing of breeding
The timing of hatching duck eggs depends not only on the type of ducks (wild ducks, domestic ducks, mulards), but also on the conditions created. In an incubator, chicks hatch on days 26-28, under a brood hen - on days 28-33.
To speed up pipping, poultry farmers often use 20% formaldehyde. But only on the condition that the deadline for hatching the young animals is violated. For example, if the regime in the incubator was violated.
When and how to spray?
During incubation, the egg loses moisture - it evaporates through the pores of the shell. And the closer to the moment of pipping, the more moisture is lost. That is why at the last stage the humidity in the incubator is increased - up to 90%. In addition, moisture evaporation is compensated by spraying.
Spraying simultaneously cools and moistens the egg. Spray the eggs from a spray bottle with warm water. In some incubators, spraying is not needed - there you can cool the eggs and raise the humidity to 95%. Similar systems are available in industrial incubators designed for thousands of eggs.
Do I need to turn the eggs?
The yolk, having a lower specific gravity, is always in the upper position. Reasons why turning eggs during incubation is essential for successful hatching:
- Preventing the embryo from drying to the shell shell. Internal organs do not stick together.
- Correct position of the embryo at the end of incubation.
- Uniform distribution of overheating throughout the egg.
It is recommended to turn eggs 4-6 times a day. This is especially important in the first week of incubation. These manipulations increase the % hatchability.
Studies have been conducted that show the dependence of hatchability on the number of inversions:
- the eggs were not turned at all - 15% of the laid eggs hatched;
- 2 revolutions per day – 45%;
- 5 revolutions – 60%.
In order not to get confused with the turning, they keep a journal in which they indicate the turning time and a symbol - the egg is marked on both sides.
Ventilation
Any incubator has a ventilation system. Thanks to it, future ducklings breathe oxygen, and carbon dioxide is released outside. There are two types of ventilation:
- Constant. Here the air circulation is not interrupted.
- Periodic. With this system, the fan is turned on once a day.
If there is not enough air, the embryos may die. To avoid the death of embryos, the oxygen absorption rates of future ducklings should be taken into account:
- 2 weeks – 2.5-3 liters of air per day;
- the day before hatching - 8-10 liters of air per day.
Ventilation is started on the 3rd day after the start of incubation. On days 18-20 of incubation, ventilation is turned on to the maximum.
All about incubators
For home and industrial use, there are incubation cabinets of various capacities (35 - 150 pieces), with manual, mechanical and automatic egg turning, temperature and humidity regulators. Such models as “Nasedka” and “IPKh-5” are considered the simplest incubators for duck eggs, with some features:
“ mother hen ” can hold up to 36 eggs.
It is a foam body with removable trays inside. The lamps for heating the eggs are at the bottom. The humidity level is maintained using baths placed inside into which water is poured. Ventilation is provided through openings in the lower and upper parts of the case. It does not have automatic egg turning; they are done manually.
“ Nestka 1 ” is a more modernized model that can already hold 50 eggs.
The temperature is maintained by a spiral heater. Ventilation is carried out using a fan. The egg turns automatically.
“ IPH – 5 ” is an easy-to-use model, it is a chamber with trays located inside it.
The model has a temperature sensor, a rotating device, water baths, a fan and a heater. Subsequent models can hold up to 120 eggs. The incubation period for duck eggs is on average 26 – 28 days.
How are Muscovy ducks incubated?
Indo-ducklings take longer to hatch than regular ducks - they hatch only on day 34-35.
Incubation of turkey eggs:
| Options | period from 1 to 16 days | period from 17 to 29 days | period from 30 to 34 days |
| Optimal temperature, °C | 38 | 37,5 | 37 |
| Number of revolutions | 6 | 6 | — |
| Spraying, once a day | 1 | 1-2 | 3-4 |
| Humidity, % | 70 | 60 | 85 |
| Cooling | 1 time after 10 days | 2 times 20 minutes | — |
If you observe the temperature and humidity conditions, you can achieve a hatchability of 70%. Since the incubation procedure for regular ducks and indo-ducks is different, you should not put their eggs in the same incubator.
Stages of embryo development
Inside the egg, the embryo goes through 4 stages of development . For each stage, it is necessary to know what the temperature is in the incubator, because the outcome of incubation depends on the temperature and humidity indicators. The slightest failure to comply with the rules can lead to the death of the embryo at a certain stage, or the hatching of weak, non-viable young animals. How many days do duck embryos stay in the incubator and how does development occur?
Development stage:
- During the first week (1st period ) in an incubator at home, the embryo develops organs and cardiac activity begins. At this stage, the temperature is maintained at 38 degrees, humidity 70%.
- From the 8th day from the beginning of laying (2nd period), the formation of the bird’s skeleton occurs. At this stage, increased gas exchange begins, ventilation is performed more often, and the temperature is reduced to 37.6 - 37.8 degrees.
- From the 18th day of incubation (period 3), the humidity is reduced to 60%. Temperature at the same level. The duckling embryo occupies 2/3 of the space.
- Time of appearance of ducklings (4th period) . To help small ducklings break through the dense shell, it is necessary to raise the humidity to 85 - 90%, and lower the temperature to 37.5 degrees.
Ovoscopy and rejection
During incubation, eggs are candled for the purpose of timely rejection of eggs:
- First exposure. It is carried out on the 7-8th day of incubation. You can see which eggs are fertilized and which are not. In the first, embryos are visible. If the embryo dies, a blood ring surrounding the yolk is visible.
- Second exposure. Carry out on the 14th day of incubation. The embryonic membrane is visible - the embryonic respiratory organ involved in gas exchange. Embryos that die during this period are called frozen. In such eggs no blood vessels are visible, and the fruit is dark and shapeless.
- Third illumination. Conducted on day 26. 2-3 days before the appearance of the young. Dead embryos are identified and the development of living ones is assessed. The embryo occupies the entire egg, its contours and movement are visible. The presence of a transparent light spot on the side of the sharp end is a sign of a developmental delay in the chick. If the embryo does not move, it is dead. Embryos that died during this period are “suffocated.” These are formed but not hatched chicks. Often in the acute part the absence of allantois is visible.
If there are a lot of frozen and unhatched chicks, it is advisable to find out the reason for this situation. A large percentage of embryo death is observed with:
- hereditary pathologies;
- infectious lesions;
- embryonic dystrophy;
- excessive or insufficient humidity;
- insufficient heating or overheating;
- disruption of gas exchange.
How ovoscoping and rejection of duck eggs occurs can be seen in the video below:
The appearance of chicks and further actions
Hatching order of chicks:
- When the time comes to peck, the chick makes a hole in the shell with its beak.
- The chick gradually expands its peck.
- By resting its paws on the sharp edge of the egg, the chick destroys the shell.
- If the chick is positioned incorrectly in the egg, the process becomes more complicated. If the chick is unable to get out of the egg within 24 hours, they help him by making a hole in a circle to make it easier to break the hard shell.
Before helping the chick hatch, the egg is candled. The formed chick is visible dark; it is also possible to see the light air chamber. If the vascular network is visible, you cannot break the shell - the chick will die from blood loss.
The hatching process takes approximately 24 hours. The weight of a healthy newborn duckling is 50-70 g. A day after hatching, the chicks:
- stand on their feet;
- actively moving;
- evenly covered with down;
- eat with gusto.
The first actions of a poultry farmer when ducklings appear:
- Waiting - all ducklings should dry out.
- Carefully inspect the livestock to identify non-viable individuals. The poultrykeeper examines the beak and eyes - they should be clean. The abdomen is dense and not hanging. It is important to check the umbilical cord to see if it is scarred.
- Transplant the young animals into a box.
- Maintain the optimal temperature, until the 10th day – 28°C, from 10th to 21st – 22-24°C.
Irrigation and ventilation
Duck eggs contain little moisture, which provides protection from the cold, but creates problems during incubation - overheating can lead to the death of the embryo. This makes it necessary to cool the material in the period from 15 to 25 days - at this time the temperature under the shell is close to 40°C. Some poultry farmers believe that it is advisable to carry out cooling starting not from the 15th day, but from the 9th day.
Ventilate the trays by opening the lid for 20 minutes. The room at this time should be comfortable, not hot and not cold (+25°C). After this, spraying is carried out with water, the temperature of which is +25…+30°C.
Instead of water, you can use a weak solution of potassium permanganate - it will provide protection against harmful microorganisms that actively develop in conditions of high humidity and favorable temperature.
Irrigation duration is no more than 5 minutes. During ventilation/irrigation, the incubation material must cool to +30°C. To speed up cooling, leave not only the door open, but also the ventilation flaps. The moisture will evaporate faster if you run the fan with the door open. After turning on the heating, the incubation material should reach the set temperature in 20-30 minutes. Repeat the procedure twice a day.
What mistakes can newbies make?
The most common problems and omissions when breeding ducklings:
- Eggs are not heated evenly. Before turning on/doing ventilation or cooling, the eggs should be mixed - those that are in the center should be moved to the edges, and vice versa. Insufficient heat production leads to high mortality.
- Heat. Due to overheating, all offspring may die. Heat stroke leads to the cessation of chick development - this can happen at any stage of hatching.
- Low humidity. The weight of the eggs decreases, and enlarged air chambers are visible when scanned. The chicks begin to hatch earlier than expected. The ducklings turn out small.
- High humidity. Removal is delayed. Many chicks die when they peck, choking in the amniotic fluid.
- No ventilation. Chicks are born with defects. Embryos lie with their heads towards the sharp edge - this is a pathology.
By comparing the incubation mode with the hatching results, it is possible to determine the cause of the problem:
- If there is a delay in hatching, it is likely that the eggs were not warmed up enough before being placed in the incubator.
- If the chicks are weakened and die within the first day, it is likely that defective eggs were laid for incubation.
- If early hatching is observed, it is likely that elevated temperatures were maintained during the second half of the incubation.
- If pipping was difficult, it is possible that defective eggs were incubated or the humidity conditions were disturbed.
If many unfertilized eggs are discarded, you should take a closer look at the parent couple; perhaps they need enhanced vitamin nutrition.
Having an incubator and high-quality duck eggs, you can breed ducks yourself. If you have no experience in breeding ducklings, arm yourself with detailed instructions. By strictly following all the instructions, you can achieve a high percentage of hatchability the first time.
0
0
Copy link
Important rules for incubation
To get healthy offspring, poultry farmers understand the specifics of preparing, selecting and storing eggs, and the details of incubation, which is carried out in compliance with important basic rules:
- incubators are used only of high quality and in working condition;
- strict adherence to the incubation regime is required;
- Only high-quality eggs are used for laying in the incubator.
To obtain offspring in a timely manner, it is important to ensure the following conditions:
- uniform heating of the incubator to the set temperature;
- maintaining humidity at the required level;
- ensuring access to fresh air and ventilation.
The equipment itself also requires preparation:
- washing and drying trays;
- filling special holes with water;
- raising the temperature to the required parameters.
Only after this they begin to load the electric incubator.