If you are going to get a dog or you already have a pet, then your four-legged friend needs his own corner in which he will relax, hide from the weather and warm up on a cold winter night. The article talks about options for making a dog house - its dimensions, materials used, construction stages, drawings. Examples of beautiful and practical ready-made structures are given - interesting ideas for design.
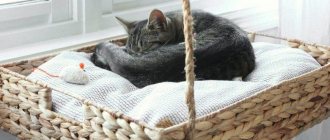
A dog house is its home, which will protect the animal from the weather and allow privacy, and it must be reliable Source fanvid-recs.com
Standard - an official document for dogs
If you have decided to take home a purebred dog with an impeccable pedigree, you need to know the standard for purebred dogs.
In other words, we can say this: the standard evaluates how well a particular dog meets certain requirements. Each breed has certain requirements. The standards are for adult animals only. They are developed and approved by special canine organizations. If you are a novice dog breeder and are purchasing a puppy, then it is advisable to ask for help from a qualified specialist. He is the one who will help you make the right choice.
The pedigree is filled out according to a specific form, which is developed and approved by the International Canine Federation. This must be taken into account when checking these documents. The pedigree confirms the birth of a purebred puppy. This document is important, it lists four generations of the animal's ancestors. If a small puppy does not yet have a pedigree, then when purchasing an animal you need to take a document giving the right to receive a pedigree from the club.
Accustoming a dog to a new place
A dog should not associate a home enclosure with serving a sentence; on the contrary, it is a place where the animal should enter with pleasure. Therefore, during the training process, you should be patient and not show negative emotions.
Advice! It is better to take care of the presence of an enclosure before the pet arrives in the apartment. It’s easier to train a small puppy from scratch than to explain for a long time the purpose of the playpen to an older dog with established reflexes.
The animal is accustomed to the enclosure gradually, starting from one to two hours. After the first achievements, they try to leave the pet overnight (if such a need arises in the future). When the owner is at home, it is better to give the dog the opportunity to move freely around the apartment.
Naturally, at first the puppy may whine and show dissatisfaction.
But a soft mattress or house, a tasty bone or a favorite toy will distract attention from sad thoughts and prevent boredom in the fence. Having made sure of comfortable conditions, over time the dog will independently enter the enclosure. The presence of an enclosure is valued by many dog breeders for easier conditions for potty training
The owner's busy schedule does not make it possible to regularly monitor the physical needs of the pet, and small dogs begin to mark throughout the apartment. Over time, this can become a habit. Aviaries for small dogs in an apartment provide optimal conditions for teaching a puppy to relieve himself in one place. In this case, the animal will avoid punishment, and the owner will constantly search for new puddles
The presence of an enclosure is valued by many dog breeders for easier conditions for potty training. The owner's busy schedule does not make it possible to regularly monitor the physical needs of the pet, and small dogs begin to mark throughout the apartment. Over time, this can become a habit. Aviaries for small dogs in an apartment provide optimal conditions for teaching a puppy to relieve himself in one place. In this case, the animal will avoid punishment, and the owner will constantly search for new puddles.
Rules of maintenance and education
There are very few general rules for keeping and raising medium-sized dogs, but the most important ones are still worth mentioning.
- Balanced diet. This is the basis for your pet's health and development. Be sure to consult the breeder about what the puppy was fed, and continue to organize nutrition according to this principle for the first time. Gradually move your baby to a more convenient option for you. Ideally, choose feeding with ready-made food suitable for the breed, or study the features of the dog’s natural diet.
- Regular walking. Medium-sized dogs need to be walked twice a day. Depending on the breed, walks should be longer or shorter and active, but they should happen in any case.
- Grooming. For some representatives it is minimal: washing and combing occasionally is enough, for others it is very complex and requires effort.
- Care for the oral cavity, ears, eyes. Regardless of the breed, it is necessary to constantly inspect and clean the ears and eyes of dirt. Teeth are brushed regularly using a special brush and bones containing fluoride.
- Health. When buying a puppy, study the genetic predisposition to diseases and the veterinary passport of the parents. Lead a lifestyle that will ensure their prevention. Carry out vaccinations and anti-parasitic treatments in a timely manner: external and internal. Take your dog to the veterinarian every year.
- Upbringing. Regardless of the breed, from the first days of your puppy’s life in your home, accustom him to the rules by which he will live as an adult. Be patient, be consistent. Do not shout or hit dogs under any circumstances.
In the next video you will find interesting facts about the Jack Russell Terrier breed.
Tools and materials needed to make a house
To assemble the frame and cover it with fabric, you will need tools that are available in the arsenal of any home craftsman. To work with wood you will need:
- ruler, pencil, square, tape measure;
- saw or jigsaw;
- hammer;
- screwdriver;
- awl;
- drill and set of drills;
- glue gun;
- screwdriver;
- stapler
To work with metal you will need:
- metal saw;
- a fine file for processing the ends of rods;
- sandpaper;
- pliers or pliers;
- wire cutters
When working with fabric you will need:
- tape measure;
- small needles with a plastic tip for fixing the fabric;
- scissors;
- stationery knife;
- needles for hand sewing;
- sewing machine;
- glue gun
To work, depending on the chosen project, you should stock up on:
- plywood;
- wooden planks 2x2 cm;
- wide strips 5 cm and thickness 4-5 mm;
- corrugated packaging cardboard;
- tape;
- PVA glue;
- hot glue;
- cloth;
- foam rubber 2 cm thick;
- twine;
- furniture fittings - buttons, fasteners, furniture nails with decorative heads.
Interesting booth ideas
You can build a dog house in the most unusual places. To do this, you can use the space under the stairs, free space in the library, living room, TV stand, corner of the room, and even the bathroom. Under the stairs, most often the free space is empty and unused. It is in this place that you can make a booth for your pet with your own hands.
A house for a puppy or an adult dog can be made from a wooden box or cardboard box. Most often, preference is given to just such houses for dachshunds or Yorkshire terriers. Moreover, this does not require significant financial investments.
Note! A house for a small dog, made in the form of a wigwam, will look no less attractive. This option will become one of the cutest elements in a house or apartment.
Fancy dog kennels are currently considered a trend. Animal owners give free rein to their imagination and sometimes create real works of art. They even use chopped timber to build a home, and the result is an aesthetically pleasing miniature log house. Dogs in such a house feel comfortable and at ease. Even traditional booths can look interesting if you choose the right colors and use your imagination.
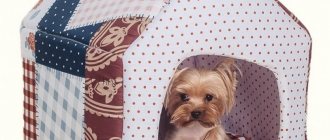
Wigwam for dogs
House for a small dog made of a cardboard box and a T-shirt
If you need a budget option, you should know how to make a house for a small breed dog from a cardboard box and an old T-shirt. The boxes are usually kept in the house after purchasing the equipment while it is still under warranty. The second necessary element is a T-shirt. You will also need a pillow to make your home more comfortable. The box is covered with tape along the folds - this will make it stronger. The pillow is placed inside. The top of the box is covered with a T-shirt so that the neck is at the entrance. You can attach the material at the bottom with a stapler. It won't take much time and won't cost anything.
DIY dog enclosure
Despite the huge selection of enclosures, many dog owners make their own cages for their beloved pets. This way you can take into account the wishes of all family members and ideally fit the indoor booth into the interior
It is important to take into account the size of the dog, assessing how much space it needs to spend time comfortably. So, for example, it’s not difficult to make an enclosure for a Spitz or a Chihuahua in an apartment with your own hands
Representatives of these breeds are small, so there is no need to build too large a fence.
To make a cage or enclosure for dogs, you will need:
- material to assemble the frame;
- wire;
- metal grid. Chainlink should not be used, as the cells are highly mobile, which can lead to injury to the pet;
- pliers;
- awnings with fastenings;
- loops;
- locks.
The frame is usually made of metal or wooden beams. In the first case, they can be twisted together with wire or welded, which will be much more reliable. Wooden parts are nailed together. You can connect them with self-tapping screws and special mounting angles. The result should be a parallelepiped. Next, you need to stretch the mesh; it serves as walls, floor, and, if necessary, roof. You need to leave space under the door, that is, do not tighten one side.
Note! You need to put plywood on the floor and cover it with a soft cloth to make your pet warm and comfortable. Lying on a wooden surface is extremely uncomfortable; the dog is unlikely to love his booth. . Canopies are used to secure the door
A lock is installed on its other side. The door will need hinges to close.
Canopies are used to secure the door. A lock is installed on its other side. The door will need hinges to close.
Instead of metal mesh, you can take wooden bars. They are made into something like a fence, attached to the assembled frame. Leave a small distance between the slats or place them closely. If a whole board or sheet of plywood is screwed to a wooden frame, completely covering the wall, then it is better to make a window in it, especially if the booth is planned to have a roof. The resulting hole can be covered with a metal mesh.
Technology of construction of the booth structure
The starting point for constructing a structure is the calculation and construction of a diagram or drawing. This takes into account the age of the dog, the characteristics of the breed, and the place where it is planned to install the booth. Measurements are taken from the following parameters:
- height of the dog at the withers;
- chest coverage;
- length from tip of nose to tip of tail.
The construction of the pattern is done taking into account allowances - 5 cm for each dimension. The diagram shows the installation locations of connecting elements and fastening of the casing, if it is planned to be removable. The required number of fasteners and decorative elements is also calculated.
For a wooden booth, construction begins with assembling the base - cutting out plywood for the base and strips for knocking down the frame. The next stage is the assembly of the frame, walls and roof. After this, the frame is covered with wall elements and the roof is installed. Painting is done before installing removable foam and fabric panels.
Note! For a soft kennel, the wire frame is first assembled. Then it is lined with foam rubber.
To make a pattern on the fabric of all elements more accurately, it is recommended to wrap the frame with foam rubber in newspaper and secure it with tape. After this, it is enough to simply cut the newspaper at the places of future seams and get a scan of all the necessary elements. Then it’s a matter of technique - the scan is transferred to the fabric and traced, taking into account the tolerances for the seams with chalk.
Place for baby
Often children want to take him to their room. This would not be the best choice for equipping your pet's personal space. If you have a large living room, then it will be much more convenient to fence off a corner here. You can also use part of the hallway. It’s even better, because here he can be alone. It is good if the selected room is separated by doors from the hall, kitchen and other rooms. If this is not possible, then try moving the cabinets apart so that a secluded niche is formed.
So, you brought the puppy home. What to do? First of all, show your pet his place. Place a diaper from his nest there, as well as new toys and a bowl of treats. Now give the puppy time to sniff and look around. The baby does not yet know how to control his urge to go to the toilet, so it is better to cover the floor with old paths, which you will not mind throwing away later. But put away valuable carpets until better times.
That's all about how to arrange a place for a puppy. Ideally, you need to place an enclosure with a door, in which you should place a soft bed and toys. The door should only be locked when you leave for a short time and after your pet has settled down to play. So, he will get used to spending some time quietly in his shelter.
At first, he may whine in the evenings and often come running to you. Be persistent. Sit with him near the sun lounger, play, feed him. Wait until he falls asleep. You may have to approach it several times and repeat all the manipulations. Patience! This will end soon. A puppy matures much faster than a child.
Requirements for a dog house
In the introduction to our material, we outlined what houses for animals can be. In short, today we will discuss how to make dog housing for the street and home. Thus, the requirements for housing located inside the apartment are minimal. It should be:
- spacious;
- comfortable for the dog;
- comfortable.
However, with housing for the street it is a little more complicated. The booths that residents of the post-Soviet countries are accustomed to are a real mockery of animals, since they:
- tight;
- blown;
- cold;
- uncomfortable.
A kennel for pets living outside must be insulated and ventilated.
Our task after reading this article will be to create a home with completely opposite characteristics for a street dog:
- ventilated booth;
- warm housing;
- soft and comfortable space;
- spacious home for the dog.
And all this in one bottle. The fact is that living on the street, the dog faces such troubles as wind and frost. The only exceptions are those cases in which the animal lives in a climate zone where the cold seasons are slightly cooler than the warm ones. It turns out that in order to protect the animal from bad weather and the dangerous effects of the environment in general, you need to create a full-fledged home for it.
Interesting fact: some owners equip their pets with real palaces, which are also heated. We do not need to create a multi-room booth, however, today we will talk in particular about how to insulate it.
"Palace" for a dog
What does a dog playpen look like?
A dog playpen resembles a kennel with comfortable conditions, usually without a roof. There she not only sleeps, but also eats and spends time. Such pet houses can be used in the interior. For example, an enclosure for a Chihuahua located in an apartment can be covered with a tabletop if necessary. Since dwarf dogs are small in size, they therefore require a low playpen. Therefore, it can easily be turned into a comfortable coffee table.
Metal enclosures resemble a cage, but it is easy to fold and put away when not needed. There are also canvas playpens, they weigh little and are easy to clean. In addition, they can be folded and transported, for example, to a summer cottage. Therefore, if you plan to move the cage, you need to think about the possibility of disassembling it.
Metal aviary
Dog and children
The appearance of a dog in the house is a great joy for children who are drawn to all living things. In turn, dogs often show kindness, patience and affection towards children. In order for a small child and a dog to coexist peacefully in the same territory, you need to know and follow the following rules:
- The child must learn that you cannot treat a dog roughly, much less beat it.
- The child must understand once and for all that a dog is not a toy, but a living being. Therefore, it must be treated accordingly.
- Explain to your child that approaching a dog, let alone teasing it when it is eating, is very dangerous. And not only for the child, but also for the dog. This weakens the nervous system, and the animal can become unbalanced and angry.
- A dog should not lick a child’s hands and face, just as a child should not kiss a dog in order to avoid the spread of pathogenic microbes.
- The child must remember that the dog should not be given sweet, spicy or salty foods.
- When the dog is sleeping, the child is not allowed to disturb it.
- Situations when jealousy of a child may arise on the part of a dog must be prevented.
It is difficult to recommend any breed of dog for a family with children, since dogs of any breed always treat their owners who love and care for them, tenderly and kindly. Before you get a pet, you need to think carefully about your own finances, since proper dog care is expensive. Now is not the time when dogs were fed what was left after the master's table. Nowadays, dogs have their own menu, which differs in many respects from humans.
The diet of a healthy dog should include meat or special high-quality canned goods that replace it, which, by the way, are not cheap. These costs are supplemented by regular veterinary care, the prices of which are quite high - the purchase of items and medications for animal care, hairdressing services, and more. And most importantly, vaccinations and monitoring of puppies that are not yet a year old will be expensive.
Houses for apartment dogs
Before we move on to discussing how to build a good-quality doghouse, let’s start making houses for dogs living in apartments. By the way, they don’t have to be small, because the animal’s growth is not at all an obstacle to building a comfortable resting place for it. As you begin building your dream dog house, check out the following interesting tips from experienced dog owners who have built houses for their own pets many times over.
So, in order to make a soft mattress for a dog, it is best to cover the floor of a manufactured home kennel not with polystyrene foam, but with polyurethane foam. This material, like an expensive orthopedic mattress, remembers the contours of the dog’s body. Agree, it is much more comfortable to sleep on such a “smart” surface; your dog will certainly appreciate it.
Polyurethane foam
It is better to make the walls of the house as thick as possible, while all their corners should be hidden under fabric, since dogs, especially at a young age, love to chew all materials that are suitable for the walls of the house:
- Styrofoam;
- hard sponges;
- cardboard;
- thin plywood, etc.
Foam panels are perfect for an apartment dog house
Not only will the product completely lose its appearance when the house is torn apart, but your pet also gets the opportunity to:
- accumulate harmful materials;
- get hurt on sharp corners.
When calculating the size of your puppy's future home, think about the fact that the baby will soon become an adult. If the pet does not belong to the toy and dwarf varieties of any breed, it is necessary to make the home much larger in size than the dog is now, that is, such that, for example, your mature St. Bernard can not only lie down comfortably inside the house, but also:
- stand up to your full height;
- turn around its axis.
The house must be the right size for the dog
If you want your dog to be comfortable inside the house for a long time, strictly prohibit children from playing with the house. Firstly, because it is the property of your pet, and secondly, while the child sits on the house, the dog may be inside, as a result the animal can:
- get injured;
- suffocate, etc.
A fashionable two-story dog house, made on two floors, can be assembled by anyone.
You cannot turn the dog house inside the apartment towards the wall or other obstacle that will prevent the animal from freely leaving the house, since in this case the pet may:
- suffocate due to lack of air;
- overheat.
Now that you know the basic rules associated with dog houses, it's time to pay close attention to the step-by-step instructions for making houses for our beloved four-legged family members.
Instruction No. 1. Shelter for a dog
The first version of the house that we will make looks like a real shelter. It has both disadvantages and advantages:
- The advantages include unambiguous convenience for the animal and space, as well as simply incredible ease of manufacture;
- The disadvantages include the bulkiness of the design.
A polystyrene foam house can be decorated at your discretion
However, the bulkiness of the booth is a parameter that will also change depending on the size of its immediate occupant.
Step #1. We measure the size of the dog and prepare the necessary materials
As you know, first of all, in order to build something, we need to prepare the necessary materials. To complete a workpiece task, you need to know the size of the parts required.
So, first of all, you need to measure the following parameters of the dog:
- height;
- length;
- width.
It is necessary to measure the dog’s parameters in order to prepare a house that is suitable for it in size.
As we remember, the booth must be large enough to:
- the dog could turn 360°C in it;
- the animal stood inside at full height and did not experience a feeling of cramping;
- so that the pet can lounge comfortably on the floor or mattress of the house.
After you take the measurements, you will need to go to a hardware store or a store that sells various packaging materials and purchase 6 (or better yet 7, in reserve) mats from:
- hard spongy material;
- polystyrene foam
You can make a real palace out of polystyrene foam
Please note: those mats that will be used as floors and ceilings must match the length of the animal in diameter and even exceed it. The remaining details must correspond to the height of the pet from the pads of the front paws to the head, and it is also better to exceed this parameter.
After you purchase foam or sponge mats, you will need to buy or assemble the accessories you have for making the house, which we also need:
- a simple pencil to make markings;
- tape measure;
- synthetic padding mats, 6 pieces;
- pillowcases, preferably made of microfiber, but cotton can also be used;
- thin wire;
- oilcloth or other waterproof material;
- construction stapler;
- scissors;
- Velcro for fabric;
- needle;
- threads to match the color of microfiber or cotton (main fabric).
To make a house you will need tools
Step #2. Preparing the mats for assembly
Pay attention to the mats you bought in the store, made of hard sponge or foam. As we have already said, the parameters of these mats must match the parameters of your dog. We have 5 of them in total, of which:
- 2 will go to the floor and ceiling;
- 4 will become the walls of the house.
It is these mats that we will first begin to prepare so that they become the walls of a reliable fortress for your pet. To do this, you need to take microfiber pillowcases, which you can either buy or make yourself, and insert these panels inside them. Before packing the panels in a pillowcase, it is necessary to attach a padding polyester fabric, the same size as foam plastic or sponge, to the inside of each of the future walls using a construction stapler.
Microfiber is the best material for creating a frame
You need to repeat the desired action 4 times, instead of 6. We pack the remaining two mats as follows.
We take one of the foam or sponge panels and, using a construction stapler, apply the previously selected waterproof material on it, which can serve as:
- simple oilcloth;
- old oilcloth tablecloth;
- diaper for babies (its reverse side);
- old (most importantly intact) yoga mat, etc.
Wrap the floor panel with material, and from the bottom side, which will touch the floor of your apartment, secure it with a construction stapler.
A construction stapler will be useful for fastening fabrics and house materials
Please note: it is very important that the fastening is made on the side that will not touch your dog. This will help:
- extend the service life of the booth element;
- protect the dog from scratches if one of the paper clips accidentally falls out.
Why do we need the oilcloth that we wrap around the floor? The fact is that this “obstacle” is designed to protect not only the panel of the house itself, but also the floor of your apartment from getting wet. Imagine you left home, your puppy peed in the kennel, urine leaked and got on the laminate flooring. Not only will the flooring rise up in the evening, but it will also absorb the smell of the dog’s yellow biological fluid. Provided that you have oilcloth in the booth, you will be able to protect both the floor and the part of the house, and all that will be left is to change the pillowcase or wash it and return it to its place.
The last 6th panel will become the wall in which the entrance to the booth will be cut. Before wrapping it in a pillowcase, you need to do the following:
- cut an arched hole in the wall, which will later serve as the entrance to the makeshift booth;
- smooth the edges of this hole with scissors, cutting off excess parts.
You can not only make microfiber pillowcases yourself, but also purchase them in a store, provided that the walls of your dog house match them in size
Once the entrance is ready, you can put on the pillowcase. Provided you are a good sewer, or are lucky enough to buy a finished product that exactly fits the contours of the entrance you made, you don't need to do anything. If you have a solid pillowcase, do the following:
- along the entrance office, cut out the extra piece, leaving about 3 extra centimeters of fabric;
- remove the pillowcase and sew the resulting tears on the inside;
- put the pillowcase back on the wall.
Voila - and the wall for the entrance to the booth is also ready.
Please note: when we told you what materials you might need to make a house for your dog, we mentioned that it is best to give preference to microfiber. And that's why:
- dust mites, fleas, and other parasites cannot live in this material;
- microfiber gets dirty much less and is easier to wash even without a washing machine.
Dust mite
As soon as the pillowcases are placed on the mats, it is necessary to sew Velcro on the edges of the fabric that are in contact with each other. To do this, you need to combine the mentioned edges and mark on them with a pencil the points where the Velcro will be located. This should be done based on the following rule: Velcro for every 15 centimeters of material. The Velcro should be small in size so that there are gaps with “bare” foam between the fabric. We need to fasten these gaps together, connecting the booth. To do this, we pierce each hole in the remaining material with wire prepared ahead of time, attach it to the hole in another mat, and then pull it together.
Velcro for fabric - the easiest solution for fastening pillowcases
Please pay attention to a very important fact: under no circumstances should you try to sew a pillowcase to polystyrene foam or a sponge. The fact is that later it will be very difficult to tear the fabric away from the house without removing its walls. But you will have to do this, because sooner or later the microfiber will get dirty and become unusable.
By connecting the mats, you will get an almost finished booth. All that remains is to add a little extra to the entrance to the house by curtaining it with some fabric:
- or the same one that was used to make pillowcases;
- some other one that matches the color of the upholstery of the frame.
The entrance to the dog's kennel can be equipped with a fabric curtain or a special silicone part can be purchased.
It is necessary to secure the curtain at the entrance so that the animal is protected from drafts walking around the apartment, as well as from the annoying glances of people, from which the dog, no matter how strange it may seem to you, should also rest. You can secure the curtain using Velcro, as well as pins that fit freely into the hard sponge and foam rubber. Now it's a small matter, all you need is:
- check the stability of the booth;
- invite your dog inside the new house to try it out.
Interesting tip: a pet who is unsure of himself may not want to try out the kennel. You can stimulate his interest by placing a toy inside the house. This way, you will show your pet that a completely safe space awaits him inside.
The animal may refuse to try out a new home
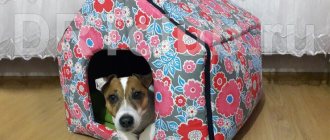
Instruction No. 2. Dog house-tent
Provided that you would like to make a simpler version of housing for your dog, you need to make an apartment tent for him, which will not be hot and comfortable. This house is best suited for small and medium breed dogs. How to make it, look at the step-by-step instructions.
House - a tent can also be made for large breeds
Step #1. We collect the necessary materials
Before you start building a new home for your dog, you need to collect all the materials required for this. In this case, we need this:
- two hangers made of wire;
- an oversized T-shirt, preferably one that you no longer plan to use;
- small size and medium thickness pad;
- cardboard;
- wire that you will use to fasten the parts together
After all the materials have been collected, we need to start building our house.
A wire hanger is what you need to make a tent house
Step #2. We create the frame of the future home
First of all, we must create the frame of a house in which our beloved dog will live. To do this, take pre-prepared hangers and straighten the wire from which they are made. After the wire is straightened, you need to bend it like a wide arch and connect it crosswise. At the junction, tie the former hangers together using thinner wire. The resulting wire frame must be attached to the floor, the role of which will be performed by:
- cardboard;
- pillow.
The frame of the future house is assembled from hangers, wire, pillows and cardboard
As you understand, the size of the cardboard and the pillow must correspond to the space designated by the frame of hangers. Provided that everything matches, sequentially fasten the cardboard and frame together with thin wire, and then place the pad on top.
Please note: the following two nuances are very important, and the safety of your dog depends on them. So:
- the pillow should be the same size as cardboard;
- the ends of the wire should be directed downwards;
- The thickness of the cardboard should be substantial so that it does not fall apart, exposing the sharp edges of the wire.
It is very important to correctly attach the wire frame to the cardboard
Step #3. Pulling on a T-shirt
Now that almost everything is ready, you need to do the following: pull the T-shirt onto the frame. It's very easy to do. The free edges behind the tent are pulled into a knot, while the throat, on the contrary, expands from tension, and thus turns into a comfortable entrance. Hurray, our pet house is completely ready, you can let him inside!
The next step is to stretch the T-shirt and knit the sleeves
Interesting fact: a similar tent can also be made for large breed dogs by simply fastening several hangers together. In this case, you will have to fasten them with wire, and wrap the ends tightly so that the animal cannot get hurt.
Instruction No. 3. Suitcase booth
You will be surprised, but a stylish and comfortable dog house can be made even from a suitcase that has broken down and will no longer be used by you. Let's consider which side to approach the suitcase from so that it looks like a house for an animal.
Suitcase booth
Step #1. We collect the necessary materials
So, in this tutorial, we'll start where we always start - with the materials we'll need to make this stylish stock. Here is their list:
- old suitcase;
- soft pillow;
- faux fur or other soft fleecy fabric;
- oilcloth;
- Tension resistant fabric;
- round sticks or thin timber;
- construction stapler or small nails.
Old suitcases are perfect for decorating a dog’s house; almost every family still has old suitcases on the mezzanine
Now that we are armed with the necessary tools, we begin further work.
Step #2. We create comfort
Inspect your suitcase. A hard bottom, a bulky lid - all this faintly resembles a house. Therefore, the first task for us is to create a certain comfort. To do this, we will need fleecy fabric, purchased ahead of time at a textile store, as well as a pillow and oilcloth.
First, we put oilcloth on the bottom of the suitcase and secure it with a construction stapler. This measure will allow you to avoid getting your suitcase wet and staining it with urine if, for example, your puppy or older dog cannot run to the street and defecates right in the house. After the oilcloth is laid and secured, you can apply the pillow. It is important that it fits tightly into the suitcase, without leaving gaps around its perimeter, since these gaps accumulate:
- food crumbs;
- dog's fur;
- dust, etc.
Fabric with pile is the best option for upholstering the inside of a suitcase
Vacuuming them is usually very difficult, and your pet doesn’t need such unsanitary conditions.
Now let's work on the lid of the suitcase, which will play the role of one of the walls of the house. You need to upholster it from the inside with soft fabric, purchased ahead of time in the store. Upholstery is done either with a stapler, or you can use small nails or glue. If the choice falls on nails, make sure that their ends do not stick out on the opposite side of the house, otherwise the dog may be seriously injured by them.
Step #3. We make the frame of the second wall and attach the fabric
The frame of the second wall is made as follows:
- the prepared bars are nailed or glued to the outside of the suitcase, at the level of its back;
- the upper ends of the bars are laid over another bar in a horizontal position, the structure is secured with nails, the ends of which do not stick out.
You can add fabric to the suitcase lid to serve as a canopy.
After you have made the frame, you can stretch the fabric of your choice:
- one end of it is attached with a stapler or glue to the edge of the suitcase lid;
- the middle of the cut is glued to a horizontal wooden crossbar;
- the end is fixed at the level of the base of the bars at the bottom of the suitcase.
It turns out that inside the suitcase your pet is, as it were, under a canopy, which has access from two sides. Such ventilation will allow the animal to feel great inside the house in the warm season, and winter drafts will be leveled by adding a warm blanket inside.
You can also make a house from an ordinary bag
Great! Another dog house, this time made from an old suitcase, is ready!
Instruction No. 4. Pet bed made from an old sweater
Owners of small (and even large) apartment dogs do not always have enough living space to fill it with kennels and houses. However, there is always a place for a cozy lounger, and it will be simply great if such a lounger is made from the cheapest materials. Today we will tell you exactly how to make one.
A dog bed can be made from cotton wool and a regular old sweater.
Step #1. Collecting materials
So, to make a royal bed for our dog, we will need:
- old sweater;
- cotton wool;
- a pillow, the size of which depends on the size of the dog;
- two terry towels;
- needle;
- threads
An old sweater can find a second life as a pet bed
Now that we have stocked up on the necessary “ingredients”, let’s start manufacturing.
Step #2. Making the frame of the sun lounger
Terry towels will act as a frame for our lounger, from which we must make two bundles of the same size. To do this, roll the terry towels the same number of times and then roll them into a sausage. Provided that you do not have large towels, but only small ones, the sausages can be lined with the same sausages from old fabric, kitchen towels and other textile mass.
After we have two identical rolls, bend each of them slightly along the edges, giving the shape of an arc. Then, on each side, make several stitches with thread to:
- maintain the shape of the sausages;
- secure them, thereby protecting them from destruction.
The frame of this lounger is assembled from terry towels rolled into sausages
The blanks received from us now need to be inserted through the sleeves inside the sweater so that their edges meet in the place where the neck of this wardrobe item is located. By the way, it needs to be darned first. Before inserting the towels, if desired, they can also be fastened together.
Step #3. We complete the sunbed
So, the frame of our pet bed is ready. Only a few strokes left. First of all, you need to sew the edge of the towels along the bottom line of the sleeves several times with large stitches, thereby separating it from the “belly” of the sweater. Once you are done with this work, take the pillow and insert it inside the body of the sweater. The result is a soft bed on which the dog will rest. Sew the sweater from the bottom side also with a needle with large stitches so that the pillow does not fall out of the product. It is better to sew along the upper edge of the frills, so that there is somewhere to attach the sleeves in the future.
After the frame is ready, you need to insert a pillow into the body of the lounger, or fill it with cotton wool, holofiber, etc.
Now that we've finished with the bed, we need to finish the sides of the lounger. To do this, in the place where the towels end, you need to start stuffing them with cotton wool and placing this airy material inside tightly until there is simply no room left for the cotton wool. Once the stuffing is complete, sew up the sleeves and sew them to the body of the sweater along the near edge. If the length of the sleeves is not enough, you can use a sleeve made from:
- one more towel;
- another sweater;
- any fabric.
To make the product look beautiful, it is best to stitch the joints of the parts with woolen thread of a beautiful color. It can also cover small “technical” stitches. Provided that you love your pet very much and want to make him the most beautiful bed, these places can be stitched with a satin ribbon.
The finished product looks like this
Instruction No. 5. House for a dog from a cage
Owners of especially active dogs know that a crate is sometimes more a necessity than a whim. If your dog, when your family is away, likes to chew the sofa, slobber on your slippers, and break a couple of flower pots, you have to leave him locked up at home. By the way, the cage may not be such a gloomy refuge as you think. Especially if you first turn it into a house for an animal. We will tell you how to complete this task in this instruction.
To turn a cage into a house, you need to sew covers on it
Step #1. Collecting materials
Since the cage itself is already a wall frame, you only need to make a soft cover for it. To do this, you need to purchase materials according to the following list:
- 4 pieces of fabric of any color, the size of which should correspond to the size of each of the walls of the cage, in addition, you need to leave a centimeter on each side of the fabric, which will go to the seams;
- 1 piece of fabric, the size of which will be equal to the ceiling segment of the cage, plus leave a centimeter of fabric on each side for the seams;
- 5 pieces of fabric, which will be the inner part of the cover we are preparing, which will be similar in shape and size to the prepared outer sides of the cage;
- needle;
- threads to match the color of the fabric;
- several buttons;
- ribbon;
- ribbon
Cage covers should be made of colored fabric: if you want to increase the degree of fun in the house, and lovers of tranquility need to choose calm colors
Step #2. Sew the cover
Having assembled the cuts for the inside of the cover and for the outside, you need to sew them along the following sides:
- bottom;
- side.
This needs to be done on the inside, that is, the faded side. After stitching, turn them right side out through those parts of the cuts that have not yet been connected to each other. Next, patch the areas that have not yet been stitched.
Pay attention to the diagram below. It is along this line that you must continue sewing the cover. You need to stitch with braid those sides that are marked with pink stripes.
Scheme for stitching covers with braid
After the stitching with braid has taken place, it is necessary to place the walls on the sides of the ceiling of the future cover, and then sew them together, while hiding those sides that were not stitched.
Then you need to sew three walls along the sides with each other, while sewing the braid directly to another braid. The fourth wall of our cover should remain unsewn, since its place is at the entrance to the future house.
If you need to fasten the dangling “entrance” part of the cover, it is best to trim it with buttons and equip the sides with loops.
Birds
If you want your home to be filled with sonorous chirping, get a bird. They are easy to keep, you can leave them alone for a long time, and they do not smell. The only disadvantages include the litter that spills out of the cage and the noise created by some species. If you want to sleep off on your day off, it is better to cover the cage with thick fabric: in the dark the birds behave quietly. Let's look at the most popular birds kept at home.
- Parrots are one of the brightest and most beautiful birds. Most often, budgies of green or blue colors are kept in apartments. But there are many other interesting species. For example, Grays, cockatoos, cockatiels, lovebirds. A parrot can be taught to speak; many people buy them for this very purpose. But in order for your pet to speak, daily training will be required.
- Canaries are nimble and agile birds. They can be trained to be handled. If you want to listen to bird singing, it is better to buy a male, female canaries do not sing.
- Finches are bright and cheerful birds. Some species have very beautiful plumage. The most common are zebra finches - ash-colored birds with expressive red cheeks.
The cage should not be placed near a window; a draft may cause your feathered pet to catch a cold. Birds are quite fragile creatures and are easily injured - this should be remembered when you pick them up.
You can also keep wild bird species at home. The starling, bullfinch, siskin and nightingale can live well in captivity. They get used to the owner and communicate with him with pleasure. Some people have ducks; this bird does not sit in a cage, but moves freely throughout the apartment. She can be tamed and is easy to train. And to prevent the bird from shitting around the house, they put a diaper on it.
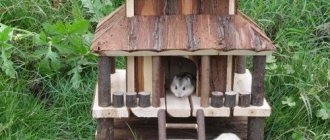
Rodents
For many residents of big cities, rodents are an excellent solution for a pet. Grozny are cute, soft and non-aggressive animals that do not require special care. And the choice of such animals is great, you can choose an animal according to your spirit.
Chinchillas are gentle and very beautiful, they are very pleasant to pet and cuddle. Rabbits are cute fluffy creatures that love to chew on everything in their path (especially cords). Hamsters are funny and active, you can watch them for hours as they run in a wheel and carry food from place to place. Guinea pigs are very similar to hamsters, but unlike them they make funny sounds, are very unpretentious and do not require special care.
You have learned about the most popular animals for apartments. Of course, choosing an animal is a purely individual matter, and when giving preference to one or another animal, you will be guided by your individual characteristics and capabilities. You should choose an animal according to your spirit, then you will live in perfect harmony, and you will have harmony and mutual understanding.
return to section
Choosing a collar is not an easy matter
A dog collar is a very important and useful accessory. Absolutely every dog, regardless of its breed, size and habits, needs such equipment as a collar. Properly chosen ammunition, which is also tailored to your pet, is the key to a reliable protector and assistant in various situations.
Purpose, characteristics and features of GPS trackers for pets.
Some tips on how to choose a dog house
A dog bed house is a feeling of softness, comfort and complete protection for your pet. By purchasing a house, your dog will stop leaving hair on your sofas and armchairs, and will also not pick up any diseases associated with drafts.
This article will help you understand the variety of dog foods and choose the best option.
Dog walking service
Often, due to being busy at work or for some other reasons, dog owners cannot pay enough attention to their pets. Along with this, the question arises of who will walk the family friend. Now almost every second resident of St. Petersburg has a dog, or even several. Busyness or any force majeure situations do not provide the opportunity to fully spend time with your beloved animal. This is why our dog walking service exists.
For small breeds with your own hands
For small dogs of small breeds (Chihuahua, Dachshund, Maltese, Pomeranian and other breeds), you can use cardboard boxes, fabrics and foam rubber.
Small dogs for home
From cardboard or plywood
Original and exclusive
Houses using geodesic dome technology have become widely known on the Internet. Such houses are made of slats and fabric or cardboard. Such houses are used both for children and for pets, including dogs.
The advantage of such home kennels is that they are suitable for small dogs and are easy to make with your own hands. Plus, you can involve your child in doing them!
So, instructions on how to make a booth for an apartment out of cardboard with your own hands:
Step 1. Constructing patterns and cutting out parts. For this you will need:
- Cardboard.
- Scissors/construction (stationery) knife.
- Ruler.
- Pencil pen
Let us conventionally designate a triangle with red edges as “Triangle A” and with blue edges as “Triangle B”. You will also need squares for the bottom of your structure or rectangles. You can choose the sizes of the triangles yourself based on the proportions: use small triangles for a smoother dome shape and large ones for a rougher one; the side of a square or rectangle is slightly smaller than the height of the entrance.
From the edge of the triangles and squares, a 2-5 cm margin is counted, which will later serve as a place for fastening the parts.
Step 2. The triangles are fixed with hot glue or Moment glue along the released strips. You should start working from top to bottom. Form a pentagon from five triangles, then attach the remaining parts to each triangle using the diagram. For a beautiful entrance, you can remove one of the triangles of the last tier. The bottom is glued together from squares, leaving space for the entrance.
Step 3. Proceed with registration. The shelter can be painted using spray paint.
REFERENCE ! This work can be supplemented with a wooden plywood floor, a personalized wooden sign above the entrance or any other decorative elements. The house is painted or covered, and a blanket or sleeping place is placed inside.
Cheap
There is also a simple way to make a dog house with your own hands. To do this, you will need a box of such size that your pet can comfortably turn around inside and sit upright.
How to make it out of the box:
We cut the top part of the box and glue it together as follows:
Use extra sheets of cardboard to create a roof. Cut out the doorway completely.
The final part is decoration (painting, possibly adding curtains for the entrance, etc.). We present to your attention one of the options for such a house:
The work is made of cardboard, covered on both sides with fabric and decorated with bows, ruffles and a decorative teddy bear. Making a booth out of cardboard is quite simple. This option is affordable and allows you to fully express yourself when creating.
Soft foam
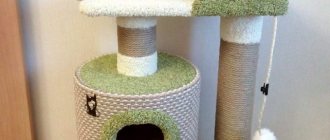
The most beautiful and warm options for houses for small dogs are fabric dog beds made of foam rubber. Experienced needlewomen make patterns for houses of the most diverse and amazing shapes.
To create such a house you will need:
- Textile . The best choice would be linen, chintz, velor, fleece, faux fur jeans. When synthetic fabrics come into contact with fur, they will become electrified and give an electric shock to the dog. Your pet will not live in such a house.
- Foam rubber, synthetic winterizer, satin or down.
- Scissors.
- Sewing machine (can be done manually, but the quality of work will be significantly lower).
How to make a house from foam rubber:
- The first stage of your work will be choosing the shape and pattern of the bed-house, cutting it out.
- The “Foam House” pattern is quite simple and does not require any special drawing skills. Based on the diagram provided above, cut out the parts: 2 pieces for each side of the house and roof, and one piece of foam rubber. For each fabric part, leave allowances equal to 1.5-2 cm on each side; do not allow allowances for foam rubber.
- The second stage - how to sew a house from foam rubber? The fabric parts of the walls are folded with the front side inward and stitched on three sides, leaving a pocket for foam rubber (it is more convenient to leave the lower part unstitched). The base and roof are stitched in the same way.
- In the third stage , distribute the foam over the corresponding parts and sew along the front side. Fold and sew the walls of the house together (the seams go inside the house). We carry out a similar procedure with the lid base.
- The final stage is decoration . You can sew ruffles or lace along the edge of the roof, make an embroidered nameplate above the entrance, or anything of your choice. Here's a glamorous and beautiful option you can make:
You can use another pattern. In the diagram, the unshaded parts indicate the primary building, from which the roof and bottom will be formed during the work.
How to sew:
According to the principle of a “house” pattern, the parts are cut out and sheathed on both sides with material. In the place where the roof and wall are sewn, the seams can be hidden under lace, ribbon or braid. The finished work looks like this.
Both options in one photo. The pink house is made according to the first scheme. The slight differences are the rounded front and rear walls, and the rounded roof due to a different sewing method.
Beds
Handicrafts also did not ignore the production of beds: they make beds from fabric, from tires, mixed compositions (fabric + wood). The most economical and easiest way to create a bed is to alter an old sweater or jacket: imagine, you don’t even need a pattern for a bed!
For work you will need:
- Sweater or textile jacket.
- Pencil/felt-tip pen.
- Filling, padding polyester or foam rubber.
- Scissors.
- Needle and thread/sewing machine.
Lay out the sweater on a work surface. The neckline is sewn up, a stitch is made from one sleeve to the other at the chest level of the jacket. Fill the future side with foam rubber through the sleeve and place one sleeve into the other.
The sleeves are then sewn together. At this stage, you can adjust the shape of the side: make it rectangular (stitch the corners) or round. The bottom is stuffed soft and also sewn; for a rounded shape, the bottom is folded and hemmed to the shape of the side. The final touch is to sew the sleeves to the base.
Comfort and beauty cheap: a dog house on the street
Lounger-pillow with ties
They look like designer ones and will be very suitable for decorative dogs:
Step 1. Constructing a pattern.
To do this, based on the parameters of the dog, draw a rectangle - the base. From the base, make allowances of 1-1.5 cm on all sides for lifting. From each edge, draw more rectangles of the desired height with allowances of 2.5-3 cm upwards. This way you will get a pattern that vaguely resembles a cross. Cut an opening from the side that will be the front.
Step 2. Cut out 2 pieces from the fabric according to the pattern.
Step 3 . Sew the pieces along the top sides of the sides. Turn the product out through the side holes.
Step 4. Stuff the lounger with padding polyester and carefully sew from one side through the center to the opposite. Thus, by sewing all the edges in the center you will get a pillow.
Step 5: Add ribbon or lace ties. Add decorative elements (buttons, bows, embroidery, etc.). You can complement the lounger with a canopy or pillows.
The best enclosures for dogs and puppies in an apartment: how to make them yourself cheaply and with high quality?
Little cute animals
If you want less hassle, keep the animal in a cage. He doesn’t need to be toilet trained, walked, or cleaned up all over the apartment. It is enough to choose a suitable house, pour sawdust, feed the animal and keep its home clean. Let us describe in more detail the animals kept in cages.
Hamsters are funny rodents. They love to run in a wheel, sleep curled up in a ball and eat, funny stuffing their cheeks with food. There are many varieties of these rodents, differing in color and size. The most popular are Angoras with long hair and Syrians, which can be golden, black, gray and white.
They put a house, a food bowl, a drinking bowl and a tray in it. They also install a small container with fine sand, with which the animals clean their coats. It’s not difficult to care for your pet’s house: you need to throw out leftover food, refresh the water and change the sawdust every 3-4 days.
Building with a pitched roof
To protect the animal from the cold, it is recommended to insulate the house, directly during the assembly of the structure.
Stage 1. Assembling the bottom box
4x4 cm bars are cut based on the parameters of the bottom, laid out on a flat surface, and secured with self-tapping screws into a rectangle. For a large dog, the frame is reinforced with a wooden plank, and then one side with boards.
Stage 2. Floor insulation
The upholstered frame is placed so that the bars are on top. The inner part is lined with glassine, fixed with staples using a stapler, a piece of foam is cut with scissors based on the dimensions, and laid out between the wooden parts.
At the top, the synthetic material is covered with an additional layer of rolled glassine and the finishing floor is nailed.
Stage 3. Frame assembly
A 10 x 10 cm board is sawn into 4 pieces: two at a distance equal to the height of the building; the other pair is 8 - 10 cm larger. The elements are fixed vertically in each corner. Long support posts are placed in the front part, and shorter ones are placed in the rear. This design creates a slope of the roof.
All bars are aligned using a measuring level and secured with self-tapping screws. Additional vertical boards are nailed in the center of the walls and two small bars on the sides of the entrance hole.
Stage 4. Wall covering
The assembled frame is trimmed with boards on the outside, and the interior space is insulated. The walls of the building are covered with rolled glassine, fixed with a stapler, and then they begin to fill the voids between the boards with foam plastic or mineral wool.
After this, an additional layer of film is nailed down, and plywood is placed on top. The upholstery is fastened flush with nails so that the animal does not get hurt.
Stage 5. Making the roof
First, a frame is mounted from wooden blocks 4x4 cm, equal to the perimeter area of the booth. They cut out the same plywood sheet and nail it to the frame. Styrofoam is placed between the boards as tightly as possible, film is laid, and secured over the entire area with a stapler.
A plywood sheet is placed on top, making a protrusion from the side walls on the back and front sides. The manufactured eaves will protect the kennel from rain. Using door hinges, the finished roof is fixed to the building, and a sheet of roofing felt is laid.
Stage 6. Finishing
Paint the wooden booth with an antiseptic solution, then dry it for two days. They line the bottom of the structure with a piece of roofing felt, bending the sections 3-5 cm to the surface of the walls, attach two 10x5 cm boards to it. Turn the kennel over, trim the entrance opening and the ends with platbands.
Stage 7. Installation
When choosing a site for a kennel, it is important to provide your four-legged friend with a wide view of the area. The site should be in a dry, shady area with sufficient natural light. This will ensure a comfortable stay for the dog.
Recommendation: “The owner should take care to maintain a distance between the doghouse and buildings where other breeds of animals are kept. Otherwise, their waste will end up in the dog’s territory, causing him aggression and discomfort.”
Dogs
Dogs are the second most popular after cats. For an apartment, the ideal option would be a representative of a small, or even better, dwarf breed. After all, large passes will be very uncomfortable and cramped in the open spaces of the apartment.
When choosing a dog, you should fully rely on your character qualities. After all, a dog can be a friend and a companion, a protector and a guard.
The biggest disadvantage of dogs is the need for daily walking, sometimes several times a day. Another disadvantage for both dogs and cats may be a possible allergy to wool in household members. Yes, and some representatives of the dog world are quite expensive, although you can always use the lending service to make your dream come true. Yes, and you also need to seriously take care of raising and training a dog, otherwise it can cause you a lot of trouble.
What's better than a house?
Usually dog owners have to make their choice between beds and houses. What is better than the first option and why should the second be chosen only for the most picky pets? Any animal taller than 25 cm at the withers will feel quite uncomfortable in a confined space. If the pet is also physically active, the owner will regularly find its refuge in the most unexpected places of the house or apartment.
The difficulty of hygienic care is another reason for refusing to buy a house. If the bed is easy to disinfect, treat with steam, or simply change the cover on it, then rigidly fixed upholstery will not allow such liberties. As a result, over time the home will emit a rather unpleasant odor. It is also not very beneficial for the animal's fur to be in a tight space - it can be wiped off in areas in contact with the walls.
This is why owners of show animals prefer bedding and beds without a roof.
Selection of material and insulation
In most cases, a doghouse is made of wood, since it remains cool in the summer heat and warm in the winter cold. Especially if you fit the wooden boards closely without gaps or cracks. In addition, wood is an absolutely harmless material. A high-quality dog house made from timber will last at least 6-7 years without losing its appearance.
Brick and concrete booths are far from the best option. They, of course, conduct heat well, but they are unbearably hot in summer and cold in winter. And most often, animals prefer to sleep in the open air rather than in such a kennel.
To save money, you can choose a kennel made of plywood and fiberboard. But since plywood is thinner than wood, building a warm dog house will require more than one layer of material.
For insulation, foam plastic, mineral wool or other suitable material is usually used. The main thing is not to overdo it when insulating with polystyrene foam, since it is airtight. Due to the lack of fresh air, the dog will not want to be in such a kennel, especially if you curtain the hole. In addition, do not forget that the floor and roof of the booth must also be insulated. But even here the insulation layer should not be too large. To prevent wind from blowing into the kennel in winter, thick fabric cut into wide strips is nailed over the hole.
An example of a booth with an attached “dining table” Source zen.yandex.ru
Design options for apartments
Home enclosures are produced in various shapes:
- rectangular;
- square;
- polygonal;
- round.
A rectangular enclosure allows you to effectively use free space; the presence of spacious apartments makes it possible to install multi-sectional polygonal-shaped fencing.
The following type of enclosure can be installed in the apartment:
- metal;
- plastic;
- wood;
- fabric.
They can be purchased at a pet store or made with your own hands from scrap materials. The choice of material depends on the size of the dog and operating conditions. For larger breeds, metal structures are installed; for small dogs, there are practically no restrictions. If the enclosure will be permanently located in the apartment, the characteristics of the material and assembly features are practically unimportant. If it is necessary to periodically transport the enclosure to the dacha, the choice is made in favor of materials that are resistant to external influences
It is important to take into account the ease of installation and dismantling of the structure, the strength of fasteners
The tent-shaped enclosure consists of aluminum tubes supplemented with polyester. This design is suitable for small breed dogs (for example, a Chihuahua or Yorkie). The main advantages of a tent enclosure:
- ease of transportation for trips out of town or to exhibitions;
- a light weight;
- low cost;
- ease of assembly and disassembly.
Negative points are the regular need for washing and fragility under conditions of intensive use. One of the practical models of an awning enclosure for a dog is shown in the photo:
For an extremely active dog, it is better to purchase an enclosure with a tray, otherwise the walls alone will not create a reliable barrier for traveling around the apartment.
Working with different materials
Translating a building idea into a real model often faces the problem of choosing a material and technology for working with it. In a home workshop, it is easiest to work with familiar materials. The house project itself can be made in a variety of styles and techniques, from gluing plywood sheets to knitting or crocheting. However, there are some peculiarities when working with each type of material, be it fabric, foam rubber or plywood.
Creating housing from soft material
Plush house in the shape of a pyramid
A house for a dog the size of a Yorkshire terrier does not have to be made of wood or plywood; it can easily be sewn from scraps of durable fabric.
Note! For work, a pattern is first developed taking into account the size of the dog.
It is recommended to choose canvas or linen tarpaulin as the main material for work; the top can be decorated with another type of natural fabric. The frame of the house can be made of steel wire. To prevent the dog from being injured, the frame is first lined with foam rubber and only then with fabric.
The methods for working with fabric are the same as when sewing clothes:
- first the pattern is developed;
- Next, cutting is done taking into account seam allowances and overcasting;
- the main parts are sewn by hand;
- the main elements are sewn together using a sewing machine;
- the finished parts are put on a soft frame;
- At the final stage, the final seams are sutured manually.
When constructing a transforming kennel with an opening roof or a removable top, it is better to use a zipper as a connecting element. If you use Velcro, over time the wool will clog the plastic base and the connection will stop working.
Made from cardboard and plywood
Although working with cardboard or plywood seems much easier than working with wire, foam rubber and fabric, it is not always possible to make a beautiful house right away. In this case, you should start by developing a model, and then transfer the diagram onto a sheet of cardboard or plywood.
To connect parts of a plywood house, it is best to use wooden planks and screws, but for cardboard you can try using the papier-mâché technique. You can make a house for a Chihuahua with your own hands from cardboard, pasting it with several additional layers of paper, but it is better to make a house for a Spitz or Yorkie from plywood.
After assembling the main elements, it is recommended to clean the edges with sandpaper. If decoration will not be performed, cover with 1-2 layers of varnish. Plywood and cardboard make it possible not only to make the structure rigid, but also to cut out interesting external decorative elements, for example, platbands or a beautiful manhole portal.
Note! The plywood booth can also be collapsible; this option is made for moving to the dacha in the summer. It won't take up much space in the car trunk.
From the box
My home is my castle
Corrugated cardboard, used as containers for household appliances, is perfect for creating an inexpensive version of a dog house. Of course, without additional reinforcement and decoration, such a kennel will not last long, and it is unlikely that it will be possible to keep a dog in it on the street, but for the home, this is probably the most successful material.
Corrugated cardboard is easily cut with a stationery knife, it is simply joined using hot glue, and the structure can be strengthened using paper and regular PVA glue. Among dog owners, such a kennel is recommended for keeping small puppies, when it is too early to buy a large house, but raising a dog is simply necessary.
The construction of the booth is quite simple - a hole is cut out and a removable lid is made. A pillow or an old sweater is placed inside. To accustom a small puppy to his house, at this stage it is enough.
Interesting ideas
You can create something special and interesting from ordinary things. For example, turn an old suitcase into a kennel or decorate a house for a Yorkie in the style of a fairy-tale princess castle.
You can use old furniture. For example, a TV stand can become an ultra-modern apartment.
Tied kennel
General rules for positioning and caring for the dog's place
Determine the boundaries of your dog's behavior in advance. If the pet is not limited by strict rules and can climb onto sofas or lie on the threshold, then the owner can determine the location of the sleeping place independently. The general selection principles are as follows:
No draft.
Remoteness from batteries, air conditioners, audio systems and other climate and electrical appliances.
You should not place the place close to doors or the kitchen.
The area should be secluded, even if there are guests in the house.
Availability for cleaning.
It is necessary to equip an alternative option in case of washing or sanitizing the sunbed.
Some short-haired and "sofa" breeds prefer to occupy furniture, even if there is a comfortable place. During training, the only solution is to equip a personal lounger in each room.
The dog's skin constantly produces a protective secretion to lubricate the fur, so the bedding quickly becomes dirty. To maintain a neat appearance and general hygiene standards, the following rules must be observed. No less than:
Once a week – knock out dust and carry out wet cleaning.
Once every 4 weeks – wash the covers and treat them with anti-parasite spray.
Once every 6 months - wash the mattress and then dry it in the sun.
After infectious diseases or childbirth, the mattress must be replaced or dry cleaning services used.
Amphibians and reptiles
Those who love unusual exotic animals should pay attention to amphibians and reptiles. For them it is necessary to equip a terrarium or aquaterrarium, in which an environment close to natural conditions is recreated
For example, desert, rainforest or semi-aquatic setting. We present a complete list of the most unpretentious inhabitants of the terrarium.
Achatina are large snails that can grow up to 20–30 cm. They do not require special attention and are very easy to care for. As a house for them, choose a container with a lid, the bottom of which is covered with a thick layer of peat substrate.
For example, a gecko is fed spiders, cockroaches, flies, and a snake is fed mice and frogs. Feeding snakes is not a process for the faint of heart, so it is better to avoid keeping this reptile for those who are too sensitive to all living beings.
Dog beds: how to choose, where to place and how to train
Any dog must certainly have its own place and be accustomed to it from the first days of its stay in the house. Let the puppy - within reason :) - determine it himself. And after that, make this place as comfortable as possible with the help of a comfortable dog bed, bedding, sofa or a special dog “house”.
In a safe haven, your pet will have the opportunity to rest and hide from the importunity of its loving owners) The number of zeros on the price tag of the bed, its exclusivity and compatibility with the interior are factors of little importance for the dog. The location should be chosen primarily taking into account her size, breed and individual preferences. The correct location of the place and the right bed are a prerequisite for the psychological comfort of your pet: a dog that has its own cozy corner will be able to feel confident, protected and will go to its place at the first request of the owner (and this is necessary if you want to have a well-mannered dog). A dog that is not accustomed to its place has every chance of very soon turning into a nervous and sometimes uncontrollable “rod” that will disturb the owners and bother the guests.
Where is the best place to install a kennel?
A house for a pet in a city apartment or house is usually installed in a dry and warm place so that it does not interfere with free passage. If this is a studio or a large living room, it is not recommended to place the kennel near the bed or sofa; it is better to give him a place opposite.
If the kennel has a double bottom and is insulated from the inside, then in the warm season it can be placed on a balcony or loggia. Well, if the family moved to the country, then the house can be temporarily placed on the veranda or terrace.
A few tips for maintaining your house
As already mentioned, it is recommended to make the cladding elements removable. It is best if the covering is made in the form of a cover that can be easily removed and washed.
When developing a booth project, it is recommended to make the roof removable in order to have quick access to the interior for cleaning. If you plan to keep your dog outside all year round, you should consider installing a heating element under the bottom to warm the kennel in cold weather.
Where to place it?
When placing your home, consider the following points:
- the structure should be located in a quiet and impenetrable place so that the animal can rest peacefully in it; in small apartments you can place the house under the table, where it will not disturb anyone;
- the place for the house should not be in a draft, nor near the entrance or balcony door; the best option would be to install the structure on the wall opposite the window;
- if the pet is a representative of a long-haired breed, then placing its home near heating radiators is prohibited; the animal will be hot next to a hot radiator, which is why it may develop an acute aversion to the new home;
- if the floor in the apartment is too cold, then it is recommended to use a stand to install the house, which will ensure the creation of an air gap between the bottom and the floor;
- the entrance to the booth should not be blocked by furniture or other objects;
- you need to make sure that the location of the booth does not overlap with the play area of small children, otherwise the poor dog will have no peace.
Building a brick booth
The brick booth is distinguished by its strength and durability. This kennel is suitable for a large dog. The materials for building such a booth can be cinder blocks, bricks and foam blocks. Stages of building a brick kennel:
- First you need to clear and level the area for the booth. Then they dig a trench under the foundation of approximately 250x250 mm, which is filled with concrete and left for several days.
- When laying out walls, you must carefully monitor the level and observance of right angles in the structure. For the manhole, the required number of bricks are passed along the width. When the masonry reaches the height of the hole, a wooden beam must be laid across it. They continue to lay bricks on top of it all the way through.
- To insulate the inside of such a booth, its walls and floor must be lined with wood.
- A wooden floor is installed on the roof and a slate roof is installed on it.