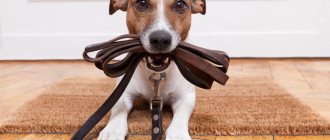
A dog is not a toy. She needs to be constantly looked after: fed and walked, washed and scratched. And she also needs to provide leisure time, otherwise the animal will be sad and because of this will begin to spoil everything in the apartment. And she needs communication with a person in a playful way like air. Therefore, every dog owner constantly buys a variety of toys for his pet. They can be fabric or rubber, simple or complex... But a quality product is always expensive. This article will help you save money wasted on toys for four-legged animals. We'll tell you how to make toys for dogs with your own hands.
DIY dog toys
Physical and mental activity of a dog is the key to a healthy psyche
A study by animal psychologist Anders Hallgren showed that about 50% of dogs rest for 20 hours a day, and 80% of the subjects had various behavioral problems. The main reason for such a long rest is lack of activities. Most owners work too much and often simply do not know what to do with their dog in the apartment. The other extreme is overly active owners. They run with the dog in the morning, go on long hikes and are sure that their four-legged friend is happy if every day, upon returning home, he collapses from fatigue. But this is also fraught with stress.
Further study of stress caused by over- or under-exertion led Hallgren to the theory of mental motivation. He proposed four classes of exercises and games that would provide the necessary stimulation to the brain and avoid the stress of boredom at home:
- “Nose work”: search activities and games;
- Educational games;
- Movement coordination exercises;
- Trick training.
- Educational games are used to rehabilitate aggressive dogs, combat boredom, and just for fun.
Training or play?
If you're serious about training, remember: most commands can be easily learned through gameplay. For example, playing with a ball will help your pet learn the “Sit” command faster. Yes, don’t be surprised: even between an active game and a command calling for calm, you can find a connection.
You just need to understand that the animal is keen and closely follows your every gesture. Just raise your hand with the ball as high as possible above the dog’s head, and you will be convinced: your pet will sit up on its own, just so as not to lose sight of the treasured toy. All you have to do is repeat the trick several times, giving the desired command until your pet masters it. However, in game-based learning methods, it is very important to draw a line between command and entertainment. It’s one thing to run after a ball, another thing to bring it and give it to the owner.
Candy
Toys are as integral an attribute of a dog’s life as food and hygiene products. Unfortunately, no matter how high-quality the toy is, its service life is limited “thanks” to the activity and curiosity of the dog. Homemade accessories can be an excellent alternative to store-bought items. After all, in every home there are materials at hand that can serve as the basis for a new interesting toy.
Source
Gutter
To construct the toy, you will need a cardboard or plastic tube (the diameter depends on the size of the dog). Stepping back a little from the bottom edge, make a transverse cut across 1/3 of the pipe section and insert a cardboard rectangle into it. This will be a kind of damper. The finished “drainpipe” is fixed vertically on the wall. The treat is wrapped in a sheet of paper and thrown into the cylinder. It will not fall to the floor until the dog pulls the flap out with his teeth. The number of such obstacles is gradually increasing. Of course, first the pet is shown what to do.
Game for dogs “Gutter”
Tennis Ball Ideas
Ball with a surprise
Option 1 (for large dogs)
Using a knife, cut the tennis ball along the curved line marked on it.
Place some food into the cut.
The dog will have to work hard to get the food out of the ball.
Option 2 (for puppies)
Make a cross-shaped cut on the ball with a sharp knife.
Place the food into the cut.
Ball with a surprise
Bead
Make a hole in the tennis ball so that you can pull the braid through it. The free ends of the braid, pulled through a tennis ball, like through a bead, are folded together and secured with a strip of felt, forming a handle, as when making a Loop.
DIY toys made from jeans for dogs
What craftsmen don’t use to make objects for their four-legged amusement! Dog toys can even be made from old jeans. Let's see how to make a couple of the simplest options that pets will like. The first one is suitable for medium-sized dogs.
Step 1. You need to cut off the bottom of the trousers, retreating about 25 cm from the edge of the gacha.
The bottom of the jeans is cut off
Step 2. Next, you need to start folding the edge of the jeans, starting from the side where the cut was made. When folding, you need to form a denim ring.
The edge is rolled up
Need to form a denim ring
Step 3. You need to cut long strips of jeans, which you then need to start wrapping around the previously made ring.
The strip wraps around the ring
Step 4. You need to wrap two layers of jeans around the ring.
Need to wrap 2 layers of jeans
Step 5. The easiest way to hide the end of the denim strip inside the ring is to push it through with scissors.
The end of the strip is pushed inside the ring
Step 6. The ring is ready. It is made completely without threads and is safe for the dog. Suitable for games of tug and fetch.
Finished dog ring
You can also make a denim “bone” from old jeans. This also doesn't require anything other than scissors.
Step 1. You need to cut about 50 cm of fabric from the bottom of the denim gacha.
Need to cut about 50 cm
Step 2. The edges of the fabric need to be wrapped inside a piece of gacha.
The edges turn inward
Step 3. Inside the workpiece you need to put a piece of jeans folded in several layers.
A denim package fits inside
Step 4. You need to cut off the parts of the legs where the seam goes from the remaining jeans - you will get a kind of rope. They need to bandage the previously made workpiece so that the fabric previously placed inside is tied in the middle. You'll get candy.
The edges of the workpiece are tied. It turns out to be a kind of candy for dogs.
Step 5. The excess ends of the ties need to be cut off. The jeans candy for dogs is ready.
Trimming excess ends of ties Denim candy
Video - How to weave a rope?
Looking for a center
Take two pieces of rope. Fold them in half and find their middle. To make the toy long and comfortable to hold in your teeth, do not skimp on the rope. Take long pieces; the remainder can be cut off at any time.
When you have found the center of each of the segments, they must be placed in a cross on top of each other so that the centers coincide. Now you need to fasten the two ropes. You can use a clamp for this.
Place the crossed ropes on your fist with your thumb extended (as shown in the picture).
Wrap the first rope around your thumb and over the second rope, using your thumb to hold the first rope in place.
Wrap the second rope over the first and pass through the third rope, keeping your thumb in place.
Wrap the third rope over the second and pass through the next rope, using your thumb to hold the third rope in place.
Loop the fourth rope over the third and then insert the fourth rope into the loop created by the first rope.
Nose work on the street
To play, you will need a dog (where would we be without it?) and a large tree with textured bark on which you can put treats. First, the treat is placed at the level of the dog’s head, and then the task is made more difficult: they hide it below, forcing him to bend over, and high up, so that he has to stand on his hind legs.
Game for dogs “Nose work on the street”
Weaving
Cut the tail of the clamp and turn the work over with the clamp facing up. Next, we continue to weave the toy according to the same pattern. First, wrap the first rope around your thumb and over the second rope. Then wrap the second rope over the first and over the third, holding it in place with your thumb. Wrap the third rope over the second and over the fourth rope, holding it in place with your thumb. And the last point is to wrap the fourth rope over the third and insert the tail of the fourth rope into the loop created by the first rope.
After this, do not forget to tighten all the tails well. Continue tightening all the ropes, pulling them together to form a four-section narrow knot.
Benefits of a puller
Now that you already know what a puller is, let’s take a closer look at its advantages. According to experts, this is an excellent remedy for the health of a pet, especially if it is raised in an urban environment. After spending the winter lying on the sofa, in the spring such patients are sure to suffer dislocations or sprains. A similar problem is familiar to owners of large pets.
The problem can be avoided through constant physical activity. Daily training with rings for 15–20 minutes will ensure good physical fitness for your dog.
The advantages of the projectile include its effect on all muscles, as well as the ability to develop observation and quick reactions in the animal.
Did you know? The sound of rain harms dogs. That is why they prefer not to injure their sensitive ears and do not go outside in wet weather.
.
Bright purple rings are clearly visible at any time of the year on a grassy lawn, asphalt path and in the snow. The device is almost impossible to lose. In addition, dog teeth will not spoil the structure of objects. Such a device will bring real pleasure to the ward.
The weight of the puller, depending on the type, ranges from 70 to 260 g. On the one hand, the dog is provided with physical activity, and on the other, the object is not a burden for the owner and makes it possible to exercise with the ward for a long time.
Many people think that a puller can easily replace an ordinary ball, stick, or plastic bottle. And they are deeply mistaken, because these are just toys, and we are talking about a full-fledged sports equipment.
It will be useful for you to learn about the reasons why dogs lick their paws, why a dog barks and howls, whether it is possible to keep dogs and cats together, how long dogs live, how to choose vitamins for your pet and how to train a dog to go to the toilet outside.
What to make to develop intelligence?
Homemade toys can be not only fun, but also smart. Interactive products develop intuition and ingenuity. Playing such games with a dog is very interesting - non-standard solutions to problems often amaze the owners. The toys are short-lived, but all the parts in them can be changed as they wear out.
Required materials for production:
- plastic and polypropylene pipes with plugs;
- wooden bars;
- tennis balls;
- thick fabric;
- metal rings and pins;
- boxes made of thick cardboard;
- treats for the dog.
A simple and interesting option involves using a plastic box or bucket. You need to put small objects inside, for example, rolled up socks, rubber toys, paper circles. You can scatter dry large granules of food between things. The essence of the game is to find all the pieces of treat. As a result, the room will be a mess, but the dog will be delighted.
For a small dog, a labyrinth-like activity is suitable. Pipes can be twisted from cardboard or boxes with a cut bottom. It is more labor-intensive to sew a product from dense synthetics. In the latter case, you need to insert metal hoops to maintain the shape.
The game is to find treats that can be sprinkled along the way on the floor or in the side pockets.
An excellent game option for animals that stay in a closed space for a long time. The owner's participation in the game is mandatory. The maze is great for training.
A simple treat toy can be made from a simple tennis ball. Two longitudinal cuts should be made crosswise, and dry granules should be placed inside. The duration of the game directly depends on the size of the hole. While kicking and tossing the ball, treats will fall out.
To complicate the task, you can hang the ball on a rope or elastic band. The dog will have to play more actively, because the only way to get the treat is by jumping.
The game is suitable for active small dogs and all breeds in adolescence. Do not hang the toy very high so that your pet does not lose interest.
Large and active pets will appreciate a more complex game made from plastic bottles. You need to remove the lid and place the treats inside. Choose granules of a size and shape so that they do not spill out quickly. The process of making the game is presented below.
- First of all, you need to make a stand for bottles. From a thick metal rod, assemble two supports and a crossbar. The structure must be stable and durable.
- The bottom of the bottles must be pierced with a hot knitting needle and threaded onto a pin. 3-4 bottles at some distance from each other are enough.
During the game, the dog will learn to coordinate its actions. Smart animals reveal the secret within 15-20 minutes.
It is noteworthy that the dog will not be able to chew the bottle, which means that such a design will not cause harm. Strongly active shaking prevents treats from falling out, which the pet will need to figure out.
For an older dog, you can make an interactive puzzle using a metal muffin tin and tennis balls. Place treats and cover with balls. The pet must alternately remove obstacles from the form and find treats. Breeds with narrow and long muzzles will comply with the rules of the game with greater comfort.
An active dog will not be interested in such a game. Your pet will simply turn the muffin tin over and eat the treats that will be released at the same time. If desired, you can use double-sided tape to secure the game on the floor.
When choosing an intellectual game, you should take into account the characteristics of your pet so that it is interesting for him.
Hodgepodge
If you pay attention to industrial intellectual games, you can see that they require considerable ingenuity from the dog. Some elements need to be moved aside, others raised. You can do something similar and even more interesting with your own hands. It is convenient to use a seedling tray with 6, 9 or 12 holes as a base. Each hole will have separate tasks. For example, these:
- A treat wrapped in paper;
- The hole is closed with the cut off top of the bottle. You will need to lift it by the lid with your teeth.
- A tall plastic cup with a tasty treat at the bottom;
- The hole is covered with cardboard with a loop that needs to be pulled.
- A piece of fabric is glued over the corner holes. The flap will need to be elevated with the nose.
You can come up with your own options, taking into account the dog’s abilities.
Game for dogs “Hodgepodge”
Plastic man
This is an educational toy that allows the animal to practice certain skills. To make it you need a plastic jar, plastic lids, ropes or cords, and sewing supplies.
Make several holes of the same diameter at the bottom of the jar. Make one hole in the lids of the same diameter. Pass one end of the rope through the hole in the lid and make a knot to secure it. Pass the other end through the hole in the jar and also make a knot. If desired, you can take another plastic jar of a smaller diameter and attach it to the larger one on top. You can glue them together with tape or superglue. Draw eyes, nose, ears. Then the toy will look more like a person.
How to choose the right simulator
There are several factors that may influence the choice of a simulator:
- Do you have a puppy or an adult dog? If you have a puppy, you need a trainer whose legs can be moved apart.
- Do you have free space in your home? If not, then you need to look for a machine that folds up or can be easily disassembled.
- Does your dog have basic training skills? If not, then the simulator platforms should be adjustable in width (turn over).
- Are you planning to study at home? If not, then don’t rush to buy, trainers have their own equipment, usually exercise machines in the form of bedside tables.
Exercise machines may vary in:
- The material used is metal or wood.
- Type of platforms - round or square.
- Size is the most “narrow” point, since there are no universal sizes for certain breeds, and the simulator can only be selected experimentally.
- Structures – sliding, collapsible, monolithic.
To choose the optimal model, it is better to consult with a trainer or owners of dogs of the same breed. Quite often, the breed’s stance is required to be “elongated”; in this case, the hind legs should be slightly wider than the front legs, and this option is provided only in simulators that are adjustable in size.
Happy Legs is the only popular brand and manufacturer of rack training equipment. The range includes monolithic and adjustable accessories. To order, you can buy a dog trainer for any size dog. Happy Legs that are adjustable in length and/or take apart are the most popular.
As an alternative to the classic simulator, so-called bumps are often used. Two or four rubber hemispheres with a “spiked” surface. On bumps, the dog trains to take a stance and maintain balance. The exercise machine forces the dog to concentrate and tense all its muscles. It is preferable to use hummocks in the initial stages of training active dogs.
Octopus
This is a good alternative to rope. To make it, take an old knitted T-shirt, a tennis ball or a rubber ball with a squeaker. Cut the fabric into strips of different widths and lengths. Fold the pieces crosswise. Place a ball in the center. Wrap it in cloth and tie a knot at the base. There will be 4 pieces of fabric at the ends. Cut each one lengthwise into 3 pieces. Weave braids and tie knots at the ends. To have more legs, you can take more pieces of fabric.
Snuff mat
And again a sensitive nose joins the game. The snuffling mat was invented by enthusiasts in the Netherlands. The dog's task is to find pieces of treats hidden in the "dense forest" of fleece strips.
You will need a honeycomb-type rubber dirt-cleaning mat, onto which many strips of fleece or other dense fabric are tied. First, the treat is hidden under the top ribbon, then the task is complicated by “burying” the treats deeper and deeper.
Game for dogs “Sniffing mat”
Agility equipment
FCI rules allow two types of agility competitions:
- Standard – classic style with three types of obstacles. The number of obstacles on the site is from 15 to 22.
- Jumping – only jumping obstacles.
This is interesting! In addition to standard and jumping, there are several other types of agility: joker, snooker and relay.
Standard type agility equipment that we reviewed above:
- Slide.
- Swing.
- Barrier.
- Ring.
- Long jump.
- Double barrier.
- Barrier fence.
Obstacles:
- Boom - similar to a slide, but it is a narrow crossbar with inclined boards along the edges.
- A tunnel is a barrel-shaped, lightweight corridor that is laid to create a sharp turn or turn. The exit from the tunnel is soft - it lies on the ground.
Additional projectiles:
- Slalom is a series of 12 poles (racks) through which the dog snakes its way.
- A podium is a platform (usually square) with a graying contact area. The height of the platform can vary from 2 to 75 cm. The platform is used to secure the dog in the contact area. The time for which the dog must stop is determined by the judge.
This is interesting! In agility, a variety of recommended commands are used, but arbitrary ones can also be used. The only condition is that the commands should not be consonant or of the same type.
Kolobok
To make a toy you will need a piece of plastic pipe and two plugs. Several holes are made in the segment. Dry food or treats are poured inside, for example, dried meat cut into pieces. The sides of the pipe are closed with plugs and you’re done. When the dog rolls the toy on the floor, treats will fall out of the holes.
Game for dogs "Kolobok"
Fabric bone
The bone can be sewn from absolutely any fabric. Let's take denim. It is quite dense and durable. And even such a toothy dog as the Jack Russell Terrier will be too tough, I hope.
In addition to denim, you will also need padding polyester. We make a template out of paper and transfer it to the fabric (Fig. 1). We cut out two identical fabric parts, leaving 1 cm for seam allowances (Fig. 2).
From the wrong side, we sew the two parts of the bone together along the entire perimeter, as shown by the red line in the figure below. We leave only a small hole for turning out (shown by the red arrow).
We will stuff padding polyester into the same hole. Let's sew it up, and...the bone is ready.
Soft toy for dogs made from gloves
It is not advisable to give dogs objects that are similar to those used by the owner in everyday life. That is, the pet is prohibited from playing with old slippers, hats, T-shirts, etc., even if the item is ready to go in the trash. The fact is that the dog does not understand whether the thing is old or new . But, once she plays with the owners’ slippers, she can then take new ones, ruining them. So it is better for your pet to have its own toys.
But what if you change an old thing beyond recognition and turn it into something unique, giving it a new life? Let's try to make a dog toy from an old glove.
Step 1. In order to make such a toy, you will need an old children's glove, sewing supplies and filler material for stuffing.
What is needed to make a soft toy?
Step 2. You need to make semicircular cuts in the upper and lower parts of the glove so that the outer fingers remain on one side and additional “fingers” are obtained on the other.
Cutout shape shown Finished cutout
Cutouts should be on both sides
Step 3. On one side you need to sew up the neckline with regular threads.
The cutout is sewn on one side
Step 4. The toy needs to be tightly filled with filler.
The toy is stuffed with filler
Step 5. When the toy is stuffed with filling, you need to sew up the second cutout.
The second cutout is also sewn
Step 6. For beauty, you can decorate the toy with large buttons by sewing them on it.
A button is sewn on
Step 7. The toy is ready. You can let the dog drag it, throw it and fetch it. The toy is not suitable for those dogs that like to chew toys.
Ready-made soft toy for dogs
Video - Mop dog toy
Knitted amulet
If you are already determined to purchase an amulet in the form of a collar for your pet, then we advise you to still make it yourself. After all, a thing created for sale does not carry any protective properties, it is just a beautiful trinket. To weave such a collar with your own hands, you, of course, will have to put in some effort and skill, but even the person who is far from knitting can make such a thing. And of course, such a collar will carry the strongest protective charge if you strictly adhere to all the tips and recommendations.
Another good way to create a collar charm is to use the macrame technique. Anyone can master it, and making such a thing will not take you much time. In addition, in this technique, unlike knitting, there is no need to use sharp metal objects, which means that the power of such a talisman will be maximum.
We present to your attention a small master class on making a talisman collar using this method.
To perform it, you will need to buy red threads made from natural substances. It is desirable that they be thick enough, then the collar will be strong and durable. But you can simply fold the threads of regular thickness several times.
Stages of making a collar using the macrame technique:
We took red threads, which we preferred to fold in three layers, this way we could achieve the maximum thickness of the weaving. If you are not sure what length of thread you will need, cut at least six meters from the ball: this size is enough to weave a collar for a fairly large dog with a large neck circumference.
We cut twelve threads of six meters in length, folding which we can get four working thick strands. During the weaving process, you may encounter such a problem as the ends of the threads getting tangled, because they are quite long. To avoid this problem, wrap the loose ends around regular small pieces of paper and secure them with paper clips, for example. You will have to unwind them to the required length as needed. Place the threads on top of each other crosswise and pin them in the middle with a needle. For convenience of explanation, let’s denote that the lower left thread is No. 1, and then we count counterclockwise. Macrame technique
Bend thread No. 1 onto thread No. 2 to form a kind of loop. Now bend the second thread vertically upward so that it lies on top of #1 and #3
Place thread No. 3 in a horizontal position above thread No. 2 and No. 4. Now lower thread #4 vertically down so that it is above thread #3, but goes through the loop and is lightly under thread #1
Now carefully pull all the loose ends of the threads and tighten the knot. You have now created a knot, which in macrame is called “lotus”. Continue the subsequent weaving in the same way, tying knots counterclockwise and performing them from right to left.
After just a couple of knots, you will find that an interesting cord with twisting elements emerges. Continue braiding until you reach a length equal to the circumference of the dog's neck. After this, trim off the excess threads and tightly tie or sew the loose ends of the collar
Continue the subsequent weaving in the same way, tying knots counterclockwise and performing them from right to left. After just a couple of knots, you will find that an interesting cord with twisting elements emerges. Continue braiding until you reach a length equal to the circumference of the dog's neck. After this, trim off the excess threads and tightly tie or sew the loose ends of the collar.
Video on making a talisman-collar using the macrame technique: Part 1
Part 2
Another good thing about such a collar is that you can easily decorate it with stones or beads as you wish. To do this, it is enough to put them on the threads in advance before weaving the next knot.
But the most important thing, of course, is not what method you are going to use to create the amulet, but what thoughts you put into it.
Surprise box
You will need a box and several sheets of paper. They always start with something simple, introducing them to the game. A piece of treat is wrapped in paper and placed at the bottom of the box. They bring the dog, who has probably already smelled the tasty treat, and allow him to get the surprise. Unfolding the paper is usually not difficult.
Gradually the task can and should be made more difficult. They increase the number of boxes and packages, some may be empty, others are also placed in a bag. It is important that the dog remains interested, so the game should not be too complex or lengthy.
Video example: https://www.youtube.com/watch?v=f5qOWB2uPbc
bottle
A brilliant idea for those who don’t know what to do with their dog when he’s alone at home. The volume of the bottle must match the size of the pet. For large breeds, two-liter ones are suitable, and for the smallest ones - 0.5 liters. A tripod is built for the game. It can have different designs and is made from any available materials. The main thing is that the bottles can be “strung” onto the top bar. Instead of a tripod, you can use a well-tensioned rope.
Just above the middle of the bottle, two parallel holes are made, through which it is put on a bar or rope. Dry food is thrown inside. To get the treat, the dog will have to twist the bottle upside down with its paw or muzzle.
Video example: https://www.youtube.com/watch?v=-JPn2h8bLuA
End processing
Repeat the above steps until the ponytails are short.
Now look at the picture above. Using this method, we need to tighten the rope and hide its ends.
Next you need to trim off the remains. Peel the outer braided surface off the rope to expose the center portion of the rope. It needs to be trimmed. Don't forget to leave the nylon part.
To finally secure the ends, melt the remaining nylon rope and move it to the side using a lighter.
Source
Kinds
Experts distinguish 3 types of pullers. Let's take a closer look at their differences and features:
- Puller Standard is a ring with a diameter of 28 cm. It is designed for large dogs. The equipment needs to be purchased by owners of boxers, huskies, shepherds and others. The thickness of the rings is 4 cm, and the weight is 260 g.
- Puller Mini is designed for training small purebred dogs. The outer diameter of its objects is 19 cm. The thickness of the material is 2.5 cm, and the weight is 70 g. The projectile has the same characteristics as the previous type, but is suitable for Chihuahuas, Pekingese, and French bulldogs.
- Puller Maxi is identical in diameter to the standard type, but has double the thickness and weight. These figures correspond to 6 cm and 590 g. Due to these features, the kit doubles the load on the chewing and neck muscles and promotes better grip. A special feature of this type of puller is a special recess for the owner’s hand. The maximum set is suitable for medium and large breeds that have strong jaws. Note that the thicker the rings, the longer their service life.
Important! For active pets of small breeds that show signs of working traits, experts advise buying maximum or standard pullers
.
Edible-inedible
To play, you will need a plastic bucket or any other container suitable for the size of the dog. It is filled to the brim with cardboard cylinders, cork plugs, tennis balls, any other small things and a handful of food is poured in. The dog's task is to get through many small obstacles to a tasty reward.
For experienced players, you can make the task more difficult by dividing the bucket into several sections. To do this, cut out a circle of cardboard of the same diameter. A U-shaped cutout is made in the middle and folded over. This will be the handle by which you will need to pull out the obstacle with your teeth.
Game for dogs “Edible-inedible”
DIY educational games for dogs will bring a lot of pleasure to both the owner and his four-legged friend.
Yellow felt terrier
Do you want to make a pattern of an original dog from fabric with your own hands to please your friends with an unusual gift? Use this detailed tutorial for creating a cute toy puppy.
To work you will need:
Print or redraw the pattern pieces. Transfer the contours to felt and cut out the blanks.
Sew the part with the belly and legs to the dog's body using an overcast stitch, aligning the edges.
Leave 5 mm unstitched at the beginning and end of the seam for subsequent processing.
Sew the second body piece to the paws in a mirror image.
Connect the components with the belly facing each other and sew.
This is what the workpiece looks like from below.
Start sewing the chest and head of the toy, starting from the junction of the belly.
Stop halfway up the top of your head. Now you need the last detail.
Apply the short part to the dog's head. The side parts are the inside of the ears, and the long part is the neck.
Sew the part along the contour alternately to both parts of the toy’s head.
You need to achieve this result (top view).
Fill the product with filling through the unstitched hole at the back.
Straighten the body of the toy and sew it up.
Glue the eyes onto the face.
Take a small piece of collar tape. Glue or sew it to the dog's neck. If desired, add a pendant to the collar.
A real dog is ready to serve.
Sew several of these toys and decorate them with different pendants. A great idea for a children's or themed New Year's gift, isn't it?
If you want to give your imagination even more space, download cutouts and templates of cute dogs. Give yourself the joy of creativity and wonderful crafts for your loved ones. Everyone will be happy with such pets.