Hello, dear readers!
I am glad to welcome you to the pages of the “Cat City” blog.
Whatever you can do for your beloved four-legged animals! After all, they love us openly and devotedly. Especially when you meet their inviting gaze eye to eye: your heart melts, there is a smile on your face, and you are ready to take your pet to the ends of the earth, and not just on a daily family walk.
But for safe, comfortable hikes and travel, your pet needs special equipment with a leash.
Of course, everything you need for Murky promenades around the city and forest parks can be bought at a pet store or made to order. But there is another option: a DIY cat harness.
Why a harness and not a collar with a leash?
Alas, friends, the collar is not suitable for mustachioed and striped ones for city festivities, because:
- This is a traumatic type of control: it puts direct stress on the furry’s neck. With a sharp jerk, a pet can cause injury to its delicate throat and cervical vertebrae.
- Unreliable type of fixation. The cat, I don’t know how, but somehow miraculously almost always manages to pull its head out of the collar and gain the long-awaited freedom. Then catch the runaway on some tree.
You should know:
It is easiest to train a furry pet to go for walks at a young age. And an adult animal, when trying to walk for the first time, can get very stressed: break out of the collar, run away, and get lost. Therefore, a harness is a more reliable and convenient option.
Protects against scratches
Have you bought an expensive scratching post and even regularly trim the stubborn person’s claws? Really nothing helps? Okay, in that case, try dressing the cat in boots.
caterville.wordpress.com
This idea works especially well when a small child grows up in the house, every minute trying to escape from parental attention and pull the kitty by the tail. Even if the cat wants to rebel, the slippers will prevent him from causing serious damage. And this is certainly better than special stickers or surgical declawing, the dangers of which we wrote about in this article.
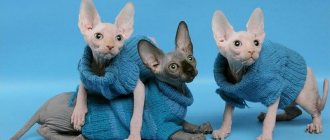
Types of walking equipment for cats
Manufacturers offer a large number of models. Their appearance and name depend on the shape of the belts and their connection to each other. For example:
- The 8-shaped ammunition is made of two rings of straps and is shaped like a number;
- The V-shaped harness differs from the first type by the addition of a lower jumper. It runs along the tummy and relieves pressure on the purr's neck. And the straps themselves cover the cat’s neck on both sides and resemble a letter of the Latin alphabet. This model does not prevent the fluffy from moving freely during a walk.
- The H-shaped model differs from previous harnesses in the presence of an upper jumper; a belt ring is securely attached to it.
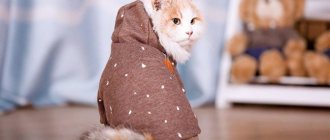
- Cat clothes with a fastening ring act as a beautiful, comfortable harness. The models are made in the form of colorful vests or insulated overalls. Often, cat owners like to make this type of equipment themselves.
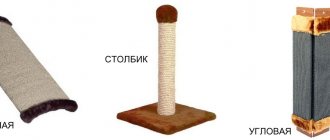
The photo shows the main types of walking equipment:
Harness-vest (or harness-overalls)
These restraints are full-fledged items of clothing (see photo). They come with fasteners on the back, stomach and chest. A pattern is required to sew these accessories, which cover most of the cats' bellies. You can sew them with your own hands from fabric specially purchased for this purpose or from scrap materials. How to make such a holding device for a kitten or an adult cat yourself?
Hand Made - necessity and love for creativity
Imagine that you are a handmade master and have created a real masterpiece in which your kitty will walk like “Mr. Cat” or “Princess”. Even the “Angel of Goodwill” can be demonstrated to everyone. A homemade suit will definitely be in the singular.
Let me note that the creative process can become a collective family activity: children love to help adults. As a result, the cat's family will become many times friendlier and stronger.
When choosing a design, new ideas and fantasies always come, and there is the Internet to help. The search will immediately offer various patterns that you can use.
Experienced needlewomen easily, simply come up with a style or model on their own in different color combinations. Craftswomen just have to see a few interesting features with their own eyes, and their imagination and hands will work at their best. And a new masterpiece will turn out quickly and without a pattern.
But for beginning cat fashion designers, of course, they will need step-by-step instructions to help them cope and please themselves and their furry little paw with a vest for a walk.
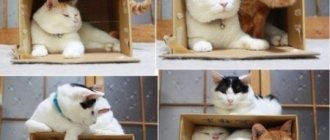
How to sew a bed for a cat Slipper and Cat - patterns and mk
Every cat should have its own favorite place to snuggle and take a nap. You won’t see any kind of beds for cats in stores: large and small, of all sorts of sizes and colors. But there is no guarantee that the cat will like your purchase.
Please your beloved cat - sew her a bed or sleeping bag using our pattern. How to sew a cat bed: choose the option you like (the patterns are all simple), select the fabric, filling, and in one evening you can easily sew a cat bed with your own hands.
Hand-Made Scheme
To get a beautiful harness, follow these steps step by step:
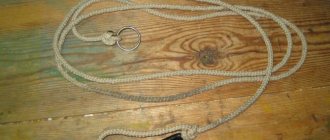
Step 1. Prepare a measuring tape, a large sheet of paper, a pencil, scissors, fabric, braid for finishing, threads, needles, pins, a metal half-ring for attaching a leash, fasteners or Velcro, as well as elements for decorating the finished product.
Step 2. Take measurements of your beloved pet as shown in the photo:
Step 3. Using the diagram on paper, draw a pattern and cut it out.
Step 4. Before transferring the pattern to the fabric, check the dimensions of the pet again, taking into account the length of the harness along the back.
Step 5. Fold a suitable piece of fabric in half along the grain thread. The fold line will be the center of the future clothing and the attachment point for the ribbon with the ring for the leash.
Step 6. Using the paper form, draw two blanks on the fabric.
Step 7. Cut out the drawn parts with a seam allowance of no more than one centimeter. Where one pattern will be the top side of the harness, and the other will be the lining.
Step 8. Sew the braid with a ring along the center line of the front piece, and then fold the two parts on top of one another, facing inward, and sew the product around the entire perimeter, taking into account the seam allowance.
Step 10. Turn the product inside out and iron it.
Final step: decorate the harness with the prepared decorations. And the handwork is ready!
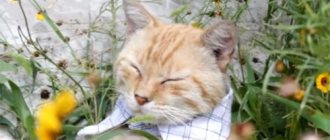
In what cases is it prohibited to lead a cat on a harness?
A cat on a harness has the opportunity to walk outside - this is a definite plus. However, not all cats need walks, and sometimes they are completely contraindicated.
Cat harnesses themselves do not pose a danger to the animal - except in cases where there are severe wounds or sores on the skin. Leash straps can rub the sore spot, delaying healing and causing infection. Therefore, you should not walk with your pet until the wounds on the skin have healed completely.
Walking, with or without a leash, is contraindicated in several cases:
- During the period of heat, it is better to refrain from leaving the house.
- After serious operations or injuries, according to the veterinarian, it is necessary to reduce the number of walks or abandon them altogether.
- In the absence of vaccinations, it is better not to take the cat outside or to the dacha - a pet with low immunity can easily contract a dangerous disease, even if it just sniffs a blade of grass.
- Until the kitten reaches the age of 5-6 months, it is better to refrain from walking.
- If a cat is terrified of the street, there is no need to force it to walk - many mustachioed cats are content with walking on the balcony or looking at the outside world through the window.
The list goes on for a long time; There are several reasons for refusing to go for walks. If your cat doesn't feel well or wants to sleep on the sofa, you shouldn't give him a walk - this will bring extra stress.
Little tips for beginners
- Make the first test ammunition, that is, cut it out of simple fabric that is no longer needed in everyday life. For example: from an old duvet cover.
- Try on a trial version, correct any errors, and then take into account all the corrections in the real version.
- Do not sew all the way around the edge of the harness, but leave 2-3 cm of the seam without stitching. Turn the product right side out through the hole left. Smooth out the edges, iron the finished harness, and carefully sew up the turning area by hand.
Important nuances
Before making a harness, you need to decide which model of accessory will suit your cat. At this stage, you shouldn't care about the appearance, just the characteristics.
Among cat harnesses, the most common models are:
- X-shaped – suitable for adult cats accustomed to walking.
- H-shaped - suitable for training to walk and for kittens.
- Vests are light and insulated - a universal accessory that should be selected strictly according to size.
Carefully evaluate all the pros and cons of accessories; special attention should be paid to the choice of material and type of fasteners. Before sewing the harness. We recommend that you carefully examine the accessories offered in pet stores. The advantage of purchased accessories is that almost all of them are adjustable in size... although, with a little more time, you can sew adjusters into a homemade harness.
Important! A cat harness should not be heavy, bulky, or made from straps that are too wide.
It would be great if you visit a pet store with your pet and ask to try on several types of harnesses. Not all cats are happy with accessories; most of them protest and even bite. It is important for you to decide which harness model is comfortable when putting on. It is worth understanding that the accessory must be put on quickly and without unnecessary movements.
Note! It is wisest to accustom your cat to the neck from childhood. You don't have to take your kitten for walks, but babies adapt to new things much faster.
For cat owners. Four tips for using cat hair
Almost all cat owners have encountered the problem of ubiquitous fur - on clothes, carpet, bedding. Some try to solve it with a brush and wet cleaning, while others use cat hair to create beautiful and practical things. Intex-press has selected several interesting options for how to use your pet's fur.
Stills from the video, Intex-press
As famous comedians said, “rabbits are not only valuable fur!” In our case, the opposite is true: cats are not only positive emotions and pleasant purring, but also valuable fur.
Cat fur has a beautiful silky shine, has a soft texture and is very pleasant to the skin. You can use this material to make a mattress pad, a warm blanket, a blanket, or various crafts.
The main method of using cat hair is felting, or felting. There is wet and dry felting.
Dry felting is used to create large and voluminous products. During the process of dry felting, wool fibers are tightly tangled together and transformed into a felt mass - felt.
Wet felting is used to create small toys or decorative items.
Interestingly, the Swiss have long been using cat hair to treat osteochondrosis and rheumatism. In addition, wool is used to make belts for the treatment of radiculitis, socks to improve blood circulation and alleviate joint diseases.
On the Internet, craftsmen share their experience of creating various things from wool.
Rug
The combed wool is collected in a plastic bag, which is placed in a box to prevent it from matting. You need to put two Antimol tablets in the package. When a sufficient amount of wool has accumulated, it is laid in perpendicular layers between sheets of paper. After this, the author of the video covered the rug blank, which consisted of four layers of wool, with a carpet. After a week, the carpet is removed and minor errors are corrected.
Toys
We comb out the required amount of wool for several days. In the video, the author decided to make a small mouse, so it took three days to comb it out. Next, the body is rolled out with the help of needles. At the next stage, eyes and a nose made of wool are rolled onto the body of the toy. Then the ears and tail are attached to the mouse. The resulting toy is perfect for your pet to play with.
Decorations
Some craftsmen even managed to create expensive jewelry using cat hair. Thus, wool felting master Flora Davis makes pendants, earrings and necklaces using fluffy rolled balls and wire from precious metals. It takes a craftsman from two to three months to create fur jewelry. It is interesting that the cost of the products ranges from one hundred to three hundred dollars.
Bags
It takes about three weeks to create a bag. This is a long and complex process. First you need to felt the wool and make yarn, from which the original bags are made. The design and shape of the product is limited only by the imagination of the craftsman and the amount of yarn.
This is just a small part of the uses of cat fur; there are many other ways to put this material to good use. The main thing is not to overdo it and not turn your cat into a Sphynx.