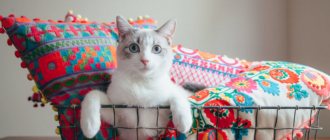
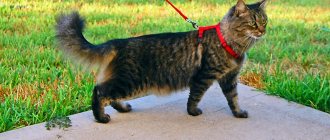
Most often, preparations are made in advance for the arrival of a kitten in the house. Not only the breed is thought through, but also the details that can make his life as comfortable as possible - dishes, toys, litter box. However, are just these items enough? As cats grow older, an important need arises - the need to sharpen their claws. And so that your dream of having a cat does not turn into disappointment, you should still pay attention to the need to have a scratching post in the house. If you don’t want to buy one, then a scratching post for cats can be made with your own hands from available materials.
Types of scratching posts: floor, column, corner
Why do cats sharpen their claws?
Once upon a time, cats were wild animals, and also predators, which they remain to this day. In the struggle for survival in a cruel nature, they had to carefully monitor their “weapons” - their claws. After all, whether the hunt would be successful depended on how sharp they were.
The danger of starvation or death had passed, but the primary instincts remained. Cats continue to sharpen their claws, clearing them of the keratinized top layer in order to free the overgrown young plate. And for this you need a fairly hard surface, like trees, for example.
Today, the habitat of cats is no longer wild forests, but a cozy apartment, and trees can easily be replaced with furniture or wallpaper. All a person can do is offer cats a worthy replacement in the form of scratching posts.
In addition, sharpening claws is a physical exercise, and the location of the claw depends on which muscle group will be involved in the process. Therefore, it is advisable to provide the animal with more than one “equipment”, but to create a mini-gym from several items.
What to consider when making
Before choosing a scheme and method for making a scratching post, you need to take into account, calculate, decide in advance on the size of the product, shape, what material to choose, place for placement and the further possibility of repairing the scratching post.
Size matters
The principle here is that the more, the better. The design should not be smaller than a cat. Even if you do a fight for a kitten, it should still be high, because the baby will soon grow up. A cat will simply not be interested in or comfortable with a small scratcher, because she likes to reach higher and further away.
If a floor structure is planned, the animal must fit completely on it (with front and hind legs). If it’s a vertical post or wall, make such a calculation so that the cat can accurately reach with its front paws and still have a little space left.
Base material
When choosing a material, it is better to give preference to natural wood or cardboard. These are soft enough materials that your pet won’t be able to injure their claws when sharpening. But it is permissible to use chipboard, fiberboard, and plastic sewer pipes, especially when it comes to the construction of an entire play complex.
Coating and winding material
For covering scratching posts, carpet and carpet fabric have the best qualities. It is recommended to purchase carpet for home use only. Office ones, as well as very cheap ones, are made on a rubber basis, can smell unpleasant, and be unsafe for the animal.
It is better not to use artificial fur or fabric, as they are short-lived, and fur tends to accumulate static electricity. The cat will be afraid of this design.
Jute (hemp) rope is made from industrial hemp, so it is safe for your pet even if swallowed.
Also, its advantages are that it is cheap, soft, and a good option for kittens. Disadvantages - when used, debris flies from jute, as it peels off into fibers. I'll have to clean more often.
Sisal rope is also made from a plant base (agave) and is not harmful to the animal. It is strong, but, like jute, it leaves behind debris. Another disadvantage of sisal is that during use by a cat, the scratching post can sag and become wet.
Cotton rope is also used to make scratching posts. It is reliable, safe, and due to the white color of the rope it gives the product more aesthetics.
Which of the presented options is better, each owner decides for himself.
Installation type and shape
Determined based on the size of the apartment and the availability of free space. Because you can make a nail sharpener in the form of a column or a floor-mounted horizontal one, or you can mount it on the corner of a wall.
Form – the simpler the better. The fewer corners and protrusions, the less the risk that the cat will damage its claws. This design is easier to repair when the coating fails.
Types of scratching posts
Felinologists, experts in the anatomy and physiology of domestic cats, recommend acquiring at least three different types of cat cats and placing them where the animal most often stops to sharpen its claws.
The simplest and most affordable types of claws:
- corner;
- wall;
- pillars;
- floor;
- complex.
They are easy to make with your own hands, spending a minimum of time and money. This can be a board, a sheet of chipboard or plywood, wrapped in thick fabric, burlap, a piece of old carpet or coarse twine purchased at a hardware store. If there is a container made of corrugated cardboard (corrugated cardboard) left in the house, then it can also be used.
Wall-mounted nail clipper with fastenings Wall-mounted nail clipper
There is another type of device where cats can sharpen their claws - this is a complex. You can build it for one pet or for several. It requires more space and is more difficult to manufacture.
Before you start making a scratching post with your own hands, it is advisable to observe what your pet likes best. One likes to climb almost to the ceiling and look around his possessions from there. Another is comfortable in a cozy house with a small opening to the outside. The third, like a true athlete, is ready to overcome obstacles for days on end, jump and jump over everything that catches his eye. With a little ingenuity, you can captivate your pet so much that he will not see anything around him except the play complex.
Practical scratching post for travel
If you travel often, and a cat is an indispensable accompaniment to your trips, then this scratching post option will come in very handy! A convenient, practical and must-have pet accessory that can be hung on the doorknob. Making the design is not difficult. All you need is a small board, wood glue, a drill, sisal rope and leather string.
We make holes for the cord. Sand the surface of the board.
We wrap the rope around the board, placing it on the glue. We wait until it dries for an hour.
We fasten the cord through the holes, tying the ends into strong knots. Ready!
Corner
Can be installed on both external and internal corners. Corner scratching posts, like wall-mounted ones, unlike floor-mounted ones, require durable fasteners. The distance from the floor should be chosen based on the size of the pet, and installed in the places most favorite for scratching.
Corner scratching post with platform Corner scratching post
Simple corner scratching post
You can also install the corner structure on furniture. An aesthetically executed scratch will not greatly spoil the appearance of a sofa or chair, but it will protect against the claws of an animal if it gets into the habit of sharpening its claws in this particular place.
A corner scratching post on the sofa will protect the upholstery from claws
How to make a beautiful corner scratching post
Global project: two-story structure with a claw post
You can make a chic corner for a cat with your own hands. A couple of pieces of furniture, a few details - and your design project is ready to please your pets. Let's get started!
Materials: coffee table; nightstand; sisal rope; stapler; glue; a piece of faux fur fabric; dye; toys for a cat (by the way, you can see how to make a toy for a kitten with your own hands on our website).
So, at the beginning of work, all furniture should be disassembled. You will end up with eight legs, two surfaces (one square, one rectangular) and another rectangular surface for the bottom shelf.
We upholster the bottom shelf and the very top of the structure with a fur covering using a stapler.
Now it’s the turn of the claw itself. Our design wraps two legs on the top structure and half a leg on the bottom. You can make as many scratching posts as you like. To secure the sisal rope around the leg, we also use a stapler.
We paint the surfaces.
When the paint dries, we assemble the structure.
And at the end of the project we decorate with toys for kittens, you can also put a pot with special green grass that they love to chew.
Wall mounted
The most economical option and easy to implement (see photo above). Fastening is carried out to the wall in the right place, but you can simply hang it. The material may be different: wood, twine, etc.
How to make a wall-mounted claw clipper
A stronger and more durable claw scraper would be a piece of wood. Cleared of the remaining bark, sanded and wrapped in places with thick twine, the tree will turn into a necessary item for the animal. It should be taken into account that the wood is quite hard and not all cats will like it as a “sharpener”.
To make your own wall scratching post you will need:
- plywood or board 20 cm wide and 50 - 60 cm long;
- rope or fabric;
- glue, stapler;
- glue gun or just glue;
- screwdriver
You can make the board yourself or choose the right size. It is not necessary to blindly follow the sizes - the main thing is that the animal is comfortable in height and width. You can also use corrugated cardboard glued in several layers as a base. You just need to think about a strong mount to the wall. Using a screwdriver, drill a hole in the board for fastening. If you need to prevent swaying, then make two holes at the top and bottom or both at the top.
Size doesn't really matter. The main thing in a scratching post is to fulfill its direct function.
Winding the twine around the base, apply glue in some places with a gun and lay the thread on it. This is necessary to prevent the wound rope from moving. If you don’t have such a gun, you can use simple glue, applying enough of it to attach the rope.
As fabric for the scratching post, you can use drape, overcoat cloth, Chelsea cloth, as well as fur or carpet. In this case, you can secure the material from the reverse side with a stapler.
Step-by-step instructions with photos for making scratching posts with your own hands
Making a claw cutter is a simple and fascinating task. It's like a toy for your kitten, he should like it. The success of the entire enterprise depends on his reaction.
Cardboard scratching post: the simplest
Let's start with a simple and budget option - a cardboard sharpener. It can be done if a small kitten has just appeared in your house. Moreover, you can complete the production of the product in literally half an hour.
Step 1. Take regular cardboard packaging boxes with wide and fairly thick corrugation (look at the end of the box wall and you will understand what we are talking about). Take them apart. Preparing cardboard boxes
Step 2. Using a ruler and marker, draw each box 12 cm wide. Draw stripes 12 cm wide
Step 3. Using the same ruler and utility knife, cut the cardboard into strips according to the previously drawn ones. Cut the cardboard on a solid base that you don't mind damaging, or use scissors.
Cardboard is cut into strips
Step 4. Start twisting individual pieces of cardboard into a tube, turn by turn.
The pieces are rolled into a tube
Step 5. To prevent the cardboard from unwinding, secure the strips with tape or glue. Individual lanes need to be fixed
Step 6. When you get the “bobbin” of the desired size, you can stop winding. You will get a large cardboard scratching post that your cat will definitely appreciate.
DIY cardboard scratching post for cats
DIY carpet scratching post
Step 1. First of all, prepare the base. This can be a piece of board or several bars connected to each other, as in the photo. We recommend taking a solid board - it’s easier and faster. It will take several bars
Step 2. The bars are connected with self-tapping screws
3. After this, take thin foam rubber, attach a piece of wood to it and measure out a piece of foam rubber the same width as the future scratching post. Cut it off.
You need to measure a piece of foam rubber
Step 4. Next, take a small rug or a piece of old carpet, the remnants of the carpet after repair.
Step 5. Place a piece of wood on the underside of the rug first, then a piece of foam rubber.
Foam rubber is laid on top of the wooden blank
Step 6. Simply roll the foam board into the mat, being careful to roll it very tightly.
Step 7. Secure the mat with self-tapping screws in several places so that it does not unfold. It is important to take short self-tapping screws so that their ends do not come out through the wood.
The scratching post is created and ready to be fixed on the wall. Additionally, you can add several laces to its upper part, which will attract attention.
Scratching post made from plumbing pipe and rope
In this master class you will see how quickly and easily you can make a post-claw claw.
1. The socket is cut from the pipe
Step 2. The length of the pipe blank should be 70 cm. If the pipe is too long, cut it off. The pipe must be 70 cm long
Step 3. Take 4 ordinary furniture corners and, attaching them to the pipe, make marks on it in accordance with the fastening holes on the corners. Drill holes with a suitable drill bit.
Holes are drilled in the pipe
Step 4. Attach the furniture corners to the pipe using bolts and nuts. Be sure to tighten them well to keep the connections strong. Furniture corners attached
Step 5. Take a sheet of plywood or chipboard and cut a piece of it measuring 50x55 cm.
Cut chipboard sheet
Step 6. Turn the plywood piece over and mark the middle.
The center of the workpiece is marked
Step 7. Place the pipe so that the center of its holes and the center of the plywood sheet coincide. Mark the places that coincide with the holes in the furniture corners. Marking holes in furniture corners
Step 8: Drill holes in the plywood using a drill and then screw the base to the pipe. The pipe will be held in a vertical position thanks to the corners that securely hold it. The pipe is screwed to the base
Step 9. Now take a piece of carpet and mark the middle. The piece should be approximately 60x65 cm in size. The middle of the piece of carpet is marked
Step 10. Next, cut a round hole in the middle of the same diameter as the pipe. It is most convenient to cut with a stationery knife. The hole is cut with a stationery knife
Step 11. Pass the pipe through the hole in the carpet so that the pile of the carpet faces up. The pipe is threaded into the hole
Step 12: Glue the carpet to the wood base. The carpet is glued to the base
13.
Sanding the pipe
Step 14. Prepare two pieces of carpet about 10-15 cm high and a length equal to the circumference of the pipe. Wrap them around the pipe at the top and bottom, and glue them in place using a glue gun. A piece of carpet is glued
Step 15. Cut a circle of pipe with an equal diameter from the carpet.
A circle is cut out of the carpet
Step 16: Glue the carpet circle as a plug onto the top of the pipe. You can glue with a glue gun.
The circle is glued as a plug
Step 17. Return to the base. To ensure that the carpet curls well, cut off the excess as shown in the picture.
Excess carpet is cut off
Step 18. Fold the edges of the carpet and secure them with a stapler.
Curved edges are fixed with a stapler
Step 19. The base is completely ready. Now take a jute rope with a diameter of 12 mm. Such a scratching post will require about 18 m. Next, using a glue gun to fix the harness at the beginning, wrap it around the bracelet.
Jute wrapped around a pipe
Step 20: Wrap the pipe completely with rope. At the top, secure the edge of the rope with a glue gun. To be sure, you can glue a few turns in the middle.
several turns can be glued
Step 21. The scratching post is ready. Using the same principle, you can make a claw sharpener not from pipes, but from a thick block. An example can be seen in the video below. Do-it-yourself finished scratching post from a pipe
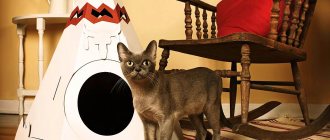
How to make a scratching post house
You will spend much less money on creating such a house than buying a ready-made one in a store. True, be prepared for several hours of your free time. The speed of production of such products directly depends on the availability of appropriate skills.
Step 1. First of all, let's deal with the base. Plywood or chipboard is suitable for it. Using a jigsaw, cut out a fairly large rectangle with rounded edges. The corners of the workpiece need to be rounded
Step 2. Next, cut out a partial circle from the same material using a jigsaw. You will need 2 pieces of such parts. An incomplete circle is cut out
An incomplete circle is being cut out. An incomplete circle is ready.
Step 3. Now you will need a sheet of fiberboard. Attach your partial circle to it, circle it and cut out the resulting part. You need 2 of these parts. An incomplete circle is circled on the fiberboard
Step 4: Next, attach one fiberboard semicircle to the plywood semicircle.
Fiberboard blank glued to plywood
Step 5. In the second semicircle, cut a hole the same shape as the semicircle. A hole is cut in the second incomplete circle
Step 6. Take the rectangular base, fix both semicircles as shown in the figure (do not screw it with screws yet). Between them, make a jumper from a block. timber lintel is installed
Step 7. Next, find the resulting structure and cover it with padding polyester, and then with finishing fabric. It is convenient to fix the material with a stapler. The structure is covered with padding polyester
The structure is covered with padding polyester Fixing the finishing fabric
Step 8: Take a piece of trim fabric and place it right side down on the round piece. Next, secure the material with a stapler. Place padding polyester on top of it. The fabric is fixed with a stapler
Step 9. After this, cover the house with plywood, fixing the material well on the semicircular base. The house is covered with plywood
Step 10. Straighten the padding polyester and finishing fabric, stretching them over the “roof” of the house. Fix it on the back side of the house on a wooden base. Make sure that the materials are well stretched.
Materials must be well tensioned
Materials must be well tensioned How to fix materials
Step 11. Using a glue gun, glue the materials along the lower edges of the sides of the house. Glue gun used
Step 12. Take the second semicircle of fiberboard and cover it with finishing material. The second semicircle is tightened
Step 13. Using a glue gun, glue this semicircle of fiberboard to the back wall of the house.
The semicircle is glued to the back wall
Step 14. Using the same principle - using a stapler and a glue gun - cover the bottom of the structure and prekikikimokimamekiremamanik It's ready. The bottom of the house is attached
Step 15 Now get to work on the scratching post. Use a plumbing pipe or linoleum reel as a base. Place it on a piece of wood (chipboard, plywood) and draw two circles.
A circle is drawn
Step 16: Using a jigsaw, cut out two wooden circles. Grind down the edges to make them smooth.
A round workpiece is turned
Step 17. The resulting circles serve as plugs for the pipe. Insert them inside the pipe and secure with self-tapping screws.
The plugs are fixed with self-tapping screws
Step 18. Begin wrapping the pipe with rope, securing its end at the bottom using ropes. The pipe is wrapped with rope
Step 19: Do not block the top end of the rope once you have wrapped the entire pipe. Upper end of the rope
Step 20. You will need long screws
Step 21. This will be the top resting area for the cat.
This will be the top platform
Step 22 Screw the circle to the pipe. But over the first side down. The diameter of a circle made of fabric is the diameter of a circle made of wood.
The circle is screwed to the pipe
Step 23. Cover the top of the circle with fabric and padding polyester using a glue gun and stapler. Covering the upper platform
24. Upper playground
Upper play area DIY scratching post house
The scratching post is ready. If desired, the upper platform can be supplemented with a side, and a toy can also be attached to it.
Pillars
The scratching post is often used by cat lovers due to its versatility. A cat can sharpen its claws on both horizontal and vertical surfaces, climb up, and chase a toy attached to a post. If you fix a horizontal platform on top of the post, then the issue with the bed will also be resolved.
A simple scratching post with a toy
Floor-standing scratching post with horizontal scratching post
Sometimes cats tear up furniture legs, most often table legs. Here you can improvise - wrap it with twine and you will get a ready-made claw blade.
How to make a scratching post
To make a scratching post, any available material is suitable - a board or plywood for support, a small block or a piece of plastic pipe for a post. Having screwed the beam to the base using self-tapping screws or secured with metal corners, you need to tightly wrap the beam with twine or sisal rope (can be bought at Leroy Merlin) using a glue gun for fastening.
We wind the rope tightly onto the post scratching post Advantages of sisal rope: high strength, durability, natural material
The base can be painted, sealed with a piece of thick fabric, carpet, or the same rope can be laid in a spiral, glued for strength. The main requirement for such a structure is stability. It is necessary to carefully calculate the proportions of the height of the column and the area of the base, or “peep” the dimensions of finished products in pet stores.
Floor-standing
Perhaps the simplest designs to implement. They can be of various shapes and located on the floor or at an angle to it. In addition, they can be combined with some other elements, columns, houses.
How to make a floor scratching post
We suggest making a floor scratching post from corrugated cardboard yourself with step-by-step instructions. To work you will need:
- construction tape,
- pencil,
- ruler,
- scissors or wallpaper knife,
- glue.
You can take a box with low sides for the mold, but you can do without it by securing the finished structure with cardboard tape around the perimeter.
Necessary tools for making a scratching post
Place the strips tightly in the box
Cut the cardboard into strips to fit the length and height of the box. Glue the strips with glue and connect them. It is advisable to use glue with a minimally noticeable odor, for example, PVA. After drying, the nail clipper is ready for use.
Simple round corrugated cardboard scratching post
Corrugated cardboard bends quite easily, so the second version of the scratching post is a twisted long strip secured with glue or adhesive tape. In this case, the size can be chosen at your discretion, and in case of long-term use, simply add layers as the shaggy consumer grows.
Two in one: scratching post-vase
Such a scratching post performs two functions at once - an indispensable device for a cat and a luxurious decorative floor vase.
Prepare a ceramic vase of any size and shape, as well as a ball of sisal rope. The vase should be quite heavy and durable. Avoid glass varieties!
Wrap the rope evenly and as tightly as possible around the vase using hot glue.
Almost the finish line, but the most important part is ahead, because the main thing is that our structure is stable. Let's fill the vase with different stones and other various weighting materials. And for reliable stability, we attach slate tiles to the bottom.
The scratching post-vase is ready! All that remains is to decorate it with beautiful branches and accustom your pet to the new device.
Game complex
In pet stores you can find large play complexes, sometimes under the ceiling. However, it is possible to construct such structures with your own hands. For such a project, you first need to develop a diagram, make a sketch, decide on the dimensions, and tie them to the place where it will be located. If you can’t make a drawing of a scratching post yourself, you can resort to the help of friends or look for something similar on the Internet.
Game complex project with dimensions
The advantage of creating a gaming complex yourself is its lower cost, based only on the price of consumables, and the ability to choose a color scheme that fits perfectly into the interior.
You can start with a small module, making a simple post-claw scratching post with an open bed, a toy and an inclined platform. All elements must be stable, well fastened to each other, and the joints and fastening fittings must be carefully hidden under a protective layer of fabric or thick cord.
Wall-mounted play complex for cats with scratching posts
Complex with a set of elements for cats
A simple complex for cats
When the cat masters the toy, you can add a house for privacy and several posts, connecting them with rope ladders, hammocks, planks, and large-diameter pipes. It all depends on your imagination. Place several open areas on the posts at different heights - at a safe distance from each other for jumping. It is better to immediately select the base for such a complex of the required size, designed for additions. This will increase the stability of the finished structure.
Toy out of the box for intelligence development
Interactive toys and labyrinths are very popular among cat owners, which not only captivate their pets, but also help develop their intelligence. Such devices are not cheap, so many people create them with their own hands.
Your pet will definitely love this homemade puzzle made from a cardboard box. Several holes are made in the body from different sides. Holes of equal size are also cut out on the lid of the box. They should not be too large so that only the pet’s paws fit through them.
To prevent the box from quickly losing its shape, it is taped around the entire perimeter. Place any round objects inside that easily roll when the cat touches them with his paw.
Another popular educational toy idea is a tunnel house. It is also made from a box, but larger in size. The pet should freely enter the tunnel through the holes on the sides. To attract the cat's attention, colorful ribbons are attached to the box, and fragrant treats, balls, and rustling toys are placed in the house.
Getting your cat used to the scratching post
An animal should be accustomed to a scratching post from the first days of its appearance in the house. Same as for the potty. If the baby is taken from the mother, then there will be much fewer problems with him. To avoid any problems at all, you can prepare the scratching post in advance and keep it next to the cat’s mother for a while. In the new home, the kitten will not only already know where to go to satisfy its physiological needs, but it will also be much easier to cope with the stress of separation, feeling the familiar smell from the scratching post.
Pets from the shelter are often familiar with the scratching post, so at home it is enough to build an analogue that is familiar to them and the problem will be resolved. But with cats picked up on the street, and quite old ones at that, you will have to tinker. Animals accustomed to complete freedom often refuse to take anything into account even after the owner has achieved a result. This is not a sign of obstinacy or bad character, it is just a different way of life than a person, which we often forget. The owner will have to work hard.
You shouldn't have high hopes for valerian or catnip. Animals, like people, each have their own character. And what is sweeter than honey for one person does not evoke any emotions for another. If herbs and spells do not help, observe where your pet prefers to sharpen its claws. What kind of surface is it - horizontal or vertical? What does he like best - wallpaper, upholstered furniture, door upholstery or wall plasterboard. And then just a little imagination and love for this shaggy terminator is enough for the previous order to be established in the house. You can also play on his primary instincts. Place a scratching post that smells like another cat in the right place - success is guaranteed from the first days. The animal will carefully “scratch” the marks of a competitor who has encroached on its territory.
How to discourage a cat from sharpening its claws in a “forbidden” place
In order for your pet to quickly switch to the scratching post, it is necessary to create unpleasant conditions for him in his favorite place for scratching. First of all, a certain smell will help. Animals have a more highly developed sense of smell and some aromas are categorically unpleasant to them. The smell of alcohol, for example, or perfume. Cats don't like the smell of all citrus fruits. You can purchase a special spray based on aromatic oils at the pet store. Surfaces should be treated with it until the pet completely gives up the desire to scratch them.
Beaphar Stop It Cat Spray for repelling cats from furniture
You can speed up the weaning process by throwing a slipper next to the wrong object at the moment when the cat tries to scratch it. Usually animals quickly abandon places where they are supposed to be in danger. A loud bang, a stern hail, and wrapping furniture in cellophane are also effective.
Many people recommend “water procedures” from a spray bottle, but this is possible if a cat is somewhere nearby trying to sharpen its claws, and the owner is sitting fully armed, waiting for her. Everyone can invent a way to dare an animal themselves, knowing all its pros and cons.
Assault is strictly unacceptable, because cats are easily stressed and such “education” will not lead to the desired result.
Six effective tips
Below are some helpful tips that will help you succeed in training your kitten to use a scratching post:
- Encourage your pet when he independently approaches the stand and begins to cling to it with his claws. You can praise, pet or give a treat.
- Do not grab your pet by the paws and force him to scratch the scratching post. Even if the owner does this carefully and gently, the kitten still will not understand what they want from him. He won't like it. The animal will try to escape from your hands, and the scratching post will already be associated with something unpleasant
- Try to attract your cat with mint. Do not use valerian (valerian), it, like a drug, distorts behavior and dulls the cat's instincts. Take a small amount of catnip and sprinkle (spray) the counter. This product attracts cats well, they begin to rub, purr and release their claws with pleasure.
- When playing near the counter, be attentive and consistent in your actions so that your pet clearly understands what they want from him.
- Do not play with the animal near curtains or furniture. By grabbing an object, the kitten will think that it can scratch other nearby things.
- Cover the corners of the sofa and other furniture with something rustling, such as bags or foil, while training you to use the scratching post. If a cat pulls up the carpet, it should be removed until a useful skill is finally established in the pet’s behavior.
Should I have an onychectomy?
Finally, we should remind you about the operation permitted in some countries to remove the claws of domestic animals - onychectomy. Yes, this procedure will save the owners from a lot of trouble and preserve the furniture, but is it really harmless to the animal itself? After all, along with the claws, the front phalanges of the fingers are removed, which affects the functioning of the entire musculoskeletal system.
A cat is a fairly mobile animal and without claws it is doomed to endless injuries - there is nothing to cling to. She will not be able to climb onto a low surface; it will be difficult for her to maintain balance. After the operation, you may suffer from pain for the rest of your life, which is shortened by almost three times due to the disruption of your usual life. In addition, having lost its claws, the animal becomes more aggressive and tries to solve all its problems with the help of its teeth.
Anti-vandal fabrics
Modern manufacturers meet the wishes of pet owners and produce special materials that can be used to protect upholstered furniture from the sharp claws of a pet. Scope of application of anti-vandal fabrics:
- as furniture upholstery materials;
- for removable covers;
- when making a sleeping place for a pet.
What to sew a cat bed from or make an unusual homemade ottoman? We list several of the most popular options for anti-claw fabrics:
- Flock. This two-layer fabric is combined from natural and polymer fibers and impregnated with a special compound that increases strength and resistance to wetness. The outer fibers have a long-lasting color and are resistant to stains. To remove dirt, simply wipe the flock with a damp cloth. For long-term use, the fabric can be washed in a washing machine. The fabric surface is smooth, so cat claws cannot catch and pull out the fibers. It is recommended to vacuum this material frequently, since flock is easily electrified (like any synthetics) and attracts dust.
- Relax is a combined synthetic fabric in which a base of cotton and polyester is covered with a layer of isoprene. Thanks to this composition, the fabric invariably retains a neat and elegant appearance and lasts for many years, requiring virtually no maintenance. Elastic material cannot be scratched. Dirt from the surface of the relaxation area can be easily removed with soapy water.
- Faux suede consists of two layers. The base is a mixed fabric made of cotton and polyamide, and the top fleecy layer is polyester. The advantage of this material is the absence of electrification and permeability to air. Wet cleaning and washing are not permitted. In case of severe contamination, you will have to invite specialists in chemical cleaning of furniture. Unfortunately, faux suede is not very durable, so a diligent cat can tear this fabric.
- Microfiber is a synthetic fabric formed by interweaving thin artificial threads. Typically, manufacturers impregnate the fabric with Teflon, which makes the material tear-resistant. This durable material is easy to care for: it can be machine washed and wet cleaned with a wet sponge.
- Tapestry fabric is a dense material formed by the interweaving of thick threads. The tapestry looks stylish and expensive. The only drawback is that the tapestry is afraid of ultraviolet radiation and easily loses its original shade in direct sunlight.
- Scotchgard is a jacquard weave fabric with water-repellent impregnation. This canvas is well protected from damage and always retains its original bright pattern. Allows dry cleaning, wiping with soapy water or a special cleaning agent.
The play complex was made by ourselves for kittens
Cattery kittens on a homemade three-story scratching post complex with beds, a house, and a hammock