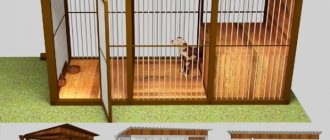
Photo: agronovosti.rf Everyone who breeds rabbits knows for sure that they cannot do without a good cage. If you buy them, it’s a total expense, and there’s also a constant risk that your pets will suffer from low-quality materials or dangerous fastenings. We suggest making a cage with your own hands, because rabbits don’t need anything special. We tell and show!
Types of cages for rabbits
Rabbit cages are classified according to the following criteria:
- Type of rabbits. Large and small breeds, adults, pregnant females and those who have recently given birth, young animals kept for separate living.
- Method of operation. Stationary, portable. Outdoors, indoors.
- Material. Wood, metal, plastic.
In one household it is permissible to have several different types of cages for rabbits, each of which serves its purpose. According to their design, cells are divided into single-tier, two-tier, and three-tier. The choice depends on the available space. Despite the differences in designs and parameters, there are general manufacturing rules that have been proven in practice. It is recommended to adhere to them.
Removing the queen cell from the cell
There is no exact rule for when to remove the queen cell from the cage. It is definitely not recommended to do this until the rabbits have reached the age of 21 days. Next we need to look at the condition of the cubs. They should already be quite active, move around and eat on their own. During the cold season, the queen cell should be left in the cage longer.
The queen cell is a place where a female rabbit can hide in complete safety and calmly bring her litter, and it is also the first home for newborn rabbits. One must approach its production with full responsibility. But as you can see, you can quite easily build it yourself at home.
DIY rabbit cage construction
The creation of structures begins with the selection of materials. The basis is wooden blocks treated with antiseptics to avoid damage to the wood. In addition to the frame, you should take care of the walls, floor, ceiling, and doors. For individual parts of the structure, appropriate material is selected.
To build a rabbit cage you will need:
- bars;
- boards;
- plywood;
- net;
- wooden slats;
- metal wire;
- slate;
- plastic pallets;
- door bolts;
- loops;
- fasteners;
- drinking bottles.
Internal partitions are made from sheets of plywood, using its qualities such as strength and moisture resistance. Chipboard is an unsuitable material because it absorbs moisture and breaks down due to swelling.
Before installation, the wooden parts are sanded and sanded. Do not leave sharp edges so that animals do not get hurt on them. It is advisable to cover the protruding parts with iron. The height of the legs depends on the location: when installed outdoors, their size is from 80 cm, and indoors they are half as low. The diameter of the cells should be no more than 2x2 cm. When installing rabbit cages in an open space, the use of roofing materials is necessary. It is undesirable to make the roof metal, since its strong heating in hot weather can lead to thermal shock.
Useful tips for building a rabbitry
Not all novice craftsmen know how to make a cage for rabbits, taking into account all the nuances, so mistakes are possible when making the structure.
For example, if you save material, this will lead to crowding, which negatively affects the health and reproduction of rabbits.
The uterine or nesting compartment must be made stationary. Any nooks and crannies can provoke the death of baby rabbits as a result of a stampede, as the female becomes frightened.
But when depositing young animals, it is recommended to use a cage with a stationary nook for rabbits. A small loophole in a compartment measuring 12x12 cm will allow the rabbits to get through there, while the female will not be able to get through and will not be able to be with them all the time. In the question of how to make rabbit cages, this option allows you to reduce the stress of the procedure for weaning offspring from a female rabbit.
Stages of building a rabbit cage
The production of cages for rabbits occurs in stages. First, the prepared bars are treated with an antiseptic. This prevents the appearance of rot on the tree and the penetration of harmful microorganisms. The requirements for the antiseptic are environmental friendliness, the absence of a large amount of chlorine, so as not to expose pets to harmful chemicals. This treatment increases the service life of wooden products.
The processed timber is cut into parts: four one and a half meters long, four 55 cm each, two 70 cm each. Then the planks are connected in such a way that two identical rectangular figures with sides of 1.5 and 0.55 m are obtained. After connecting with the beams, a box is obtained , which is the basis of the cage for keeping rabbits. Dimensions may vary depending on design.
Then you should start building the floor. It can be made from different materials, which have their own advantages and disadvantages: metal profiles, mesh, slats. A high-quality floor will be obtained by combining. For example, there is a metal profile below, and a mesh on top. The profile will prevent the mesh from deforming, which increases service life. Such a floor is not subject to rotting, like wood, but it faces another danger - metal corrosion. In addition, a metal floor is cold for rabbits to live in, while a wooden floor creates a more natural environment for them.
Expert opinion
Dobryshev Sergey Anatolievich
Professional rabbit breeder and hare breeder with 30 years of experience
If you intend to place a queen cell for grown-up rabbits in a cage with female rabbits, a part 50-70 cm wide should be left on the floor with a mesh for the construction of a wooden covering. The floor is secured with nails and screws.
Material for walls - boards, plywood, mesh. The back part is made of boards. For the front, a mesh is used. This allows you to observe the behavior of your pets. Plywood is suitable for the side parts. The roof is also made of waterproof plywood, but if the design provides for its tilting, then it is necessary to attach hinges. They are screwed to the timber, and then the plywood is installed. The entire structure is placed on legs about a meter high. The last stage is the installation of feeders and drinkers.
Installation of the floor in the rabbitry
You can use different materials to install the floor.
Floor in the rabbitry Source ytimg.com
Metal profile floor
This option is characterized by a long service life and ease of maintenance. The disadvantage of this design is the difficulty in its manufacture. Firstly, you will have to make such a grid yourself. Secondly, special attention to the cells, which must be very small so that the rabbits’ legs do not fall through.
Fine mesh floor
Fine mesh is easy to install and easy to maintain afterwards. But it may break. The design and long service life are no different. Typically, the service life is directly related to the quality of welding.
Wood slatted floor
Wooden slats – environmental friendliness and affordability in one. They are easy to install. But if the material is not initially processed properly, then rabbits can get splinters in their paws. Another drawback is the short service life. Soon such a floor will begin to rot and will need to be replaced.
You can combine these options.
Important! It is not advisable to use a non-mesh floor in the main compartment. This is due to the fact that waste products will penetrate through the holes and accumulate in the pan.
Instructions for building a rabbit cage yourself
The construction of a rabbit cage begins with a drawing. The optimal options are selected depending on the breed, age, and number of animals raised. The choice of materials depends on the following criteria: strength, resistance to mechanical stress, resistance to moisture.
We should not forget that rabbits belong to the order of rodents and can significantly damage wood. The materials used must not evaporate harmful substances. Drafts are unacceptable, but there must be air circulation, which is provided by micropores in the walls. All fittings used must be of high quality and protected against corrosion.
Construction begins with the construction of a frame to which a metal mesh and sheets of plywood for the walls are attached. Arrangement of the floor is a crucial moment. The best option is replaceable structures. They are easy to remove, clean and reinstall. In case of severe damage, they can be replaced with new ones. Metal mesh is more convenient to clean, but it provokes dermatitis, so wooden slats are preferable.
The roof of the rabbit cage is also a canopy that protects from precipitation and ultraviolet rays. You can make additional opening doors in it. The roof has a slight slope. In addition to plywood, roofing materials can include tiles and slate. The metal option is not suitable, since in hot weather this will lead to strong heating inside.
The finished cage is installed outdoors or indoors, depending on weather conditions. In cold weather, insulation is carried out by upholstering the cell walls with sealants: mineral wool, polystyrene foam, stitched mats. Rabbit hutches require regular maintenance.
Recommendations for placing a rabbitry
It is important not only to understand how to make a rabbit cage, but also to know where to place it. When choosing a place on the street where the rabbitry will be installed, you need to consider several important factors:
- Rabbits are distinguished by increased sensitivity to drafts. Therefore, the place should be chosen such that the rabbit’s house is out of reach of the winds.
- However, greenhouse conditions are not suitable either. An important point in keeping any pets, including rabbits, is high-quality ventilation. If this condition is not met, pathogenic organisms in the feces will begin to actively multiply and negatively affect the condition of the rabbits.
- The location should be dry, away from bodies of water. This is due to the fact that the upper limit of moisture tolerated by these animals is 75%. An indicator higher is fraught with consequences - pets will begin to sneeze and get sick.
- Homemade rabbit cages should be installed in the shade under trees. Avoid direct exposure to sunlight.
- During the winter cold, the rabbit's house is insulated. The temperature inside the cells must be maintained constant. It is not allowed to decrease below +10 degrees. The upper temperature is +20 degrees.
The rabbitry is installed in the shade, direct sunlight is excluded Source fermok.ru
Cold climatic conditions require the location of the rabbitry in a special barn or other building. Which also has a number of specific requirements.
- The windows of the shed should face south or southeast. This way the animals will be able to receive enough light and warming sunlight.
- It is important that additional lamps and heaters are installed in the room so that in winter the animals avoid a lack of heat and light.
- The walls must be plastered. This will prevent excess moisture from penetrating into the room itself.
- A constant supply of air is ensured to the cells.
When arranging the cells, it is necessary to take into account that they must be located from the ground at a certain height. This saves you from rodent attacks.
DIY rabbit cages: drawings, dimensions
When doing serious business, one cell is not enough. A whole complex of structures will be required, for each of which a separate drawing must be drawn up. The appearance of cages for rabbits largely depends on imagination and financial capabilities, but there are size limits that are not recommended to be violated. The height of the room should not be less than 45 cm. For adults, the optimal area is 150x70 cm. It is necessary to provide a place where the animals can walk.
The front wall is made a few centimeters higher than the back. Individual sections can be connected by small manholes. The hinged lid will provide additional convenience during maintenance. Regardless of the breed being raised, we must not forget that the animals must have sufficient space for movement. Their deficiency will lead to obesity and decreased fertility. In outdoor cages you can make holes into a fenced pen.
You can get ideas for rabbit cages by browsing the relevant websites. If you want to draw up your own drawing, you can do this on graph paper or by using special programs and printing the result.
Choosing a location for cells
Unpretentious animals can be raised not only in a barn, but also in the open air. A structure placed outdoors must be insulated and not blown by the wind.
Rabbits do not tolerate drafts well, so it is better to make the back wall blank. In addition, for mass breeding of animals it is necessary to make a small complex, and not be limited to one cage.
Rabbits do not tolerate direct sunlight, so cages located outside are best placed with the open side to the east.
The room with rabbits should have windows facing south so that there is enough lighting for the full development of the animals. In winter, it is advisable to provide additional heating and lighting (at least 10 hours a day).
If the area of the plot and possibilities allow, be sure to equip an enclosure for the animals to walk. It can be stationary or portable, which will also help solve the problem of excess vegetation - it is enough to move the enclosure to a new place from time to time.
By the way, in addition to side fences, the enclosure must also have a protective roof. This will protect the animals from attacks by bird predators, and will also help shade them from direct sun in case of extreme heat.
Drawings of cages for rabbits with dimensions: examples
The most common are double structures with separate sections. One section houses the adults, and the other contains the queen cell. Other types include cells with one section, three sections, and group ones. There are original designs.
Drawing up a drawing, algorithm of actions
First you need to draw up a drawing in one plane. It will become clear how much space the structure will take up, and if necessary, make adjustments.
An axonometric drawing will make the future home more visual.
Goals of rabbit breeding
For industrial purposes, small tall cages with limited or no zoning are suitable. The format for replenishing food supplies is at the discretion of the owner - from a permanent, separate section with provisions to periodic, personal feeding by adding food to the cage.
At the same time, you should create housing for your pet with special amenities in the form of: a wide walking area, entertainment elements of a structural or portable nature, a spacious sleeping place (either a mound of hay or a fenced space - both options are designed as quiet and dark places).
Mandatory in both cases is the prudent installation of a removable bottom for the entire cage for waste disposal, as well as an additional door in the food compartment for adding food without the risk of rabbits escaping.
It is important to understand that in any case, the animal’s comfort is a priority.
Do-it-yourself rabbit cage: photo examples, types of designs
There are significant differences between rabbit hutches. If you want to make it yourself, you can choose from existing designs.
Simple one-story
Two-story
With a place to walk
Made of wood with metal mesh
Materials and tools
When building a cage with your own hands, you will need certain materials and tools. Their list is universal and the difference is only in the number and size, depending on the type of structure.
- For the drawing you will need stationery and graph paper.
- High quality edged boards.
- Wooden bars.
- Galvanized mesh with small cells (1.5-2 cm).
- Hygroscopic plywood sheet.
- Roofing material (slate, etc.).
- Galvanized sheet (thickness from 110 microns and above).
Cage for adult rabbits
For adults, two-tier and three-tier cages are suitable. This significantly saves the area allocated for rabbit breeding. Plywood partitions divide the interior into areas for eating and relaxing.
The family home consists of three sections. A breeding male with good characteristics is placed in the middle, and healthy females suitable for mating are placed in the side compartments. Manholes are made between the compartments.
The construction of three-section cells has its own peculiarities. The frame is assembled from timber, and boards are used on the outside. On the inside, plywood is preferred. The back wall is made of boards, and a mesh is mounted in front. The compartments for females have an attic where she can climb using a special board. This is necessary for the rabbits to rest from maternal duties. Otherwise, they may develop aggression, leading to the death of newborns. This option is suitable for breeding purebred rodents, allowing you to sort individuals and monitor the onset and progress of pregnancy.
A separate room for young animals is built with minimal dimensions. You can immediately move strong rabbits into a room for adults.
Tips for organizing a rabbit queen cell
To make a good queen cell for the female and her offspring, follow these recommendations:
- A queen cell that is too large is a bad idea, as the female rabbit may mistake it for a cage and start defecating in it. In a small house, the female and her offspring will be uncomfortable, and the risk of litter crushing will increase. Also read about winter drinking bowls for rabbits at this link.
- To prevent the bottom of the queen cell from rotting as a result of contact with feces, place a galvanized metal sheet on it and cover it with straw.
- If the female is young and inexperienced, cover the queen cell with straw yourself, as she may forget to do this. An experienced rabbit will arrange the nest herself.
- The hole should not be too high, otherwise the grown young animals will not be able to get out of the hole. Very low is also not suitable, since newborn rabbits should not go beyond the queen cell. The presence of a threshold will prevent the female from carrying out the babies that have attached themselves to her.
- Coniferous trees, especially freshly cut ones, are not suitable for arranging a queen cell, since essential oils repel rabbits.
The minimum layer of straw for the zinc bottom of the queen cell is 20 cm. Otherwise, the rabbits may freeze.
Do-it-yourself rabbit cage: step-by-step instructions for the production of work with photo examples
DIY rabbit hutches have the great advantage of allowing you to take your specific circumstances into account. For example, we can consider the construction of a two-section cage.
Step 1. Treat the bars with an antiseptic.
Step 2. Cut the timber into parts of the required size in accordance with the requirements of the drawing.
Step 3. Connect the parts so that you get rectangular shapes.
Step 4. Assemble a frame from them.
Step 5. Start installing the floor.
Step 6. Start upholstering the walls. The back one is made of boards treated with an antiseptic, and the front one is made of mesh.
Step 7. Cover the inside of the walls with plywood.
Step 8. Build the roof.
Step 9. Install planks on which movement is possible.
Step 10. Place an excrement tray at the bottom.
Step 11. Place the cage on supports.
Step 12. Place feeders and drinkers inside.
Why is the popularity of rabbit farming declining?
There are several reasons for this phenomenon, the most important ones should be mentioned.
- Increasing the well-being of our compatriots.
You need to understand that previously, rabbits were bred in villages or dachas not out of great love for animal husbandry, but in order to improve the standard of living. Rabbit farmers, in addition to meat, brought income from skins, from which winter hats, fur coats, etc. were massively sewn. Today no one wears such hats, so handing over skins is a big problem. Currently, young people prefer to buy meat in a store rather than breed animals themselves. Breeding rabbits requires not only knowledge, but also a lot of work - Rabbit breeding is one of the most risky activities; in the event of an epidemic, the entire livestock dies within a day. Meat is unsuitable for consumption and must be disposed of at special landfills. A veterinarian must live nearby, carry out periodic inspections of the livestock in a timely manner and carry out all vaccinations. If there is a veterinary hospital only in the regional center, then it is better not to breed rabbits.
Rabbits are too susceptible to disease
We will not list other factors hindering the massive development of rabbit breeding, but there are quite a few of them. But even those mentioned should force potential rabbit breeders to carefully weigh their options against practical conditions.
Rabbit cage sizes
Do-it-yourself two- or three-tier cage for rabbits: step-by-step instructions with photo examples
To make a rabbit cage you will need some materials. The frame is made of timber, the ribs of which are located inside, sheathed with a metal corner to protect the wood from the sharp teeth of rodents.
Assemble the sides. The parts are fastened with corners using self-tapping screws.
From the edge, measure the distance corresponding to the door, and attach the partition to give strength. The same actions are repeated on the opposite side.
Between the door openings, 2 bars are mounted in the shape of the Latin letter “V”. This is where the feeder will be located.
Having assembled two such partitions, they are connected with pieces of bars using reinforced corners. The result is a finished frame.
Now it's time to start installing the bottom. A good option is to use wooden slats.
The gaps between them should be of such a size that the rabbit's paw cannot get stuck there.
The protruding parts must be cut off.
Cover the first tier with a sheet of metal and fix the stop for installing the second floor.
The third tier is also installed.
Now it's time to install the doors. Loops are used for this.
Before moving in it is necessary to carry out disinfection.
Hut for fawning
In such a house, chambers for queen cells are usually placed on the side. The walls must be solid so that there is no draft. If the enclosure will be placed indoors, then you need to choose a place without ventilation. When the house is placed on the street, it must be insulated.
The queen cell should be made removable so that, if necessary, it can be moved to another enclosure. The camera must be kept dry at all times. It is necessary to periodically lay fresh hay in it. You should not use sawdust for bedding, as small parts of it can get into the rabbits' noses.
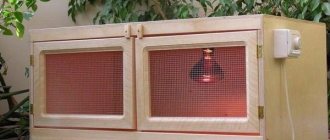
When the female brings her babies in winter, you need to put a heating pad with warm water in the queen cell. You can also use a regular incandescent lamp for heating. It must be on all the time. With such heating, you need to take care of fire safety.
Some breeders lay a cable from the “warm floor” system in the queen cell. The cable must be placed intact in the enclosure; there should be no solders on it. Using this method, you can regulate the temperature in the box yourself.
Cages for rabbits in two tiers
The construction of a two-tier cage is not much different from a single-tier one. The height is 2-2.5 m, width – 1.4 m. The dimensions can be changed, but within small limits.
How to make a two-tier rabbit cage with your own hands: nuances
When designing, it is necessary to provide for nuances that will make the premises reliable and make caring for animals easier:
- It is recommended to use hinged doors in the rear wall or roof.
- Don't skimp on fasteners.
- To prevent rabbits from injuring themselves, the edges of the mesh and fasteners should be carefully sealed.
- Installing a retractable tray will make cleaning easier, where feces will fall through the mesh on the floor and urine will flow.
- The lock, which is a piece of wood rotating on a nail, is unreliable. A better option is hooks or latches.
- To prevent rabbits from gnawing the partition, the edges of the openings should be lined with tin.
- The roofs of each of the tiers can be lined with linoleum.
How to properly arrange a queen cell
After finishing the carpentry work, the queen cell needs to be installed in the cage. There should be enough space in the home for rabbits to feed and walk around. This should be done about a week before giving birth, so that the female has time to build a nest and insulate it with her down.
The queen cell must be warm and dry; to achieve this goal, it is necessary to cover the floor with litter. The owner must provide the material for creating a nest to the rabbit, and she herself will equip a cozy place for the babies.
To make the female rabbit feel comfortable, she should regularly clean the nest box. It is also recommended to carry out disinfection periodically to protect the mother and offspring from various diseases.
Litter
So that the female rabbit can prepare a nest for the babies before giving birth, she needs to cover the floor with a layer of suitable material. Straw, dry blades of grass, sawdust, and cotton wool are suitable for this purpose. The main thing is that the litter is dry.
Interesting! Sometimes inexperienced females in captivity forget about the natural need to build a nest before giving birth. Then the cubs can be born directly on the hard and cold floor. This can lead to the death of the rabbits.
Experienced female rabbits do not need the owner’s help when arranging the nest. The main thing is to provide the expectant mother with free access to the necessary materials.
Protection from bowel movements
After birth, the rabbits will relieve themselves directly in the queen cell. At first, it will not be possible to solve this problem by cleaning, since it is not recommended to disturb them for some time after giving birth. To prevent the plywood from rotting due to excess moisture, you need to protect the floor with a sheet of galvanized steel. To do this, it is recommended to cover the bottom with the above building material. This flooring is easier to clean, it is resistant to moisture, and extends the life of the queen cell.
However, metal has high thermal conductivity, so the temperature in the nest box will decrease. This can lead to freezing or death of the rabbits. To prevent this from happening, you should cover the floor with a layer of bedding at least 10 cm thick.
Heating options
More often, female rabbits give birth in the warm season, but babies can be born in winter. In this case, it is important to provide newborn rabbits with suitable temperature conditions - from 24 to 27 ° C. This can be achieved by insulating the interior space and using various heating means: heating pads, film with built-in heating elements.
When using heaters, it is better to set the temperature to a minimum. This is important, since overheating is also dangerous to the health of rabbits.
More often, rabbit breeders use electric heaters to heat the queen cell. To avoid electric shock and damage to the device, you need to protect the heating elements from moisture.
At the end of the cold weather, the heating in the queen cell must be turned off.
Heating with a heating pad
One of the most affordable and safest devices for heating the mother liquor is a rubber heating pad. It is enough to fill it with moderately hot water, and then lay it on the floor under the bedding.
However, this heating method has many disadvantages. If there are a lot of rabbits on the farm, then buying a heating pad for each queen cell will be expensive. In addition, it will be difficult for a person to regulate heat. And you will have to spend a lot of time servicing a large number of heating pads.
A medical heating pad will help maintain the optimal temperature in the queen cell. It looks like a rug covered with fabric. It is laid on the floor, covered with rags and bedding material. It is important to place the wires so that rabbits do not get to them and chew them. The heating pad is connected to an outlet and turned on if necessary. It is recommended to buy an electric heating pad with a temperature regulator and a waterproof cover.
Favorable conditions for successful winter breeding are created by infrared heaters with a built-in thermal switch that prevents overheating of rabbits in the queen cells. These are safe devices that work without a power plug.
Using bottles
The most primitive way of heating the queen cell for rabbits is plastic bottles. This method has the same disadvantages as when using rubber heating pads.
Containers should not be filled with hot water; the optimal temperature is 40°C. The liquid cools quickly, so it is necessary to constantly add hot water. It will be especially difficult for farm owners who have more than 100 rabbits on their farm. Therefore, this method is considered the most troublesome.
Film with heating elements
The most modern way to heat a queen cell is a film floor. To warm rabbits, you need to buy a film that has heating elements built into it. It is cut into pieces of 25 cm. For the queen cell, one small section is enough. To connect the parts, you should study the instructions.
The film is fixed on plywood or a board, 2 cm bars are placed across it to create an “air cushion”. Then the mother liquor is fixed to the structure. It is necessary to install a thermostat in the nest box so that you do not have to regulate the temperature yourself.
Important! For the queen cell, it is recommended to purchase film with a power of 140 – 150 W/m².
Queen cells for rabbits are a place where a pregnant female can feel completely safe. When creating it with your own hands, you need to take into account the size of the representatives of a particular breed, the number of offspring, climatic conditions, and type of construction.
Making your own rabbit cage using the Mikhailov method
Rabbit cages built using the Mikhailov method are multi-tiered mini-farms. The structure consists of several tiers, each of which serves as the basis for the next. The bottom is made of slatted lattice, which ensures that manure falls into a special container. The walking compartment is equipped with feeders and drinking bowls. Food and water are replenished as needed.
The main advantage of mini-farms is minimal human participation in the production process, which ensures the absence of stress for shy animals.
Cages for rabbits Zolotukhina
This structure increases the efficiency of raising rabbits. The structure consists of three tiers. The higher ones are shifted relative to the lower ones by the width of the grid. There are two cells on each floor. The feeder is a tilting tray, which makes it possible to add food without opening the door.
This design is very popular.
House for young animals
A cage for a domestic rabbit should accommodate from 10 to 20 animals at a time. The walls need to be made 30-40 cm high. The offspring can be kept there for up to 5 months. The cage should be raised from the floor surface by 70-80 centimeters.
You need to put a net on the floor to prevent kids from chewing on the wood. You can make the entire floor from mesh, but such a house will have to be placed in a warm room. With a mesh floor, the house will be constantly ventilated, and feces will not accumulate there, which will help protect animals from various diseases.
Hay can be used for insulation. The layer thickness should be from 15 to 20 millimeters. Artificial bedding will have a bad effect on the young animals, and therefore they may get sick. It's worth giving up.
Cages for dwarf rabbits: step-by-step instructions
Cages for dwarf rabbits do not require large material costs. The weight of a dwarf rabbit is small, so the house for it should be appropriate.
Step 1. Assemble a frame 1 m long, 70 cm wide, 55-70 cm high.
Step 2. Nail wooden slats to the bottom or install a metal mesh.
Step 3. Make the walls. Cut a hole in one of them for the door.
Step 4. Place the door on the hinges.
Cages for giant rabbits
Rabbit cages for the “giant” breed are larger than usual. Adults reach a length of 60 cm and a weight of 7.5 kg. The minimum area per animal should be 0.3-0.5 m2. The height of the house is from 55 cm.
Feeders, drinkers and hay
It is important not only to have an idea of how to build a rabbit cage, but also how to properly equip it from the inside. Feeder, drinkers and hay are the constant attributes that must be present.
When equipping a drinking bowl, it is important to take into account the fact that it can be easily removed, since it will have to be washed frequently and the water in it changed. It is best to use trays made of metal strip for this purpose. Attach them to the cage door or next to it on the wall.
One of the most optimal options for making a drinking bowl is using sewer pipes. A scrap of this material with a diameter of 10 cm and a height of 8-10 cm is used to decorate the “cup holder”. A trimmed 2-liter plastic bottle fits into this ring. Cut it so that it is on the same level as the “cup holder”, leaving only a strip 2-3 cm wide and 5-7 cm long.
How to build a cage for a decorative rabbit with your own hands
When designing cages for decorative rabbits, you should provide for free movement in them. It is recommended to build two tiers with the possibility of transition. You need to start by drawing up a drawing, since such cages are often installed directly in the apartment. In a two-story cage, you should make two doors: one at the bottom end, and the second at the top.
Types and designs
Rabbit breeders usually use different queen cells. Which one to choose depends on many factors:
- number of rabbits;
- size of housing for animals;
- the area of the building where the rabbitry is located;
- seasons when animals are bred;
- frequency with which the rabbit's nest is used.
Types of queen cells
- Stationary design. For stationary placement, the cage is divided into two compartments of different sizes. A nest is made from the smaller section. It is separated by a solid partition. A round passage is made for the rabbit. It is made at a height of 10 cm from the bottom. The simplest device for such a nest is to block off a small space across a small space with a board placed on edge, 15 cm wide, in the darkest part of the cage. It will prevent the rabbits from spreading out and will create additional warmth. Usually a stationary structure is made if the area of the room allows it.
- Temporary structure.
A mobile (temporary) queen cell is not a very heavy structure, but requires more time to manufacture. This is a rectangular wooden box with a 20 cm diameter circular passage on one side. This is the most practical design. It does not take up space, is easy to carry, and easier to clean. Such a mobile queen cell is installed in a cage where litter is expected. When the need for it disappears, such a nest can be easily removed from the rabbit house.
DIY rabbit cages - photo
You can choose a suitable design or borrow an interesting idea by considering the available options.
What materials can it be made from?
When planning the construction of rabbit hutches, the first thing to think about is the choice of suitable building materials. In principle, any available means are suitable for constructing a simple structure that can protect animals from unfavorable external factors.
In the construction of rabbit farms, wood and metal, galvanized profiles, plastic elements, bricks, clay and even industrial pallets are used. Despite the fact that almost any materials are suitable for use, their choice should be approached with full responsibility.
Wood
Even a novice rabbit breeder can handle making a wooden cage
Wood is used very widely in the construction of rabbit cages. Any structural elements can be made from it. It is from wooden beams that the frame of the future cage is usually made. Floors made of wooden planks are also popular among rabbit breeders.
The main advantages of the material are environmental friendliness and ease of processing . Wooden elements can be easily given almost any shape. You should not lose sight of the excellent thermal insulation properties of wood: in winter a wooden rabbitry will be warm, and in summer it will not be too hot.
Among the disadvantages, it is worth highlighting rapid destruction. Rabbits love to chew on everything around them, so the wooden elements of the interior of the cage are quickly destroyed by rodents. In addition, due to its porous structure, wood absorbs all odors and liquids, so it is not recommended to install a solid wooden floor in a cage.
Important! Insects and humidity also contribute to the rapid destruction of wood, therefore all wooden structural elements must be treated with protective compounds. When choosing such a composition, make sure it is safe for animals.
Metal
Metal is much stronger than wood, but working with it requires a different level of skill
Compared to wood, metal is a more durable material for construction . Rabbits cannot chew through metal elements, they are easy to wash and are not afraid of insects. True, metal processing requires special skills from the master, as well as the ability to handle special tools.
The frame of the future cage is created from metal pipes. Metal is also used for the interior of wooden cages to prevent the natural material from being chewed through. But it is not recommended to make the roof and outer walls of the cage from metal, since in the sun they can become very hot, and in the cold they can freeze, which can pose a threat to the health of long-eared residents.
Galvanized profile
Galvanized profiles are used in combination with other materials. Unlike all-metal elements, strengthening or finishing the cage with a profile does not make the structure heavier, which is especially important for portable mobile rabbit cages.
Plastic elements
Plastic is lightweight and durable, but can release toxic substances in the heat
Plastic pipes can be an alternative to wooden beams and metal pipes. Durable and lightweight material allows you to create universal cages for use in any conditions.
When working with plastic, it is important to keep animal safety in mind. Internal structural elements that can get in the teeth of rabbits should not be made of plastic. The animal can injure its mouth or esophagus from shrapnel, as well as be poisoned by synthetic substances included in the material.
Important! When exposed to extreme heat (for example, in the heat), some types of plastic release toxic substances.
Bricks and clay
Bricks and clay are used to build rabbit hutches mainly in hot regions . The bases for the houses are laid with bricks, and the seams are coated with clay. Such a cage protects animals well from overheating, since the brick has excellent thermal insulation properties.
Net
The walls of rabbit cages are made solid, in the form of a lattice of slats, or they are made of mesh. The most convenient option is considered to be a mesh, which should have medium or small cells and be strong enough.
Slate
The most practical material for making a roof for a rabbit hutch is slate. It will perfectly perform its protective function, without overheating in the sun and without being afraid of moisture.
Available materials
Rabbits are not the easiest animals to care for. For temporary housing or in conditions of critical savings, houses made from scrap materials are suitable. Inventive rabbit breeders adapt old barrels and containers to contain rodents, or assemble multi-story structures from industrial pallets.
Each material has special properties that can be both an advantage and a disadvantage. You should be guided in your choice based on the advice of experienced rabbit breeders, individual conditions (climate, animal breed, etc.) and instructions for popular drawings if you plan to use them.
Useful tips
Raising rabbits at home is not difficult, but it is important for novice rabbit breeders to know all the rules for caring for them and the nuances of building rabbitries. The following expert advice will help you avoid these common mistakes:
- It is necessary to build “houses” for rabbits from high-quality and durable materials; you cannot skimp on them, especially when it comes to fastening systems. The edges of the cuts should be carefully processed, otherwise the animals may be injured. If cells are being made for the first time, then you can use recycled material (waste from boards). With the advent of young offspring and the acquisition of experience, structures are already built from new material.
- Constantly cleaning the cells will help get rid of the unpleasant odor. To do this, install a mesh tray on the floor; all waste will easily fall through it, making cleaning easier. In addition, structures located in enclosed spaces must be periodically ventilated.
- You need to equip the doors using locks not on nails and pieces of wood, but in the form of latches or hooks.
- Covering it with iron sheets will help increase the strength of the rabbitry, since animals will not be able to chew through the metal. This also applies to passages in partitions, walking compartments and queen cells - they are sheathed with tin. Thanks to such measures, the rabbits will not have the opportunity to destroy the walls.
- When installing cages under a canopy in the yard, you need to equip the cages with special containers under the floor. From above they cover with a ladder and a net. Thanks to this, pets will be protected from hypothermia.
Do I need a walk?
Of course, freedom of movement for rabbits is very desirable. With active movements, the skeletal and muscular systems are strengthened and the immune system is improved.
But many rabbit breeders, having the opportunity to arrange a walk on the farm, refuse this idea. And there are reasons for this:
- firstly, rabbits can undermine the fence and escape;
- secondly, the walking area needs to be protected from above from attacks by birds, and this is an extra cost;
- thirdly, if animals live in an enclosure, it is almost impossible to vaccinate and control birth rates.
If this prospect does not scare you, you can safely arrange walks for your animals.
Mini farm
A mini-farm is the most convenient and practical cage for rabbits. Although it is not very easy to do. Experienced farmers spend months building such a cage.
The rabbitry itself is quite large. It can accommodate up to five dozen rabbits. Also, a mini-farm implies full automation and mechanized supply of water and food.
If you are new to farming, we do not advise you to use this method, as it requires large financial investments.
Features of winter keeping rabbits
Rabbits, unlike poultry, can tolerate sub-zero temperatures quite easily, however, they need to be provided with comfortable conditions to prevent frostbite and colds. With proper insulation, the cage does not need to be moved into the utility room even at a temperature of -20 °C.
When insulating, thermal insulation material is placed between the walls of the cage
When keeping rabbits in winter, you should adhere to the following recommendations:
- With constant exposure to low temperatures, rabbits' fertility decreases and their reproductive functions deteriorate. To reduce the effects of cold, you will need to fully insulate the cells. For this, modern heat insulators with a thickness of 3 cm or more are used, which are placed in the space between the walls of the cage;
- if there is no extra money, then natural materials that can be prepared in the summer are suitable as insulation. These include: moss, foliage of trees and shrubs, pine needles, thin branches. The material collected in sufficient quantities should be thoroughly dried in the shade. A dry heat insulator is placed between the walls of the cage using a similar principle;
- Each separate section of the cage must have a compartment fenced off from the main part. It is made according to the box principle, when the frame is sheathed using boards or plywood. To enter the compartment, a cut is used in one of the walls;
- to avoid a decrease in reproductive functions, a lamp with artificial lighting should be provided in each cage. This will allow for an increase in daylight hours, which will have a beneficial effect on the fertility and activity of the animal. If necessary, a heating cable is laid into the cage and connected to the back wall or queen cell;
- Rabbits' food in winter should be high in calories with a high content of concentrated and roughage. The main sources of vitamins and minerals are carrots and beets. It is allowed to feed rabbits with boiled potatoes.
Video: recommendations for keeping rabbits outdoors
The process of making cells is simple and will not cause any particular difficulties even for people who have rarely used a hacksaw or a screwdriver. The general principle of assembly is easy to understand after studying just a couple of instructions. The main thing is to correctly calculate the size and draw up a drawing of the cell - this will help to avoid most of the mistakes that beginners make.
- Author: Vitaly Varlamov
Hello. My name is Vitaliy. Area of professional activity: technical means of automation and design technologies. Rate this article:
- 5
- 4
- 3
- 2
- 1
(15 votes, average: 4 out of 5)
Share with your friends!
All-season rabbitry
This option is suitable for you if you live in a cold area and the natural climate does not allow you to normally keep rabbits. Then, it’s worth insulating your rabbitry, making it out-of-season and suitable for any temperature.
Remember that the extreme temperature at which rabbits can be kept is -5C. If the temperature outside is lower, then you do not need to start raising rabbits until you have insulated the cage.
The easiest, but most expensive method is to purchase a special heating element powered by electric current. If there is no normal voltage outlet near the cage, then you should use a transformer.
After construction is completed, you can compare your cage with photographs of finished rabbit hutches. The main thing is to work hard and you will have a good rabbitry.
Heating options
In addition to thermal insulation of the walls, it is advisable to install heated floors of the cages. Most often, two options for floor insulation are used in enclosed spaces. A concrete floor screed is made in the room, into which the electrical cable is placed. This solution has several advantages: concrete protects the cable from moisture, and at the same time it is possible to organize heating of the drinkers so that the water does not freeze into ice. The disadvantage is the cost of concrete (especially for spacious rooms).
A more budget-friendly option is film infrared floor covering. The advantages of the material are an affordable price; it is possible to organize insulation of the floor of individual cells. The downside is the need to cover the film covering (use a plank floor or flat slate).
Heated queen cell
Rabbits need special care during the winter months. Adults tolerate temperature changes well, but small rabbits can freeze. Preparation of the queen cell for winter begins in the fall, before the first frost occurs.
Safety regulations:
- 1. With the end of the cold weather, the heating is removed.
- 2. The temperature should be at a minimum.
- 3. It is necessary to protect the heating elements from moisture and urine.
Temperature-controlled queen cell heaters are commercially available.
Device types:
- 1. Electric heating pad. It is placed on the bottom and covered with straw. It works from the mains. Wires must be hidden and insulated from rodents.
- 2. Warm infrared floor. It is a film with a power of no more than 100 watts. It is attached to slats under the queen cell. Due to the air gap, good heating of the bottom is ensured. This device allows you to adjust the temperature when the weather changes.
At the moment when the rabbits begin to crawl out of the nest, the heating is turned off so that the young animals do not overheat.
